Article by Lizzie Crudgington, Bright Green Learning

When helping clients design online meetings and workshops, we often face all sorts of assumptions about what you can and cannot do online.  Usually we find that you can do MUCH more than you first assume.  What you need is some creativity and thoughtful planning!

Here I share a few examples of some of the more unusual ways in which I’ve used Zoom in the last months for more informal online convenings and gatherings, such as various birthdays and other fun events. These are being shared in the hope that these times push us to challenge our assumptions about what we can and can’t do online, have fun testing new ideas (for example with kids, friends and family- push yourself to try new things in a ‘safe space’), and then find ways to adapt and integrate more lively and creative interactive elements in our professional as well as personal virtual lives going forward.

I’ve included some ‘how to’ steps below with these 20 examples, revealing some of the things to think about when preparing for these online activities.  If you feel so inspired – have a go!  And reach out with questions if you’d like more details. Included below:

  1. The Maker Challenge
  2. Read Together Online
  3. Sewing Workshops with Grandma
  4. Playing App-based Games
  5. Online Face-painting Game
  6. Hum that Tune
  7. Charades
  8. Mind-meld
  9. Pictionary Online
  10. Online Quiz with Riddles and Emoji Questions
  11. How Well Do You Know…? Game
  12. Guess the Song
  13. Musical Statues
  14. Blow Out The Candles on the Cake
  15. Choose a Themed Virtual Background
  16. Get Physical with a Speed Hunt
  17. Collective Cocktail Making
  18. Online Spinning Wheel
  19. Celebrity/Who’s in the Bag?
  20. Taking Cranium (the Board Game) Online


OK, let’s start!


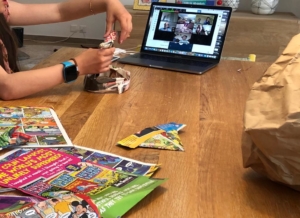
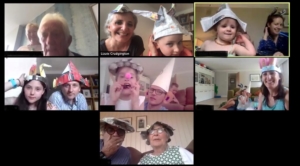
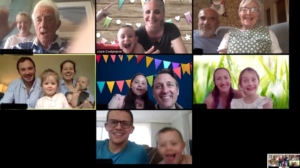
  • The Maker Challenge. The week before Easter, we planned an online family party and asked everyone to get scrap paper ready. We ran the party on Zoom with families in five locations. Each family had 5 minutes to make their Easter Bonnets from scrap paper – ensuring the camera was lined up so we could see one another’s creative process – and of course we wore the bonnets for the remainder of the party.
    (Other versions: Instead of an Easter bonnet, make a space helmet, pair of glasses, diving mask, a dress, a bouquet of flowers, a trophy, a car, the strongest bridge, the tallest tower…. The fun is in the making! And why stick to scrap paper?  Could be modeling clay, twigs found outdoors, LEGO…)

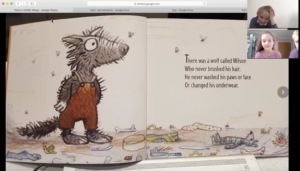
  • Read Together Online. Take photos of the pages of illustrated children’s books and upload these to Google Drive. In Zoom, screen-share the book and simply click through the pages.  We’ve had reading sessions with grandparents, as well as 6 and 7-year-old cousins reading their favourite books together.

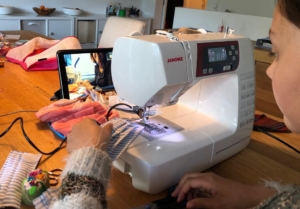
  • Sewing Workshops with Grandma. This was really simple.  We just set up Facetime (could use Zoom or other platforms too) with the cameras carefully positioned, and away we went. Home-sewn face masks – tick.

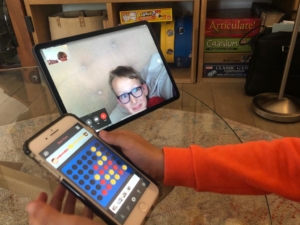
  • Play App-based Games such as Connect 4 and Rummikub – whilst using Zoom or Facetime to interact. We use two devices (a smartphone and tablet or computer) so that we can chat and see and hear one another’s reactions during the game playing – maintaining the social dimension.

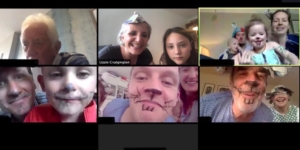
  • Online face-painting game. How about it? Also during the Easter party, we played a face-painting game using only an eye-liner pencil. We gave a willing volunteer the challenge of giving face-painting ‘instructions’ to everyone else (based on an image provided), without using certain words (i.e. they couldn’t use the words rabbit, bunny, nose or whiskers). We did the drawing part with backs to the cameras and then, once complete, we had ‘the big reveal’. Ours was a Easter-themed bunny, but you could choose any face-painting theme.  An interesting exercise in the power of communication too – usually with entertaining results.


  • Hum that tune. To play this one, we combine Zoom with WhatsApp.  The name of the tune is picked from a hat, by the “game master”, photographed and WhatsApp’d to the player who’s turn it is to hum.  Then those ‘guessing’ the name of the tune race to submit the correct answer – either to a WhatsApp group or the Zoom Chat.  (We find that using the Chat for answers works better than shouting out the answer as it can be hard to hear the person humming, especially if the group playing is large.)


  • Charades. As we did for for ‘Hum that tune’, we combined Zoom with WhatsApp. The charade is picked from a hat by the game master, photographed and WhatsApp’d to the player who’s turn it is to act out the charade.  Those in the same team call out over Zoom.


  • Mind-meld. The idea of this team game is that a word (suggested by the one team) is given to all players on the other team who then have 30 seconds to each write down three words associated with that word.  If there is one word in common in what all players in the team write down, they win a point. To play this, the word is called out, and players simply use simply pen and paper to write down their three associated words.  After the 30 seconds they then hold their papers up to the webcam so everyone can see what they wrote and whether or not they win the point.

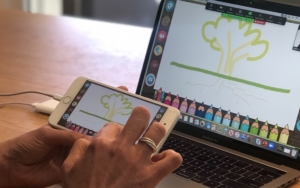
  • Pictionary online. For this, we’ve done it in various ways. One option is to use the whiteboard in Zoom and have players ‘annotate’ it using the ‘scribble’ tool.  Others can then guess either shouting aloud or submitting their guesses via the Zoom Chat or a WhatsApp group. Another option – which allows for a better touchpad drawing experience – is to invite players to use a drawing app on their smartphone or tablet.  If they connect it to their computer via USB, they can then screenshare what they are drawing.  The downside of this option is that it requires a bit more tech set up (getting people to install drawing apps on their devices), and you need to change who is screen-sharing every time there is a change in who’s turn it is to draw.
    (Another option: use paper and pen in view of the webcam.)

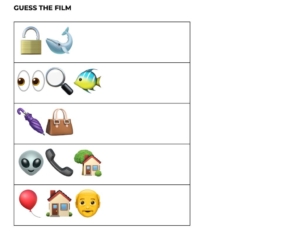
  • Online Quiz. There are so many ways to do this.  A few things we’ve done to ensure the quizzes are fun and interesting to all – ask everyone to contribute questions in advance. Include riddles and try some questions with emojis (e.g. Which film is this?).

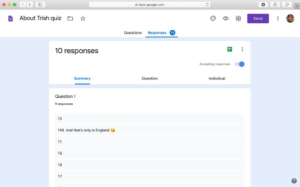
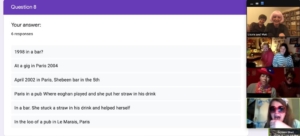
  • How Well Do You Know…? Game. A great variant on the quiz – especially if you are throwing a party for a birthday girl orboy – here Person X. We asked everyone to submit questions about person X in advance (e.g. Where were they born?), and we created a Google Form with questions numbered 1 to however many questions you have.  Note: Don’t actually include the questions themselves in the form – just the question numbers.  During the party, announce the game and send everyone the link to respond to the Google Form.  Read question 1 aloud and invite each player to write their response in the form.  Repeat for question 2, and so forth.  (The fact that the questions aren’t written into the form keeps an element of surprise!). Make sure that person X also responds in the Form!  Once you’ve gone through all the questions, go the summary of responses (in the Google Form) and screen share these, looking at them question by question. Person X reveals the correct answer (and all are amused by the variety of responses).   If you like, you can give points for correct answers but this is totally optional.

  • Guess the song. Different to ‘hum that tune’, in this game we play songs from a playlist in Spotify and it’s a race for players to guess the song – using the Zoom Chat or a WhatsApp group.  To ensure a good sound quality, mute everyone and play the music through your computer, clicking on ‘Share Screen’ / ‘Advanced’ / ‘Music or Computer Sound only’. Not only does this help with sound quality – it also means people can’t see the songs you are selecting to play, which would defeat the object of the game.
    (Another version of this game: What’s the next lyric?)


  • Musical statues. A classic party game, super for expending some energy and loosening up bodies. As in ‘Guess the Song’, play music for musical statues using ‘Screen Share’ / ‘Advanced’ / ‘Music or Computer Sound only’. Before starting, check everyone has their web cam set up such that you can see them in their ‘dancing space’.  And then play musical statues as normal – when the music starts every begins to dance. When the music is stopped, everyone freezes (stops dancing), and the person who is still moving is out of the game. This continues until there is one person left.  A great and easy party game for small and big kids.


  • Blow out the Candles on the Cake. Just for a bit of fun – when it’s a birthday, have a real (or ‘model’) cake with a real candle held up close to the web cam and have the birthday boy or girl blow the candle out from their computer (close up to the web cam).  Tip:  Make it tough for them, and get them really huffing and puffing (with little effect on the flame) before you blow it out once and for all 🙂

  • Choose a Themed Virtual background – such as bunting or a photo of your favourite bar! In Zoom, go to ‘Choose virtual background’ (next to the video options in the bottom control bar) and you can upload an image of your choice and select it as your virtual background. (Note: This works best when your own background is neutral)


  • Get Physical with a Speed Hunt. This is another great way of bringing some movement and energy to online events. Prepare a list of commonplace items and mini challenges and have different household / office teams race to complete them.  g. ‘Find something stripey’, ‘Find something that makes music’, or ‘Take a selfie of all your team in a wardrobe’.  Either have everyone return to the web cam as they tick of each thing on the treasure hunt list, OR have them take a photograph at each step and WhatsApp it to you.
    (Another version of the game: Create mixed teams (across multiple households / offices) and use the Breakout rooms function – putting one mixed team per breakout room to complete the speed hunt.  Note – for this option you can’t ask everyone to take a selfie of themselves together in a wardrobe!)


  • Collective Cocktail Making in Various Kitchens. Need a drink? Rather than just take a break, make the drink preparation an online activity. It requires a little prep, deciding on your cocktail and sending out an ingredients list in advance with enough time for everyone to source things (e.g. mint, red berries, soda water, lime, cucumber…) To run it’s really easy.  Just invite everyone to move their devices to somewhere safe in the kitchen and line up webcams so everyone can see one another well, and then walk through the cocktail making steps, and once made – enjoy!  A refreshing and energizing break.

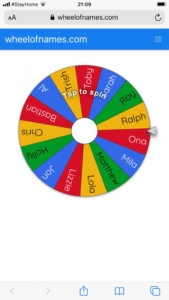
  • Screen-share an Online Spinning Wheel – such as the ‘wheel of names’. I love this and use it for all sorts of activities. For example, if playing a team-game online, use it to randomize the teams.  Put all names in the wheel, screen-share it and and spin it to see who goes with who (e.g. the 1st 4 are together, 2nd 4 are together, etc.) Use it to choose which games you’re going to play next (e.g. will it be Pictionary, charades or treasure hunt?) Use it to see who gets to go next (from all the names).  So many applications.  Get creative!  And keep people on their toes with the element of surprise.  (Note: the default setting in ‘wheel of names’ is that, once selected by the spinner, the name disappears, but you can change the settings if you want to keep all items in the list. You can also change the colours, sounds, spin time, etc.  It’s very versatile.)


  • Celebrity / Who’s in the Bag?  For this one, you need to know how to play the game IRL (in real life), then this online version description will make sense. You also need a dedicated games master.  It’s a lot of fun, but the games master doesn’t get to play.  The game works as normal, only the games master has the list of celebrity names and, as people can’t pick the cards or papers from a bag. The games master uses lightning speed fingers to type the names into WhatsApp and send them to the player who’s turn it is to make his/her team mates guess the names.  Every time their team guesses an answer, you send the next name.  As it can go really fast, I try and queue up the names so that I just have to press send.  You can also cut and paste them from a list (make sure you have three copies of the list at the start: one for each round – with the names in a different, random order in each list).  For scoring – count up how many names each player gets in 45 seconds (ask someone else to manage a timer!!) by looking at the number of names sent to them in the WhatsApp thread.  At the end of each turn, write ‘END TURN’ into the WhatsApp thread so you can keep track of how many names they got in each round. 

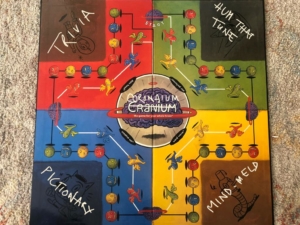
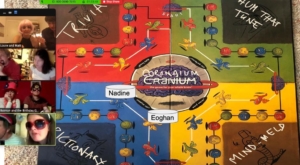
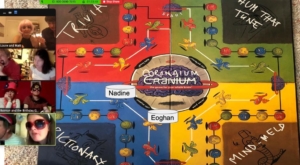
  • Take Cranium (the board game) Online – renamed ‘Corona-ium’ 🙂 For those who are becoming masters managing Zoom calls, you can put a number of the ideas above together and take the board game Cranium online.  Cranium combines games like Pictionary, charades, hum-that-tune and quiz questions, so see notes above on running those.  Take a photo of the Cranium Board and put this into a Google slide (or make one up of your own design). Make and name a coloured shape per team as the pieces to move around the board (using ‘Insert’ / ‘Shape’). Then designate someone to be the scorer (ideally not you).  Doing it in google slides in this way you can share the link with everyone (view only) so that at all times people can see the state of play.  From time to time you can screenshare it too. If you have the board game, you can take photos of loads of the cards and have these in your photo library ready to send out to people via WhatsApp or pop them into a google slide deck that you screenshare.  If you don’t have the board game (and I prefer this option with an international group), rather than picking cards, before playing ask everyone to send you (privately) 5 quiz questions, 5 famous people, 5 things, 5 songs, etc. Compile these and use them for the game, drawing on them randomly. Caveat: A player can’t give an answer they submitted so you need teams of at least three.Top Tip: As this game has lots of moving parts, I like to give different people the ‘lead’ on different topic types.  e.g. One person reads out the quiz questions.  Another does the Pictionary.  Another the Charades, etc.  This means you can participate and enjoy the game too, rather than just being the games master permanently.

We hope that these 20 examples give you some ideas for how you might adapt the above for your next online gathering, whether it is in a team meeting, a learning activity, or another fun gathering with others online!

Does this look familiar?

It wouldn’t have to me before today.

It’s my treadmill screen and my laptop screen (notice Zero Inbox!) because I just made myself a Walking Desk.

Impressed by the recent New Yorker article, “The Walking Alive” by Susan Orlean, gently informing all us knowledge workers that we are shortening our lives when we sit at our desks for so many hours a day, I decided to get out the saw (sic) and convert a treadmill over to a workstation myself. (If you want to know more, there is also a nice NPR Interview with her –Treadmill Desks and the Benefits of Walking Alive.)

I have lamented again recently on my slow down in blogging over the last year. That has been in part due to lots of work (common to us all), but also to the fact that I started to get up from my desk and go out of my office for some kind of exercise every day thanks to last year’s sticky New Year’s resolution. And as we all know, time is a finite resource. So at least one-hour a day (plus transaction time) almost every day is gone from work hours, and this was definitely part of my blogging time.

But today, I am writing this blog while walking 1.7 km per hour at my treadmill desk. It sounds slow, but I have been on here for 2.5 hours now (probably too long, first time over ambition) and covered some fair ground.

I didn’t buy a treadmill desk, although there are some snazzy ones available, but converted a regular treadmill by simply putting a board horizontally through hole in the two “arms” of this Kettler Track Experience. The board gives me room for my laptop, phone, agenda, and some files (and probably a cup of coffee if I am careful).

It still took me a while to get it to the right work position. I immediately noticed that my laptop was too low when it was on the board to be comfortable for more than 5 minutes. So I put a stack of printer paper blocks under it to raise it to the right height. Even at this level I can still see my screen (as in the photo) so can motivate myself by time, distance or calories, if my email is less than inspirational.

It is surprisingly easy to work on my feet – I have already made phone calls, scheduled a meeting, zeroed my In-box, created a word document, filled in an online registration form, and read and commented on a paper (and wrote this blog). All at 1.7 km per hour.

All perfect? Not yet. I have to figure out how to keep the treadmill programme on manual, otherwise I will have the situation I had on my first call when the machine sped up at seemingly random times and had me huffing before I could get it back down to my comfortable pace (giving a whole new meaning to “Thinking, Fast and Slow”). I also need to get use to working without a mouse, or make my desk elevation (aka blocks of paper) wider.

I see that I might get addicted to this as it seems to take multi-tasking and productivity at your desk to a new level. And for home office workers to note: It doesn’t really work in slippers (although pajamas are probably ok if they’re loose enough). Finally, don’t plan on walking at your desk right until the minute before you zip out to a meeting, because after a couple of hours on the treadmill, even at that slow pace, you’ll be a little dizzy and disoriented when you step down on terra firma again. (So, no power tools either.)

In the time it has taken me to write this blog -exactly 44 minutes, 1.05 kilometers and 108 calories, I have kept moving, and still achieved something work related – my first standing blog post, and I hope the first of many on my feet.

If you’re like me, you have a drawer somewhere of gadgets that just didn’t quite make it into your daily routine. Or you have some apps on your iPhone that you tried but never got into the habit of using and now you are not exactly sure what to do with them.

I wrote a blog post a while ago about “Domesticating Your Facilitator” which used the theory of domestication (how innovations are tamed or appropriated by their users) to think about how to onboard a facilitator in an organisation which has not used one before. (I also had to laugh because in that blog I mentioned a  previous post I wrote in 2006 called “New Technology: It’s Not Just for Christmas” where I talk again about domesticating a new video ipod (sic) that I received for Christmas and unfortunately I am pretty sure that this toy has indeed ended up in that drawer.)

I am very curious about the process of appropriating new things, so that they become useful to us and not just paper weights or pretty icons or interesting titles on our e-bookshelves, and this includes new learning.

This is on my mind in particular this week because I’m in Bangkok running a Training-of-Trainers (ToT) workshop where a group of smart trainers from around the region are being introduced to a new set of training modules on ecosystems for business that includes hundreds of slides, dozens of pages of facilitation notes, and a new sequence of presentations and activities, quizzes, case studies, icebreakers, discussions, group work etc.

All in 3 days.

And the last day of this three is a demonstration of one module that they will run themselves with a new group of interested and eager learners from outside our ToT group. So my role is to set them up for success and to help them appropriate this information so that they can use it immediately on Friday, and especially thereafter.

For me that is a part of the domestication process. Like my video ipod, receiving it and letting it get dusty in my desk after an initial burst of enthusiasm makes it much harder to use. For trainers, participating in a ToT, where you hear and work through some of the material and then go home and put that enormous binder on a shelf in your office until weeks or months later when you deliver the training (the likelihood diminishing as each week passes) is akin to putting that gadget in a drawer for “future use”.

When you have an opportunity to deliver that material on your own, you will take it off the shelf, open it up and probably in the middle of the night the evening before your training (but let’s hope not) and at least on your own without the ToT trainers and your peers in the room, you will have to learn it all again by yourself. At that point, unsupported except by strong coffee and Google, you will try to domesticate the material out of sheer necessity.

So how can a ToT programme change that pattern and help trainers move that process up to during the ToT (and not afterwards)?  How can you precipitate that moment when someone moves beyond passively accepting the material to making it their own?  Turning it into a tool that actually works for them, and domesticates it so it is a part of their life.

Here are a couple of things that we have built into the design of our ToT to help do this:

1) Let people read the materials
This might sound glaringly obvious, but it’s not. We often try all kinds of things to get our learners into that big manual. We send it electronically in advance, or portions of it. We hand it out in hard copy the night before and ask people to leaf through it (after the opening dinner and reception and on top of their jet lag). We page through the manual with them in plenary and tell them what’s in it. We do an exercise from it on page 13 etc. All these things are good of course, but it is actually amazing what happens when you block out a half hour or an hour in the ToT agenda early on (like the first morning after introductions and context setting inputs) and just give people time in the workshop room to read through the materials- to see how they are organised, the logic of presentation, and the content itself.

2) Have learners identify for themselves areas where they want more inputs
I combine this reading exercise with a job aid (a worksheet) that asks the trainers to note down the topics on which they feel they would need more support and information, and where they have specific questions (e.g. Day 1, Session 3 of the training, I have question X.) Their questions are organised on my worksheet into content questions and process questions so they think about the materials from both of these points of view.

This action gets them even closer to the materials because it asks them to imagine using it and identifying aspects where they have a level of comfort already and where they don’t at the moment. Thus narrowing down where they want more (as opposed to me deciding this for them and probably getting it totally wrong). Testing the content against their existing competencies shows them that actually they know some of this already, and that there are spots where they could usefully learn more in order to use it effectively.

3) Have learners share their “learning edges” with peers
Once people have identified the areas where they want to learn more, their “learning edges” (because not everyone wants to admit where they don’t know something), I send them on a “Pairs Walk”outside the room. On this walk, they use their worksheet and materials to share the questions they have with one other person in the safe environment of a comfy chair in another part of the venue or outside in the grass. It is often at this point that your partner can answer some of your questions – point to a place in the manual with the answer, or share an experience they have had that speaks to your question. This peer learning exercise has many merits in addition to getting some answers to your questions; it demonstrates the value of the peer network for support (so even months down the road, you might shoot an email to one of the other trainers to answer your questions), it shows you even more about what resources are in the material, and gives you and your peer the opportunity to “display ownership and competence of the materials” (which is a part of the “conversion” stage of domestication.)

4) Aggregate the remaining questions and answer them together in Open Space
Now that some of the questions are answered, what remains are the trickier or less obvious ones. Now back in our ToT room, I collect the remaining questions from the Pairs on cards and we cluster them to see what categories of questions trainers have left. The categories that emerge lend themselves beautifully to Open Space Technology (OST) sessions which can now be scheduled and run to discuss and answer these questions. (I have written a lot on this blog about applications of OST: Opening Space for Conversation (and Eating Croissants), and Training Camp: An Un-ToT Design as it remains for me an incredibly useful framework for learner-centred workshops.)

Anyone can host one of the OST discussion sessions. It can be one of the ToT “master” trainers, or can be one of the participants if they feel comfortable to do that. Running three or so in parallel means that the learners can choose which to attend and customise their learning to exactly what they need. They can stay with one group or move around, giving them complete control over how to use their learning time.

5) Follow up with group and individual learning capture
For each of the Open Space conversations I create an RLO (reusable learning objects) template – which is flipchart template that invites the group or conversation host to record resusable learning. This is not a running record of the discussion, the aims is to pull out things for people to remember and (as in the name) reuse. It also means that people who were not in the discussion, because there are several in parallel, can benefit from the useful nuggets that come out of the discussion. You can post these templates for a Gallery Walk which can be done in pairs again, or use them for a very brief highlights report back the next morning.

I usually run the above sequence, or something similar, about three times in a ToT, because as one question is answered others crop up, as people really dig deeply into the materials. And of course as the demonstration course with the outside participants starts to loom on the horizon (offering another important “conversion” opportunity to participants.)

Participants at our ToT yesterday were delighted with this sequence. It feels different. It feels like they are coming to the materials, rather than the materials coming to them when they get to decide what they want to learn rather than a ToT trainer deciding what people should learn. Even if the two match up pretty well, the level of engagement and active appropriation of the materials is completely different. Participants are given, and take, responsibility for their learning in this kind of process. 

We still have 2 days to go on our ToT, and will have another two OST sessions today. By Friday when our 25 new external participants walk into the room and the trainers deliver Module 1 of our series to them, we should have made good progress in helping the trainers domesticate this new material for themselves – making it more familiar, more useful and personal, so that it doesn’t get stuck in that drawer (like that ipod) forever.

I was working with an intact team (e.g. working in the same office space) recently on a retreat, the third that I had run with them over the years. Now, working with the same group on a long term basis is wonderful for a facilitator as it absolutely demands creativity and innovation; you cannot fall back on your favourite workshop activities over and over again (like you may be tempted to do when you work with new groups each time).

For this retreat, as for many, further strengthening relationships among team members was one of the soft outcomes desired – getting to know one another better, helping people look behind the office every day and delve a little deeper into what makes people tick.

One of the opening activities for any workshop is some kind of introductions at the onset of the day. Now with an intact team, this might be more of a “check-in” as everyone knows each others name, position in the organisation, etc. For this particular team, which in some cases knew each other from years of co-work, I decided to go a little deeper than usual and still keep it relatively light in the dynamic.

I am a fan of Vanity Fair magazine and one feature of the magazine is an interview, called the Proust Questionnaire (after the French novelist, critic and thinker Marcel Proust) on the last page that has a set of intriguing questions – things like:

  • What is your idea of perfect happiness? 
  • Who are your heroes in real life? 
  • What is your motto?
  • Which historical figure do you most identify with?
  • What is your favourite journey?
  • Which talent would you most like to have?
  • What is your most treasured possession?
…and so on. I took out some of the strongest ones, like “What would you regard as the lowest depth of misery?” and “How would you like to die” etc. because that was not the feeling that I was going for at 09:00 in the morning. You can see some samples of the Proust Questionnaire on the Vanity Fair website.
In the end I had a good number of questions that I liked, but in total that was less than the number of people, so I used the questions twice.
Preparation: 
  1. First I numbered the questions 1-14 (that is how many questions from the Proust Questionnaire that I ended up using), I liked the progression in the Vanity Fair interviews, so I used that order more or less.
  2. Typed them into a matrix that fit on an A4 sheet and printed it out.
  3. Copied it twice on coloured paper – yellow- I did this as it is just a little more visually interesting than the white paper that is laying all over workshop tables.
  4. I cut up the matrix, both sheets, so that I had 28 little squares, numbered, each with one of the Proust Questionnaire questions on it. 
  5. I put all the little squares of paper in an envelope.
Running the activity: 
  1. After I briefed the activity, I asked everyone to pick a square of paper from the envelope, while I walked around with the envelope.
  2. I told them that some questions would be doubled up.
  3. I gave people 2-3 minutes to think about their answers. As they picked slips and read the questions I heard some nervous laughter. ( I let someone who wanted to change their question, although the second one was not much “easier” than the first)
  4. Then I called the numbers one at a time and asked people to stand, read their question and share their response. 
  5. We did this until all were read out and everyone had answered.
What worked

The random nature of the question selection (picking from an envelope), the diversity of questions (they were all different except for the few pairs- I read out the questions that were not selected, as even in themselves they are thought-provoking questions), and the unknown ordering (not knowing who would be next) all added some surprise and a little drama to the exercise. And the provocative nature of the Proust Questionnaire questions really made people think. It was still challenge by choice – people could change their question if they wanted, but there really are no easy questions, and they could choose how they wanted to answer it. 
As the facilitator I could also choose the easier or the more provocative questions from the Proust Questionnaire depending on what I knew about the group and their interest in pushing the envelope together. As I mentioned, this was a group of people who know each other pretty well, but in most cases, these kinds of topics had not come up in their every day work discussions, so people listened and were deeply curious about their colleagues’ responses.
Outcomes?
The answers were conversation starters all of them, they added something different to what colleagues already knew about their fellow team members, and it was a fun way to start the day. And in this case, the game was NEW (they were the first group to ever play that particular “game”). 
You might need a new activity or game from time to time when you work with groups frequently. Look around you – you can find game and activity elements everywhere, even inspired by Proust or your favorite magazine! 

In the learning field, especially when the approach is learner-centred, we talk of the “learning journey” that people go on as they build their capacity/understanding/competency in a new area. We may also use the words “learning narrative” to describe this learning process to others.

It’s interesting to think how a learning practitioner builds his or her ability to design a compelling learning journey. And I wondered today how storytelling and story writing might help us…

If you look at the structure of a story and that of a learning process (let’s take a week long workshop for example) you might find some of the same steps along the way.

Where a story might introduce the characters at the beginning, in a learning course you would introduce both the participants on the learning journey (e.g. other learners in the room), as well as the issues that will be playing a big role in the week.

After introductions, you might have some time to get to know the characters, including their backstories and ambitions. In a learning workshop you might at this stage have some group development exercises to help people to get to know more about their colleagues, and also go deeper together into the issues and themes of the workshop. As in a good story, all would not be described in a linear or obvious way; you would discover interesting new things, facets and added complexity, as you read. In a workshop it could be the same, new aspects of the theme would be uncovered as the group digs into it and adds their own different perspectives to it (e.g. through group discussion and work, rather than only presented through straight lecture format).

Then, just when you get comfortable (hey, I get this stuff!) there needs to be a challenge – some tension in our story (and our learning) – what ever will our heroes do?!

(And of course there might also be some antagonists – in workshops they call themselves “Devil’s Advocates”:-)

Our challenge may be a real community challenge-like transboundary water conflict or unsustainable fishing practices – to which the workshop participants, with the community members, are trying to contribute some thinking. It might be a learning case study to solve together or a U-process that helps them reflect on a problem, perplexing issue or an unhelpful paradigm. At this point in our story, and our workshop, as we try to overcome the challenge, passions and emotions may be high – can we do it?

Yes we can! (At this point the ending of our story may be personally biased, I tend towards resolution and happy endings, and I think that learning environments often benefit from the same). In our story, this can include that ending summary that we see when the characters get together and talk through what happened (like at the end of Secret Seven books or Scooby Doo episodes). In our workshop it may be a final report back on the conclusions of the group work, presented to the community or to each other. This could be followed by a collaboratively built summary reflection on what happened and what people learned, and some final words.

In stories, as in learning, there are lots of interesting ways to make the narrative exciting for the reader (and workshops for our learners). Unusual and complex situations and scenarios (who gets the land: the farmers, villagers, foresters or loggers?), thought experiments, seeing things from different perspectives, excellent questions, incredible backdrops (I once held a learning workshop on a beach in Thailand, at a wastewater treatment plant in Morocco, and a mountaintop in northern Mexico) and more.

So, where can you find insight and inspiration for the design of your learning narrative? Read any good books lately?

I’ve had the word “Howtoons” written on my bulletin board for several years.

For me, the word has become emblematic for mashing things (anything) – combining, mixing, using them in ways you might not have thought about before – to make something new and even more useful. And there are blissfully no rules to this.

In the case of Howtoons it is using cartoons and comics to help people learn how to do things (versus pure storytelling and entertainment alone).

I love the word “Howtoons” for what it reminds me to do. It’s almost a one-word checklist for:

  • Is there something completely different I can do with this thingy?
  • Can I put something from another field, sector, industry, country, department, etc. with this to get something fresh and new that I can use? (I wrote a little about this in 2008 in a post called “Keeping it Fresh” after my 5th circus performance as a spectator in a month, and again in 2011 in 10 Different Ways to Do Anything: Get Inspiration Anywhere)

And when I googled “Howtoons” just now, I was even more delighted with some of the sites that use this moniker.

At the Instructables website, they call Howtoons “weapons of mass construction” and show in comic strip format how to make everything from a Marshmallow Shooter to a Turkey Baster Flute. They say they use OpenKidsWare much like MIT uses OpenCourseWare for wider distribution.

The Howtoons website itself is more of a one-pane cartoon, very sophisticated and embedded with what makes great comics, where they manage with this format to explain how to make their alka-seltzer powered rocket and spring loaded chopsticks. They also explain that Howtoons are what you get when you take a comic book artist, an inventor and a toy designer and put them together. Another successful mash-up!

Ever in search of innovative ways to help people learn, I have been delighted with what I have heard in the last year about the “Maker” movement (not as in True Blood) and tinkering, as ways to bring innovation and creativity to learning. These were both featured at the DML (Digital Media and Learning) Conference earlier this year – they even had on their Conference Committee a “Making, Tinkering and Remixing Chair” – Mitch Resnick.

DML sessions included Tinkering with Tangibles (digital textiles), Making Makeshop (on designing making experiences with families), Literacies of Making, Mobile Quests (that remix public events for social change), Design Tinkering  – that was a breakout – very fun!

In the Design Tinkering workshop, each table had the same pack of materials and some instructions. Two tables each had the same instructions -e.g. there were two sets of instructions – one was prescriptive about what to do with the materials, the other said (as below) “build and explore as much as you can about the materials provided”. We tinkered, and it was great fun re-purposing familiar materials into new things (the “thing” we made below lights up, not sure how useful it is otherwise, but we enjoyed our work)!

At TEDGlobal this year, we were also treated to talks on tinkering and making, with an interesting one by the co-founder of Arduino, Massimo Banzi. Arduino makes the cheap open-source microcontroller, a small programmable computer that has launched a thousand projects (like the DIY kit that sends a Tweet when your beloved houseplant needs watering.)

Another TEDGlobal speaker, Ellen Jorgensen, talked about her do-it-yourself biotechnology lab where you can walk-in and do biotech research in a community lab like GenSpace (where you can “hang out, do science and eat pizza.”) TEDGlobal itself even had its own MakerSpace where you could do your own DNA extractions, among other things. I wrote about my bio-molecular self-assembly experience in TEDGlobal2012: What’s Going On Right Now?

I will keep that word “Howtoons” right in front of me on my white board. For inspiration, and to prompt me to combine, recombine, mix and mash my learning tools with each other or even very different things – whether its cartoons and how-to advice or others (and I’m sure I can think of a way to use that Turkey Baster Flute in my work…some how…)

(Warning, this is a long blog post and rather detailed in terms of design thinking for Training Trainers. If you are a ToT organizer or trainer/facilitator it might be useful. If not, then you will want to check your Dilbert RSS feed right now.)

There seem to be cycles in our learning work and we seem to be in a “training” cycle now – with several ongoing projects to help groups create learning environments for themselves and others. I am not as fond of the word “training” as “learning“, for me the former seems to come from the perspective of the provider, with the latter from the perspective of the user of the knowledge or information. From a design perspective, I find more inspiration when I can put myself in the knowledge user or learner’s shoes. I know that for the learner a Training of Trainers (ToT)  exercise is a step with a group into the unknown…

There are many ways to create ToT environments and we also know that a great deal of the work that a new trainer (or learning facilitator) needs to do is individual. (See my blog post on “Training-of-Trainers from the Trainee’s Point of View“.) And if much of the work is about individual assimilation of content and methods for creating that learning environment for participants, then the ToT design should feature lots of guided individual and group learning spaces.

Many of the ToT designs that I see follow a set sequence:

  • an overview of the workshop that is being shared, with rationale, and partners behind it;
  • an introduction to the group of Trainers (trainees in the ToT) and their experience and motivations;
  • an expanded set of sessions that follow the workshop outline – each with a demo of the content by a content expert and then Q&A;
  • a session on adaptation to the local context with a discussion, group work and individual action planning;
  • a run through of the workshop with the new Trainers on delivery (the whole or parts of it).

This is a logical sequence and I have used it or something like it myself, sometimes with a full demo up front so the new trainers can experience it as participants, followed by the deconstruction of the workshop to go through the content and exercises that would be delivered when the trainers are back home.

I am currently thinking about how to do this a little differently these days, to make it more learner centred, and to draw upon some of the interesting “camp” designs that have featured in other sectors for peer learning. This interests me more as I come to the realisation that so much of the “translation” work for new trainers (moving from reading the Trainers Manual to them standing up and delivering it) is individual and can look very different trainer to trainer.

What if you combined ideas from the family of non-traditional events such as Bar Camps,  Foo Camps, Unconferences, and the inspiration for these – Open Space Technology – for a ToT, to come up with a Training Camp?

What might this look like? Here is a possible design for a 3-day Training Camp…

Training Camp Day 1:

  • You could start similarly to the more traditional ToT, just to put people at ease, and to provide context to Trainees, and to give some of the background that is needed to work together (why are we doing this? who we are? what we are bringing to the discussion). Then do an initial slow Walk Through of the base workshop (the one everyone is learning.) Expect everyone’s eyes to glaze over at some point.
  • Then you might give the Trainers 30 minutes or so of Individual Work to look through the Trainer’s Manual again (let’s assume that you were able to send the manual in advance and they didn’t want until that morning at breakfast to read through it) and highlight some things they would like to explore further. You might make them a simple Job Aid/worksheet to capture questions/types of questions that would help them frame the kind of sessions they would like to have to learn to use the information in the manual;
  • This could be followed by an hour of Pairs Work to talk through some of their questions to weed out any easy ones (this could even be a Pairs Walk if you are in a beautiful location and people’s curiosity is already getting the better of them). This could be followed by a Plenary Exchange of what kinds of things people are identifying for more focused work.
  • Finally, you could open up the Training Camp space, and ask people either individually or in Pairs/Trios to propose learning sessions that they would like to host that afternoon, and schedule those using a simple matrix of time and space, as you would for setting up an Open Space Technology session (See photo for set up). The kinds of things people might want to discuss could include specific activities in the workshop design, content pieces they want to understand better, strategies for getting their participants attention, ideas for daily check-ins, how to identify and involve local content experts. Each session should have an output –  a set of tips, a checklist, a guidance note, or some key steps to follow, etc. – which could be captured on flipcharts and/or electronically and shared with the rest of the trainers, and put into the Trainers Guide (for the future). 
  • Then the scheduled Training Camp session would run itself for the rest of the afternoon. At the end, you could have an individual  reflective time where the trainers could make some notes for themselves on what they learned and what they want to remember. I am a fan of worksheets and job aids with good prompting questions, and I can imagine something like this to both complement the Camp sessions, and also to use at the end of the day.

Training Camp Day 2:

  • You could start the second day with a Table Discussion and Exchange of what people learned from the sessions on the first day (they could share their flipchart artifacts). What were some of the things that they learned that they thought were most useful for their own delivery of the training course under consideration? Take some of the most useful things from the table discussion into a Plenary Collection.
  • At this point it would be interesting to do some Pattern Spotting, and let people generate some of the things in terms of delivery that they think they would like to work on further with the content experts attending. This could be collected on cards, clustered and the grouped into Tutorial Sessions with those content experts. These could then be run in parallel, but have an open format where people can go where they want and ask the content experts questions on a self-service basis, and once satisfied go somewhere else. If there are big questions that everyone shares, then this can be done in plenary.
  • In the afternoon, hold a session on Adaptation. You can give the trainers an hour to think specifically about what it will take to contextualise the workshop to their local context (the trainers may be from different sectors, countries, organizations etc.) They could do it individually or in groups from the same country/organization. Again a worksheet with some prompting questions can help people think about what they can do about identifying local content experts who might speak at their workshops, how they might want to adapt the timing to different workday rhythms in their country, what stories or cases studies they might want to use or identify to replace those already in the workshop to make it more relevant to their learners, etc.
  • For the next 2 hours of the afternoon set up the Training Camp space again, with three parallel sessions organized in 3 rounds of 45 min each this time.  Invite people to host conversations about adaptation – not everyone needs to host a session.
  • At the end of the day, ask people to find a partner and then to identify a piece of the workshop that they would like to co-facilitate on Day 3 for feedback. For this, take an agenda, blow it up to A3, and make slips from the sessions of about equal delivery size (say 30 minutes) that are either presentations that the Trainers would make, activities they would facilitate or discussions they would run. Put all the options on the slips of paper out on the table and invite Pairs to take one and prepare to run that session in the morning. (See photo above)
  • Give the Pairs the rest of the afternoon to work on their design and delivery preparation for their session. Have the content experts hold Office Hours (in the same room), where the pairs can come to find them if they have questions during their preparation. Let people go wherever they want to prepare. Create a materials table where they can find any supports they need, along with flipcharts, computers for PPT etc. While they are doing their planning, make a schedule of the sessions following the chronology of the base workshop.

Training Camp Day 3:

  • Start Day 3 with 30 minutes of free time for people to finalise their preparation for the sessions if they need it, or to practice.
  • Then bring people’s attention to the schedule of the day, and how it maps over onto the whole base workshop schedule. To do this you could make a large flipchart schedule of the base workshop, and highlight the sessions that will be demonstrated (use numbers for easy referral). Not all the sessions will be covered, as in one day there will not be time, so you (the ToT Trainer) will play the role of curator, and make the necessary segue ways where there are gaps. Ask the trainers to do this in their sessions too.  
  • Before you start the demo, give people a way to take some notes which they can use to provide feedback on each session. This could be done as a handout, with each session (named and numbered) and a space to write in feedback. But I think it would be interesting to give people index cards and ask people to take notes on those for each session (during and/or immediately afterwards). (See photo above) That way at the end you can collect the cards for each Pair and simply give them the cards to go through individually.
  • Start the demonstration. After each Pair runs their session with the group, take a few minutes for people to write down their feedback, what worked and what the Pair might consider doing differently next time. This appreciative frame will help make sure people are constructive in their comments. Either have them fill and hand in the cards with a few oral plenary reflections, or have people fill in their comments matrix and take a few reflections. Either way make sure to get some feedback for the Pair, and encourage people to take any notes for themselves as well. Also use that time to make points yourself (as the ToT trainer) about that particular part of the programme.
  • In the last hours of the day, hold a session where people individually or in groups will make a Next Actions list for themselves – what will they do when they get home? What is left to do to take the workshop from the Manual to their first live delivery of the materials with a group of learners? Again you can give them an action planning framework to fill in for the steps they want to take (I warned you I was big on worksheets and job aids!)
  • Close with some brainstorming on what the organizers and the ToT Trainees think would help them succeed – what could the group consider putting into place that would make it easier to share their learning, to continue the peer learning, to share any innovations or tweaks that the individual trainers may identify?  This is a perfect social media opportunity! Make some agreements on how to make this a reality.
  • Clap, make noise, have a party!

So, three days may be a bit of a push for this, but possible – if you have 20 ToT Learners, and only a 3-day slot. No matter how long it is, a Trainer who is going through a ToT exercise with a group of other trainers, needs to have a set of tools, a map of what they are learning, and people they can count on to help them when they get lost or need support or inspiration. The metaphor of a Camp, and the open space, with the individualised and group learning that it provides, may be just the model for helping Trainers find their way with a new workshop or process.

It is often difficult to find table signs that stand up so that you can see them from a distance (we had 88 people and 11 tables at our Climate Change Adaptation Learning workshop on Friday in Windhoek). I was impressed by the cleverness and the budget-friendliness of the solution above that the team here came up with.  We quickly changed from numbers to letters at the coffee break – both of which had been written on the back of the name badges before the workshop to help mix people up for seating during the day.Worked beautifully!

Every town should have a local circus school, if only to remind us that there are at least 10 ways to do anything. It’s not just because I am a proud parent to two jugglers that I enjoy the regular circus shows. It’s because creativity literally oozes out from under the doors of the place.
Today’s show featured some 50 young circus students; and one of the challenges they clearly set themselves was how many different ways they could get them on and off the stage. Sure, they could have just walked on and performed their acts. But they didn’t. They hopped on in burlap sacks, they somersaulted on in pairs (not easy, but possible), they walked on using colourful plastic cups as “binoculars” to peer at the audience, they rolled in on giant balls, they stepped in whispering mischievously to each other, they walked in on ropes that they were laying down in front of themselves as they went. And on and on.
They also used those methods to leave the stage, walking back on their rope, picking it up behind them as they went, always cleverly tying in the juggling, acrobacy, or high bar that they performed into their means of “transport” on and off the stage. 
I asked one of the teachers how they came up with all their ideas. She said simply that they get together and ask themselves the question – what are all the different ways we can do this? Then they have a lot of laughs and come up with the most amazing stuff, always keeping it very simple. Those plastic drinking cups were “binoculars”, they were lined up as a colourful border at the back, then a border at the front of the stage between us and them, they were piled up into the most perilous tower (several times) in the middle of the stage, and then knocked unceremoniously over by a giant ball, and at the end the young performers toasted each other with them. 

Sometimes it’s as easy as that, get some people together and ask the question – what are 10 different ways we can do this (get people on stage – or do our brainstorming, design this project, run this meeting, celebrate this achievement)?  For inspiration look anywhere, find some friends, and don’t forget to ask the question.

Synchronicity. That is the best word I can come up with to describe my first introductions to ‘Business Model Generation: A Handbook for Visionairies, Game Changers, and Challengers’ – simultaneously via my neighbours the Ortelli’s who know lead author Alexander Osterwalder and rightly thought it was a book I would love, and via my Hub Geneva collaborations with Patrick Keenan of The Movement who’s partner Alan Smith led the handbook’s design. Thank you all!

It aims to help people understand and methodically address the challenge of business model innovation. It addresses the questions:
How can we systematically invent, design and implement powerful new business models?
– How can we question, challenge and transform old, outmoded ones?
– How can we turn visionary ideas into game-changing business models that challenge the establishment – or rejuvenate it if we ourselves are the incumbents?

Not the typical strategy or management book, it is designed to convey the essentials of what you need to know to work with business models quickly, simply and in a visual format. Examples are presented pictorially and the content is complemented with tools, exercises and workshop scenarios you can use immediately.

Having incorporated the core tool – the Business Model Canvas – in a couple of workshops, there is plenty of learning to share. So here I write up some of my own process notes to help anyone else interested in using the Canvas in a workshop setting when time is limited. It is a very participatory, learner-centred, peer-learning approach.

Using the Business Model Canvas in Workshops

1) Set Up: Mount a very large Business Model Canvas (approx. 6 flipchart sheets) on a wall. Mark on this the block names: Customer Segments; Value Propositions; Channels; Customer Relationships; Revenue Streams; Key Resources; Key Activities; Key Partnerships; and Cost Structure. (See sample in photo above.)

(If you are dealing with ‘Beyond Profit’ business models, you may like to add also Social and Environmental Costs; and Social and Environmental Benefits as described on pp265.)

2) Understanding the Canvas Blocks: Having prepared ahead of time an A4 sheet for each block – on which is written one question that best guides people in determining what content goes in each of the canvas blocks – ask participants to randomly pick a sheet (e.g. place them face down and ask them to select.) Depending on group size people may get more than one or may share one between a few people. Ask the group to read silently the questions on their sheets and consider which block the question relates to. Once they have a good idea, ask them one at a time to read out their question and suggest where it belongs. The rest of the group then says whether they agree or think it belongs somewhere else, and – once there is consensus – stick it on the wall-mounted canvas.

For example, for the block ‘Customer Segments’ the question on the corresponding A4 sheet may be along the lines of: “To whom do we offer products and services in response to their problems / needs?” Continue until the group is satisfied that all the questions are in the right blocks.

Already the group is actively engaged in establishing understanding of the different Business Model Canvas blocks, and participants are helping one another learn about it along the way – rather than listening to an ‘expert’ present it to them.

3) Detailing the Features for Each Block: The next steps also require some advance preparation. This time it is post-it notes (or ‘stickies’); lots of them! For each block, write up a handful of examples or prompts, drawing from the material in the handbook if desired. For example, if we take Customer Segments again, we know from the previous step that we are looking for clients to whom we are offering products and services in response to their problems / needs. In this step, the post-it notes might include: mass, niche, segmented, diversified, multi-sided, and so forth – with a brief explanation of each. Take the group of related post-it notes, and stick them to an A4 sheet labelled with the block title. So for each block on the Business Model Canvas you an a sheet of prompts.

Repeat the process for step 2, asking people to choose a sheet and then determine – as a group – where the post-it notes belong. Note that these prompts are not necessarily the answer to the question “To whom are we offering products and services..?”. Rather they just provide a means to better describe the business model, so we can say, for example – “we offer our services to X, a niche market…”

4) Designing Your Business Model: Once the the group has constructed this canvas, complete with questions and prompts, it’s time to dive into working through an example. I like to divide the group into small teams and have all these teams work on describing a “business” that is known to everyone – such as their own! Then when they present back, consider where there is agreement and where some divergence is present. A great launch pad for the next step – considering what the business model could be!

I hope this helpful. Perhaps one last thing – the ISBN: 978-2-8399-0580-0. Happy Modeling!

When I am preparing a workshop, in the day(s) before, I go carefully through the Facilitator’s Agenda (which has more process detail than the Participant’s Agenda) and make detailed notes for myself. For each numbered session (without session numbers the workshop blocks are impossible to keep track of), I write down: 1) what needs to be done for preparation; 2) what materials I need, and 3)  an outline of my “script” – what I am saying to the participants to brief, run and debrief each session.

(A “session” for me, is a thematic block, normally an hour or two in length – the time it takes to introduce something, work through it, and come up with an intended output.)

I normally go one step further with this session preparation, and prepare any Job Aids, handouts, or design the flipcharts that I need to make on site to use in each session (for briefing, debriefing, a group work template, whatever.)

I do this because I need to have thought through as much as possible BEFORE I get into the workshop room, because once I am there anything can happen.

When I’m preparing my flipcharts or whatever needs to be done on the spot in the precious moments just prior to the workshop’s start each day, I really cannot be thinking deeply about what I am doing (as strange as that sounds). I can’t be designing things, wordsmithing, or wondering about the best way to phrase a group work question, as I can be interrupted at any moment, repeatedly, by practically anyone for practically anything – calls for directions to the venue, catering staff with questions, lost luggage, changing name tags, taking feedback, new ideas and opinions, greetings and more greetings – and you want to be available for all of these very important pre-meeting tasks.

Of course, I could write up my flipcharts in my home office before I go, I do have my own dangerous flipchart (see: Reframing Falling Flipcharts – hmm, there seems to be a recurring theme here.) But then you might have a last minute change, they might get mangled, you might forget them at home or on the bus. So I usually write up the flipcharts as a draft on cards and then recreate them on site using those as a guide.

This is all well and good, but what happens to those cards? If I keep them, they sit in my files, they get misplaced or out of sequence; rarely do I go digging into my files to find and reuse them. What if I could draw each flipchart model once quickly by hand, use it as a model to prepare the real thing in the room, and at the same time keep it electronically? Wouldn’t that save me time and from recreating the wheel?

I do now take photos with my iPhone of all my “best” or most useful flipcharts after the workshop and save them in Evernote where I can search for and find them again. I have been doing this for about a year now, and have some 500+ notes which are entirely workshop templates, flipcharts, activities, game descriptions, systems diagrams, good results of group work etc. Why I like Evernote is that its text recognition feature lets me go into my Evernote database and search for a word that is embedded in an image (rather than for a tag or a title). I take so many photos after a workshop that I don’t always have time to tag them, and the tags are rather generic anyways, so I can simply search for a word written in the photo of the flipchart and find the image.

I am interested in the possibility now, with my new Irisnotes (a digital pen) (thanks to my friend Lorenzo for this Christmas gift and tutorial!), to actually write up my flipchart “draft” in advance and keep it electronically for use again. I drew the above image with my Irisnotes pen on an A4 paper in 1 minute and when I connected to my PC simply saved it as a jpeg and then uploaded it to this blog, and also saved it on my PC.

This can also be helpful for collaboration. With Irisnotes I can also send the flipchart picture I have just hand drawn as an email. For example, if I was working with Lizzie as my co-facilitator, I could send her all the flipchart drafts in advance for her comments before we get to our venue,without having to type them all up and nicely format them (not one of my strengths).  We could even co-develop them in real time through a process that I used today for another discussion.

This was for a client telephone call focused on agenda development for an upcoming facilitated event. For this call I used Irisnotes while connected to my PC (by a small USB cable), which meant I could see my writing on the screen as I wrote my notes. As I was on a Skype call, I shared my screen  (cool new Skype feature), as we discussed a draft agenda and a set of group exercises (make sure you don’t have other files open or Hello Kitty “wallpaper” that you don’t want shared as well).

While we were talking, I drew examples of the group work matrices that I was proposing for the meeting in real time. I also captured the steps that we would take as we worked through the flipchart template I was proposing. Because he could see me drawing as I spoke, he could easily follow the logic, question it, help me improve it so the final drawing was more or less agreed. At the end of the conversation I immediately emailed him the file. And with Irisnotes, I could either send the file in my handwriting or convert it to text (accurate, if you write in straight lines, but still expect some minutes of work tidying things up. Lined paper to start with would help this.) Because I was drawing matrices I just sent him the file in handwriting as an aide memoire of our discussion, which I then typed up into a more formal proposal later.

Stick all that into Evernote, so I could find the above notes by searching for “Introductions” or “Group work templates” for example, and the next time I wanted an example or exercise for a workshop, I could find my flipcharts already “made”. With the help of some handy technology, I can make my preparation time more efficient, and be prepared for even more of anything.

I think all of us would instinctively answer this question with a “Yes”, but how often do we actually take steps to create an interesting visual “learnscape” around us, particularly in our temporary learning venues.

At least 99% of the time, the spaces that we use for our workshops, whether for strategic planning, team development, training or other, are square rooms with white or beige walls. All the chairs are the same. The tables might be rectangular, square or round, and probably all the same. The windows are uniform, the walls are blank. The latter is often a good thing, particularly if you want to hang up flipcharts and the products of your work. At the end of the workshop the walls may be covered and the “journey” of the workshop evident for all to see.

But what about the first morning, when people first walk in? What do they see and how does it set them up for the exciting, creative and productive experience that you will help them co-create with your terrific interactive agenda and fast paced repartee?

It is interesting to notice when workshop or conference organizers do take the external environment and the challenge to create visual interest into consideration. I think that conference organizers perhaps try a little harder as they assume that the participant experience is more passive, so they add a plant or a sofa. Actually, TED Conferences are really brilliant at this, the stages that you see in the videos, or as a participant from the floor are intricate, rich and interesting.  Watch a minute of this Tim Jackson TED video for an example of the eclectic mix of background articles they use. Or take a look at the photo I took of a panel discussion at the TEDGlobal Conference I attended last summer. The TEDXChange Geneva event that Lizzie organized also featured a whole task list on procuring props for the stage, shipped in from Zurich, to make the background for the speakers and the conversations look interesting, including a vintage coke machine, a wagon wheel and more (see photo here), which all tied in some way with the talks being given.

When you can’t truck in props, you can still create visual interest in other ways. The recent Membership Meeting of a standard setting textile product group that I facilitated featured a sample from their first harvest on each table – there to admire, feel and connect people with their process. In the room as people entered were also maps of their strategic regions, with photos of the value chain stakeholders, and posters created to show the value chain. We used these for one of the first exercises, and put them up before we started for the visuals and to get people in the theme of the meeting from the onset.

It you want to leave the walls free, what about the ceiling? I was mesmerised by the big room at the Hub in Brussels, where we had a recent LEAD Europe (Leadership for Environment and Development) training course gathering, where a local artist had hung a cardboard sculpture. How visually stimulating it would be to have a workshop in that space! I remember during past IUCN Commission on Education and Communication workshops, there would be bouquets of fresh flowers, and bowl of bright fruit and chocolate on all the tables. I remember a facilitator from Disney telling me that at some of their planning workshops, each participant would have their own placemat and setting with drawing paper, coloured markers, playdough, lego or other small items to “play with” while the meeting was going on. What can you bring in that will be different and interesting to look at/interact with during your learning exercise?

Creating stimulating visual environments for learning, even in our temporary workshops spaces, can enhance creativity and spark ideas and engagement. It can signal that something different is coming, something that will connect people will both their left and right brains. You can do this by moving people around, by using different rooms, by going inside and outside, and also by looking differently at your main workshop room and setting and thinking more about how you can make it visually stimulating. Even you are a canvas – people will look at you, the facilitator, trainer or organizer for HOURS, what colours are you wearing???

What do you notice when you have the opportunity to watch 35 Pecha Kuchas? We have featured these interesting presentation techniques – 20 PPT slides autotimed at 20 seconds each – in different workshop settings in the last few months. Here are some of the things we noticed that made them work:

13 Tips for Pecha Kucha Success

  1. Practice your Pecha Kucha WITH the timing turned on (don’t just talk through your printed slides to yourself as “practice”.) 
  2. Check particularly how your message for each slide matches the 20 second timing limit.
  3. Too much information? Think about where you need to break down your message if there is too much information for 20 seconds. For example, run your message over 2 or 3 slides if need be. Think creatively about how your visual can progress with your message development.
  4. Too little information? If you find that there is too little for 20 seconds, e.g. just a one liner or one brief point, then double up two messages on 1 slide, or think about a quick example to illustrate your short point. Note: Watch that the example doesn’t launch you into a long story which will blow your timing.
  5. Using diagrams? These can be a good way to snapshot lots of information but be careful with diagrams or graphs that are too complex. Can they be recrafted so the one key message/line/box is bolder? Note that people will not be able to read the little stuff (like all the indices etc.) quickly, so only include what you need for your story. Spread it over 2 slides and use a build. Make a handout for later if people will need the detail, don’t try to go through it in your Pecha Kucha.
  6. Save time by not using the first slide to introduce yourself, the title of your talk only, or closing with a “Thank you for listening” slide. Just say it quickly. If you want to elaborate on yourself, use a wordle (beautiful word cloud) of your CV or bio to snapshot yourself (here is an example of one I did for myself).  
  7. Watch your computer positioning – make sure the computer is in a place where you can see the screen as a prompt and still face the group, unless you have good peripheral vision and can stand at the side so you can see both the screen and the eyes of your audience. 
  8. Never NEVER read your slides.
  9. Design thinking – I have seen both slides with only images and no text, and slides with an image and a prompt word. Unless you are very good at picking images and they are very obvious (even quirky can be obvious within your narrative), I think I like the latter. The single word can summarise the point of the image.  It is also very effective to only have one or two words on a blank slide (centred or interestingly placed), and perhaps with a black or colour background. In any case, mix it up!
  10. Interactivity? It is hard in the time allocated to do very interactive work with your audience – you can use hand mapping or voting, or other quick inputs, but if you have to pick on people and wait for an answer, and then if people talk too long, there goes your timing.
  11. Part of a Pecha Kucha marathon? If your Pecha Kucha is one in a string of PKs, then the organizers might want to pause for a minute (literally) between them and invite people to write down any thoughts, questions, or comments before starting the next one. The organizers could even make a Job Aid of some kind (a card with a matrix, etc.) to help people keep track of where they are in the line-up and their impressions.
  12. Getting people’s attention – If you do want to engage, then end with a “lesson” unconcluded; with a question, or an invitation.
  13. Don’t apologize for “not having enough time to go into depth because of this format”; that just says you didn’t prepare well enough.

Everyone should be able to make their point in this day and age of micro-media with an “elevator speech” – and 6 min and 40 seconds is an incredibly generous elevator ride by most building’s standards!

I got a great question this morning from a fellow learning practitioner working at the UN in Geneva, asking for ideas about how to structure 20 short participant presentations over a 2-day workshop.

I wrote a blog post last month about using Pecha Kucha’s and Ingnites for this kind of thing (see The End of Boring…), and went on to suggest how to use this in a workshop where people might not have prepared to try a new technique.

Why not let people choose between doing a Pecha Kucha and doing a poster for their 5-minute presentation. Tell them 50% can do one and the other will do the second technique. See if they self-select between the two after an introduction to the techniques.

For the Poster, tell people that they will have a flipchart size sheet, coloured markers/collage materials and their product will be photographed and shown on the big screen as a guide for their 5 minute talk. You can give them a word budget too if you wish – 10 words, 20 words – or you could have them pick a card and the card number gives them their word budget, so they will all be different. That gives them a little more drama, as their Pecha Kucha colleagues will experience.

Then give people time in the workshop to prepare themselves, say a 45 min or 1 hour prep period before the presentations start. And finally, put them into pairs to do this preparation work (even mix them, one poster person with a Pecha Kucha person). This pairing gives them some support and someone to bounce ideas off of, it also gives them a deep dive into someone else’s work, and let’s them experience the other technique they didn’t choose. The one-hour investment in preparation time will be made up through the 5/6 minute presentation time frame (versus the 10-15 min per person they might have expected normally), and provides valuable relationship building time.

After the preparation time, set up the sequencing, let people pick a number between 1-20 out of a hat, which will give them their order. Then schedule them in 5 presentation blocks (that is roughly 45 min, with the transition times). After each of block of 5 presentations, plan on a reflection discussion for 10 minutes – what are people noticing about the presentations? What patterns are emerging, what might that mean for our topic X or Y. Change the questions for this reflection slightly each time for variety, as well as a useful opportunity to help move people’s thinking on your topic. Pull out different things, about one aspect or another, or about what we can do with the new information we are getting (so how it contributes to our action, next steps, or other goal of your workshop.)

For timing within the overall workshop, it depends on what purpose these presentations serve. Are they briefing people on the other participants, on work between a previous meeting and this one, information on the activities of many different offices of members in a network? If so, then it would make sense to start this early, such as after coffee on Day 1 and finish after lunch the same day. Or perhaps it is on commitments ore personal action plans for the results of a longer workshop, in which case you will want that at the end. See when the information given is most useful for the work you are doing. With 20 of these, it would be important to work it around a break, coffee or lunch.

Other interesting presentation-linked techniques that I have seen recently (not linked to the above scenario, but cool anyways – I want to remember them in any case so I put them here!):

  • Give a “quiz” at the end of the presentations. This would also work for the 20 presentations referred to above. As people present, note down some of the key points, interesting facts, etc. Then at the end of the presentations, to start the discussion, ask the audience the quiz questions. Question by question, ask for the answers from the audience; then if desired, ask the speaker to complement this with (only a little!) additional information. This is also the way to focus the discussion on a certain line of inquiry if that is helpful for your workshop. You can also decide if you want to tell people in advance that there will be a quiz or not. If you do, you might get them to pay more attention to what they are hearing; surprising them will wake them up for the discussion. See what makes sense for the group.
  • Introducing speakers: Have the audience introduce them. Put up on the screen a photograph of the speakers (with their name and title if you want, or try it without and also ask the audience for their name and title) and walk down into the audience and ask people to introduce this person. Some people will have heard something about them, read an article, or met them, let the audience say a few words about the person and then ask the speaker if there is anything they would like to add. I saw this at the Battle of the Bloggers at Online Educa last year with an audience of about 150 and it worked brilliantly, and in the end the information got out.

What other interesting practice have you seen for making presentations powerful and memorable? What are the ways we can help people with brilliant ideas and thoughts in their heads share them with others in the most productive way?

We often get asked to introduce ourselves at the onset of a workshop or meeting, or at the beginning of a presentation. We may say a few words, or cram our entire CV on a PPT slide. What are some other, more creative ways to introduce ourselves?

If you want to give an impression of your experience in an interesting way, I really like the Wordle option. Go to http://www.wordle.net/. Now take a Word version of your Curriculum Vitae. Select all and copy your entire CV. Paste it into the box on Wordle, and in 1 minute you have a beautiful word cloud that you can screen shot and paste into a PPT slide. The word cloud emphasizes key words that are more frequently used, so you get a quick snapshot of who you are and what you do.

I heard about another cool tool last night called Personas, a data mining site created by the MIT Media Lab that is a part of the Metropathologies exhibit. It says it “scours the web for information and attempts to characterize the person”. It produces an interesting visual and a final continuum with key words that best describe you (you have to try it to get the gist – it takes literally 2 minutes). This screen shot can be captured and popped into a PPT slide. Both of these are licensed under the Creative Commons licenses so can be shared, and used with attibution (so put the URL on your slide too).

Two interesting ways to give people insight into the innovative you.

I had a design conversation this morning for a one-day workshop that featured 10-15 participants each individually presenting project ideas, one after another. How do you make that interesting (after the third one)? Why not a pecha kucha or an Ignite (the tag line is “Enlighten us but make it quick”)?

Both are presentation techniques with origins in the design and IT world which give presenters 20 slides on autochange at 15 seconds (ignite) or 20 seconds (pecha kucha), for presentations that total no more than 5 or 6 minutes. Both are now global phenomena, yet far from being household words. Pecha Kucha has a good website with samples, and here’s one using Pecha Kucha for sustainability. Some good videos of Ignite presentations are on the Ignite Oreilly site, with more on Igniteshow).

These techniques shifts the whole emphasis refreshingly onto the story and the images and makes it much more fun and creative. One website said, “This is not your father’s PowerPoint presentation.” It all might sound intimidating, but even bad ones are really good (or at least funny and only last 5 or 6 minutes anyways.)

So there are new ways to do presentations, there is also new software for that. Lizzie wrote recently in our blog about Prezi, and what about Keynote that I recently heard enthused over by a super smart 11-year old attending a workshop with his mother (a reaction to the slideset no doubt). In fact, there are 40 listed in wikipedia under presentation programme from AdobePersuasion to VisualBee. It probably has never crossed your mind to try anything but PowerPoint, but if you only have 6 minutes to present something or if you want to get people’s attention in a long series of presentations (or just a long day), it might be worth trying a new format.

Or what about a completely new format for the workshop itself (or at least Day 2)? We have written about using Open Space Technology in the past (see our post Open Space for Conversation and Eating Croissants) and how that technique helps to organize and support learning. There are a range of Unconference techniques that are being used (many again conceived in the IT sector, and often focused on sparking innovation and creativity enhancements). I heard at last year’s Online Educa about the FooCamps and BarCamps that started 5 years ago and promoted as “user generated conferences”. Again the content is brought by participants, and schedules are generated by those with ideas to share and develop with others. A typical FooCamp schedule board looks like this (lots of intriguing titles – I like the scribbled out session called “Howtoons” – I would have gone to that one.)

Again, the objective is to provide those people who seem to have at the top of their Job Description: “Go to Meetings”, with a new and refreshing frame. A 2006 article about this was explicitly headlined: Why “Unconferences” are Fun Conferences: Unconferences – meetings organized on the Web or on the fly – are becoming the no-b.s. alternative to industry gabfests. The mention of “organizing on the Web or on the fly” comes from the fact that many pride themselves in being organized in less than a week, and are “evangelised” or promoted using mainly web tools. Some recent social applications include CrisisCamps held to promote relief efforts for the Haiti Earthquake. They are also short, with one day or half day formats, and a panoply of parallel, one hour sessions. (And perhaps also a driver for the creation of Ignite or Pecha Kucha type presentation formats).

All this is still a lot of talking. What about having a whole session where no one talks at all? Maybe something like a Dotmocracy session could be a calming and still productive way to spend an hour after lunch. I have seen this done for evaluations, but not as it is described here as a way to gather inputs on a specific idea. If you look at the template, it is obvious how you can use this for brainstorming, and you don’t even need those sticky dots that can be a pain to cut anyways. This looks like something that could also work with very large groups, similar to the Camps and Pecha Kuchas described above.

Maybe I am oversensitive to boring. And yet, there are productivity gains to be made from spicing things up, speeding them up, tapping into enthusiasm and creativity, and cross-sector learning from the IT sector – not just from their methods, but also from their eternal willingness to borrow, adapt and mash things up. And for Facilitators, boring is not what we want to pop into people’s minds when they think of our work (I was going to say “is the kiss of death” but that sounded rather unappreciative). At least there is no shortage of intriguing pathways to explore, these are just a few, if we want to help try to bring an end to boring.

GROUP
TROUP*
TROMP
TRAMP
TRAMS
TEAMS

I couldn’t believe that this worked, on my first go, after reading Brian Remer’s puzzle instructions in this month’s Thiagi Gameletter (TGL-Seriously fun activities for trainters, facilitators, performance consultants, and managers).

Brian calls this instructional puzzle a “Doublet”, and cites Lewis Carroll (of Alice fame) as its originator. In Brian’s description of this puzzle he went from WORK to PLAY and APE to MAN in four to five one-letter changes. I picked my two words (thinking about a teambuilding request I received today) and wondered if I could go from a Group to a Team as easily. It worked beautifully, and I could immediately imagine how this could be used as a teambuilding exercise, or part of a visioning or strategic planning opener. (fyi, Brian Remer writes a thoughtful monthly e-newsletter from his Firefly Groupspark your passion for continuous learning is his tag line.)

(Imagine my dismay later when I discovered that I had spelled troupe wrong! More on that anon.)

There is also a great game in the March TGL called “Destination: Innovation” by Dimis Michaelides (I found his bio on an intriguing website called Facilitators Without Borders) that involves an airfight of paper airplane ideas and flying paperwad obstacles that I am eager to try at one point (I also wrote about a paper airplane idea in a previous post called Keeping it Fresh about innovating on workshop exercises.)

Ah, I always get excited by new games! A Facilitator has a faithful set of these kinds of frame games, tried and tested, and whenever you get a new one, or a new idea for one, you just can’t wait to try it…

*TROUP – UK Acronym for: Time to Restore Our Utility Poultry (no joke!) (Phew, saved! while I come up with another one that has all the words spelled correctly!)

For an event that combines product designers, technology experts and policy makers, you want to move into as many innovative “integrative” spaces as possible. That takes buy-in from all parties, as well as lots of courage!

On Tuesday, the second day of a 2-day international conference on sustainable products and services in Essen, Germany, we took the familiar format of “Who Wants to Be A Millionaire” and converted it into “Who Wants to Be a Sustillionaire” (credit to the CSCP team for the title!) We used this modified format to do something interesting and new for plenary reporting on a series of 5 parallel workshops, in which 200 people from 29 countries took a set of project ideas to their next stage of development.

Many conferences have a combination of plenary sessions and parallel workshops as a part of their design. The challenge is how to bring in the learning and outcomes from the parallel work back to the whole group in a way that is not a boring sequential set of oral reports from the workshop organizers.

It’s an interesting decision about whether to do plenary report-backs at all. Really large conferences don’t bother. Medium-sized ones with community-building goals, often try. And it is a challenge for organizers and facilitators to do this in a way that is engaging and not sleep-inducing (heaven forbid adding into the mix the after lunch snooze-time zone.)

One compelling reason to do after-workshop reporting, is that it ups the stakes in terms of quality outcomes. If you need to report back to 200 people what you accomplished during your 2 hour session, you put some extra effort into it and want it to be good. Another pro is that it promotes more authenticity in reporting, as you have your whole group of 40 or so participants in the room witnessing and hopefully validating your description of what came out of the event.

So there are some good arguments around why to try to bring some of the flavour and learning from parallel sessions into a plenary setting. We decided to do it.

So back to our game session, “Who Wants to Be A Sustillionaire”. We thought it would be interesting to get each of the Project Incubators (the titles of our parallel workshops) to give us two questions, in the familiar multiple-choice format of the game show. We would combine them all into one game round which would be delivered by Powerpoint in the plenary after the conclusion of the parallel sessions.

On each slide we had the question, and then an A, B or C choice. The next slide had the same question with the right answer highlighted. There were 10 questions. Each question was asked to the audience by the game host (in this case it was me), and their answers were collected in different ways. After some of the questions (at least one per workshop) I asked someone from that particular Project Incubator, either an organizer or participant, to tell us a little more about the question’s answer and in doing so some of the results of their workshop.

It was ambitious, we got some laughs, and good humoured responses. In retrospect, I would do it again. Here are some of the things I learned about the conversion process, converting the game show format to the learning format, that I would consider next time:

What I liked:

  1. I could administer the game from the audience, I had a lapel mike and walked through the audience as I asked the questions which were shown on the big screen at the front of the plenary. I also had a hand mike, so I could either ask the group to respond, or I could ask individuals the questions. It made it more spontaneous.
  2. The quiz was at the end of the conference, so I knew many people by that point, and when I needed to pick an individual to answer a question, I knew who might be happy to answer a queston in front of a group of 200 people, and who might add a little extra humour to their answer.
  3. I thought 10 questions was about right, I would not have wanted more (perhaps a few less, but generally, the 10 questions went pretty quickly).
  4. I thought it worked well to collect the answers in different ways. For some I asked the audience to stand if they thought it was A, B or C; or asked them to raise their hands; or ask individuals. I could also lightly play on the ask the audience, phone a friend etc. (although no one took me up on the latter). I couldn’t easily use 50:50 as we always had 4 answers.

What I would try or do differently next time:

  1. I would number the questions (1 to 10), so as the game host, I could tell when we were getting near the end and raise the drama.
  2. I think I would put the questions in order from very easy to hard, like in the game show. Ours were mixed, and all of them had some funny answer choices, which was good, and at the same time made the questions continue to be rather easy. Next time, I would make the first ones very funny and easy, and then get gradually harder so that people didn’t automatically know the answers. It might give me more opportunity to get discussion going within the audience and not just between the audience and me.
  3. I would vary the kinds of questions – we used a template to make it easier for the session organizers to give us their questions. We even gave them some samples, and then asked them to give us the wrong answers in advance and then give us the right answer after their session. I think having different kinds of questions, and different numbers of answers (e.g 2, 3, 4, 5) might have given more variety, and therefore be easier to animate.
  4. I was a good idea to have question “stems” (e.g. What are the priorities for…? What is the role of…?) which were sent in advance (5 days) to the organizers who could use them to frame their questions. In the future we could go back to the game show for some familiar stems, to even further connect the audience to the energy of the tv game.
  5. I would build in a little more time between the end of the workshops and the quiz in plenary – we had a courageous 30 minute coffee break to collect the final answers, check through them and run the game. It did feel like the quiz was very fresh which was great, and perhaps little more time would help iron out any little hiccups, let us look over the quiz as a whole for the build in difficulty and drama, and give us a test period. A lunch break time length would be great.
  6. I might add a final question that is not directly related to the indvidual workshops but was a comment on the overall goal or message of the conference – that could be the 1 million Euro question.
  7. Adding monetary figures overall to each question might have added some fun, at the end I could have asked who wanted to donate their winnings to the Project Incubator follow-up (hopefully everyone would have raised their hand!)

These are some of the things I learned from the experiment to convert a game show into a conference reporting game. It was infinitely better than stand up reports, gave some interesting energy to the end of a lively conference, and gave people a shared experience that could continue to bind them together (more than sitting shoulder-to-shoulder together and listening to podium speakers).

I think it also showed the organizers in a good light, as courageous and willing to try something new. It promoted the idea that there are always new ways to do routine things, things that we might do without giving it much thought, especially in a familiar setting (in this case, like a conference). How can we keep from going on autopilot and missing out on the innovation and energy that comes from trying something different and new? And for sustainability, we will take all the innovation and energy we can get!

This morning I was surprised with another Mother’s Day present – a game called “Coconut Cracker” which my 8 year old had created for me.

The essence of the game was that you had to toss a pencil onto a small piece of paper (a post-it note). On the post-it note were drawn nine small circles about the size of a marble. The objective was to get the pointed end of the pencil into one of the nine circles. If you got the pointed end in a circle, this first victory allowed you to peel off one of four pieces of cello tape which were holding a decorated paper cover onto half a coconut. The first three wins got to peel off one of the cello tapes. The fourth person to win would be able to uncover the hollowed coconut and get the surprise inside.

The game was fun! We were three players (my competitors were 8 and 6 years old.) The circles were just the right size, not too small and not too big, so that we had to try, test approaches, refine our pencil tossing skills, and then could succeed in the task. Each piece of tape lifted added to our anticipation, we got excited, we got a little sloppy. The final tape took us a full few minutes to get. And then someone won! We cheered, he peeled off the last piece of tape, lifted the coloured paper cover and exposed the contents of the coconut, which was confetti (hence the name, Coconut Cracker), and delightedly threw it all over the room.

That was a good game that he had created. It had many of the components of the kinds of games we play over and over for learning and recreation, including:

  • Roles (we each had an action we needed to perform which was clear)
  • Rules (these were introduced at the beginning and did not change, very important)
  • Accounting system (we counted our throws, and the tape)
  • Macro cycle (over all we were trying to uncover the coconut)
  • Micro cycle (each round we were trying to get the pencil in a circle, and we needed to complete four rounds successfully)
  • Props (pencil, post-it, coconut, confetti – this game was probably inspired by finding a coconut shell and thinking “what can I do with this?”)
  • Referee (well, we all did that, we might have needed a way to deal with disputes)
  • Safety procedures (no one could put the pencil in his/her eye, or eat the confetti)
  • Media for introducing or debriefing the game (here my son did it orally, we were allowed to ask questions)
  • Name (something that does not give away the game, here Coconut Cracker was just on the edge, but since we did not know what was inside it seemed clever afterwards)

One further thing a more complex game has is a causal model, which governs between decisions and results. I would have to think about that one for Coconut Cracker, which is ultimately a game of skill.

At the end of the game, my son said that next time he might introduce more “levels” to the game – like having layers of paper covering the coconut, which when removed could become the next “game board” (e.g. post-it), each one a little more challenging, like smaller holes and further apart, so it would prolong the excitement and add to the skills development. I was amazed (very proud of course), and it made me wonder why we don’t create more games from scratch as adults. If we wanted to use them for something specific, like team development, or maybe as an entry into an innovation process, we could put more context into the frame.

There are some amazing people for whom creating games is a great art, one is Dennis Meadows, with whom I have had the great pleasure to learn over the years about games. He created wonderful sustainable development games like FishBanks, and STRATAGEM, among many others. Games that are both complex in their models and learning, and elegant in the simplicity of play (both are also computer supported.) I took my list above of components of a game and slightly adapted it from a workshop Dennis gave in 1998 about using games for learning. I am not sure he would completely agree with my assessment about Coconut Cracker’s merits, and my interpretation of the components. I took some poetic license – it was Mother’s Day after all!

This week I was asked to facilitate a session on “Brainstorming” for the monthly meeting of the Geneva Facilitators Network (linked to the International Association of Facilitators which certified Lizzie and I last December as CPFs). It sounded like a relatively easy brief, however it proved to need some deeper thinking to make it interesting and a learning experience for the network members who would attend.

The previous week at IUCN we had hosted a Facilitators Demonstration and Learning day and one thing I noticed was that some techniques and materials cause some fatigue from participants from simple overuse. This poses a challenge when you want people to be brainstorming new ideas – if presented with a usual way of doing things, it might not add that extra stimulus to get people thinking beyond the easiest interpretation of the question.

So to start our brainstorming session I put cards on the table and markers and stood at the flipchart and asked the group to brainstorm a list of the “most common brainstorming techniques”. Without too much enthusiasm, they easily generated a list of about 7 of the techniques we all use all the time. The one I was using was the first mentioned (open question, call out, flipchart capture), the next was using cards or post-its (for individual work, collection, grouping, labeling, prioritizing), then came a few others (card races, autumn leaves, wall graffiti charts, a few others), and we had our list.

At that stage I had some rather rhetorical questions – which I asked myself first in my design considerations – why do the top brainstorming techniques get used so often? And if we want a brainstorming technique to help groups generate new creative ideas, what is our opportunity to model that in our brainstorming session? (After our intensive Facilitators Demo last week and some workshops I had run recently, I never wanted to use markers, cards or flipcharts again!)

So the next step of our sequence was to have a discussion around three questions related to brainstorming: 1) What are the most important conditions for successful brainstorming and what can hang up a brainstorming session; 2) What are the most important things a facilitator would need to consider to choose or design/adapt a new brainstorming technique for a group? And 3) What are the crucial next steps after a brainstorming session?

But I didn’t think that running a similar idea generation exercise would get us really thinking, so the groups got the following task:

1. We each picked a card which put us into three groups: hearts, diamonds and spades.
2. Each group had a place in the room (pre set up) with a table and a bag of items. On the bag was the Ace with their suite and one of the three questions (above).
3. Their task was to take 15 minutes to: Design a brainstorming session that would help the group answer their question, NOT using ANY of the common techniques that we had generated in the previous session, and using at least ONE item from the bag. They would have 10 minutes to run their session.
4. People didn’t know it in advance, but the bags had in them an eclectic mix of plastic dinosaurs, cows, balls, blindfolds, musical instruments, as well as the standard cards, tape, scissors and scrap paper.

So I timed out their 15 min and each of the groups had their 10 minutes to run their sessions – and what entertaining and unusual sessions we had!

The results were very thoughtful. The debriefing conversations which followed the three demos served to supplement the answers to our questions. This worked well because they were based on our shared experience of these brainstorming sessions, and as a result they were much deeper and layered than I imagine they would have been if we had simply stood at our flipchart and shot out ideas, or written them on cards for clustering.

In our reflection we went back to those three questions, and asked ourselves about our own process to generate the ideas as facilitators, and also our experience as participants. What did we see as the conditions for good brainstorming and what hung us up sometimes? (e.g. things like lack of clarity on the question or the process, although this generated quite a lot of discussion as some of the facilitators felt that broader questions initially might produce more creative left-field responses an not lead people in one direction or another and ). What did we take into consideration ourselves when adapting or creating new techniques for our colleagues (things like familiarity with the group, their level of trust and risk openness, etc.), and finally what needed to happen next after the brainstorming (here we went from the mechanical in-session follow-up like defining roles and reporting, to the softer side like commitment to action of the group, and celebration).

We finished with our take-aways as facilitators – which included my own – never underestimate the creativity of any group to take on an unusual task and make something interesting and useful for themselves out of it. As long as you hold the goals firmly and with respect, people are happy to trust the process and might get even more out of it than anyone expected. Which is usually one of the reasons groups engage facilitators in the first place.

I have spent hours in the last few weeks trawling through handwritten notes in my In-box diligently taking out the ideas, potential next actions, and possible “to dos” in there. Apparently I am my most prolific at ideas generation when I am sitting in meetings or presentations (shouldn’t I be listening?) Then I end up with pages of notes, filled with little boxes of ideas that are eagerly expecting to be cared for and considered.

David Allen in his GTD system has designed a clever way to manage them, in a Someday/Maybe list, or Incubate list, which provides a placeholder and a way to scan these random thoughts regularly (e.g. in the weekly review process) for a quick decision on whether there are any ideas there whose time has come. However, I now have a very long list of these, and am still not sure how to take care of them.

I wonder if I should instead try to get comfortable with notion of information (and ideas potentially) being a flow rather than a stock. This has been a theme at the annual Educa Online conferences and a vibrant discussion within the web 2.0 knowledge management set. Maybe instead of fastidiously trying to capture and keep all these ideas, I should just have them and let them go out there into the world, or better find them a good home. (Lizzie suggests I publish my Someday/Maybe List on the blog, maybe I will in 2009, what better home could there be?)

We found out rather late in the preparation for our major Congress that we could not stick anything on the walls during any of our workshops. There was much wailing and gnashing of teeth at this announcement as many had planned terrific interactive sessions needing many sheets of flipchart paper that they wanted to paper the walls with during their 90 minute sessions. However, a crafty workshop designer can work with anything, even the tightest of parameters. Here is one innovation that hatched as a result of this rule – the human flipchart.


Well, everyone was wearing lanyards with their nametags anyways. Take a few volunteers, clip on some blank paper, and some tape, give participants their cards and viola – your interactive activity works, gets even more people involved, and not a sticky blue mark on any wall.

Not optimal you might say, but you never know when you are working in a space with apparently precious walls, the famous carpeted walls, or even no walls for that matter (how nice would it be to do your session under a big tree?) Give a good workshop designer a parameter in advance and with a little creative thinking they’ll design for it. Everything is possible…

Imagine you are at a huge international conference. How can you get over 8,000 people from 178 countries who have so much in common, but don’t know anyone, to engage in conversations and meet each other? At mega-events like this, people pass by each other in droves in the hallways of the conference centre, pack into elevators or escalators on their way to the next event, and stand in long slow queues to buy their coffee. But with the exciting diversity of languages represented at a conference like this comes the inevitable and rather awkward entry question of “Do you speak English”? (or “Parlez-vous Francais?”, or dozens of other possible language variations). To deal with this quandry, our Learning and Leadership unit, partnering with the Commission on Education and Communication, introduced an innovation at our organization’s recent World Conservation Congress: language buttons.

Well, we decided that one way to get people to appoach each other was to advertise the languages they speak, so that the Do-you-speak-X question would not be a barrier to engagement. We made thousands of buttons with 20 major languages printed on them in their own alphabets AND we made a blank button. On the blank button, people wrote other languages (such as Nepali and Afrikaans), and dialects (like Kreol and Bavarian) and even in one case a rather key coordinating person coyly wrote, “Don’t even think of talking to me” (but I don’t think he ever wore it).

In this process, we learned new things about colleagues – our Australian Director spoke Nepali (he had worked in a field office there), a Canadian colleague spoke Chinese for the same reason, our American Chief Scientist was fluent in Thai. These buttons were conversation starters even among people who knew each other. That was a huge benefit, not to mention sharing the incredible pride that people felt when they put them on (like my colleague Nicole in the photo above who sported 7!)

The buttons were a hit! The Information Booth workers had them, the Registration people had them, the Commission on Education and Communication members had them, and many, many more. These big conferences can be so impersonal, yet are attended by people who have the most to gain, exchange and learn from great conversations with each other. The question we asked was,” What can we do to get people talking together?” One small answer, only 30mm across, turned out to be a big success.

Today I found myself in the bleachers of, can you believe, the 5th circus performance in under a month. I have serendipitously enjoyed: one national Swiss circus, one regional Swiss circus, one opening of the World Conservation Congress (which involved four perilous circus performers – I am going to count that), the none-other-than Cirque du Soleil, and a final circus performance of my 7 year old, who takes circus classes after school. That is a lot of circus (circi?) for one person.

Today in the 3-hour perfomance of the regional Swiss circus, I thought to myself, how can these performers distinguish themselves from all the other jugglers, acrobats, and unicyclists? Audiences today, with so much access and exposure, must be the toughest crowds. (Even for those who do not go five times in a just over a fortnight.) How do they keep it fresh and new?

I thought this as I watched the young man on the unicycle. What was so interesting about his performance was what he did NOT do. He did not actually sit on the seat and ride his unicycle around the ring (at least not for more than the first 5 seconds). After that he hopped on it, he threw it up in the air, he rode it sideways without the seat or pedals, and other equally inexplicable things, none of which involved him riding that unicycle. It was a prop, a foil, a bouncing agent, a propulsion unit, something to hold his hat.

Cirque de Soleil was the same – incredibly innovative with what might seem standard circus fare. The juggler was there, with red balls, but he never threw them up in the air. He bounced them off a briefcase, up and down an umbrella, over his head and in and out of his hat. Those juggling balls never touched his hands, but they juggled none-the-less.

WARNING: HUGE SEGUE-WAY TO WORK-RELATED REFLECTION

Lizzie and I spent 3 hours Friday afternoon working through the design of an upcoming offsite workshop, an important one, involving senior management and a critically important issue. This 2-day workshop would effectively launch a 4-year process. The workshop had exciting things in it, but by the time we got to the afternoon of Day 2 in our design, we were yawning. We still had a few items to cover, but the way they were currently designed was too much of the same good thing. No more groups, no more cards, no more creative carousels, or flipchart template work. We had put in our visualisation, we had light role play to show different perspectives, people had worked alone, in pairs, trios, quads and in plenary. We moved the room set-up around four times. We needed some inspiration, so we stopped.

What would those circus people do with some flipchart paper, markers, meta-plan cards, and balls? Would they have people write their aspirations for the future on flipchart paper, make huge paper airplanes with them and then shoot them out the second floor to see which goals get us the furthest? Would they take those cards and draw items on them that they would put in a time capsule to be opened at the end of the 4-year process that we are planning? Seal them in a box for those amongst us to open at the end to see what life was like in our institution in November 2008? Maybe no agenda item at all, and no materials (some of the most interesting Cirque de Soleil performances were just 2 people and nothing else), maybe a walk outside and an Open Space session to simply deal person to person with any outstanding items.

Inspiration. Who better to get it from than performers who can eternally come up with new things to do with the human body (or briefcases, stools, or trained poodles for that matter.)

At the World Conservation Congress this week, there were 7,900 registered participants from 178 countries, and 972 events – from knowledge cafes to skills building workshops to conservation cinema. In this veritable souk of activity, how could you and your event avoid getting lost? People had a lot of great ideas about how to get attention and be memorable.

An innovation at this Congress was the creation of 12 thematic “Journeys“, which helped to organize some of the hundreds of offerings. These provided direction to the Congress traveller who might choose to follow the Islands Journey (In the Mood for an Island Get-Away?) or Marine Journey (Protecting Planet Ocean), or that of Protected Areas (Protected Areas for Life’s Sake!), Energy (The Nature of Energy) or Markets and Business among others. By following a Journey people had signposts to events that dealt with key issues and related social networking gatherings that put them in the pathway of other people interested in the same issue. All information on each Journey was collected into a short Journey guidebook, which in itself provided a useful synthetic resource of key words, related issues, institutions and experts working in each Journey field.

Even within the Journeys there were many overlapping events, from which people chose their favorites based on titles and short abstracts. How provocatively people worded their titles and abstracts and for some the promise for audience engagement helped people pick where they spent their precious time. The “Beyond Jargon” workshop title and short description promised and delivered the many innovative ways conservationists are getting their messages across through ideas and campaigns as unusual as a crocheting a coral reef , through developing a horticultural moss growing programme in prisons to prevent moss gathering in forests. A Learning Opportunity workshop with the provocative title of 3D Virtual Worlds: The possibilities of promoting global environmental awareness was held at which the Save Our Seas Foundation took participants to their Second Life Island and talked about how they use Second Life to educate youth about marine issues, as well as how YouTube has impacted their communication media choices and design, as exemplified in this powerful 1 minute Rethink the Shark Campaign video.

And every event had many speakers (it seemed). Who won the competition for attention and space in people’s long term memories? In the thousands of presentations that were made, many speakers used combined techniques to capture and keep people’s attention. By far the most effective combined great imagery with storytelling. The ones that touched us most were personal accounts and provided places to go for more resources and ways to follow up. For example, a speaker from Virunga National Park in the DR Congo set up the Gorilla.cd blog for the park rangers to share stories of their often perilous work to protect mountain gorillas, and invite other bloggers to be campaigners for their in-park team. Other speakers used video imagery embedded within their presentations to get a diversity of voices into their presentation, to take the audience out of the room to other parts of the world; they used music as a audio sub-titles to their presentations to make the participants’ experience fuller, or included other language translations of their text. Presentations that had images, stories, new ideas, and ways to act were by far the most memorable. Speakers who challenged the audience, asked them questions and pitched it above introductory level added to the appeal.

With such choice, we needed some help to see the trees for the forest – thanks to those who helped make themselves and their messages most memorable.

(I have written about this before, see this January 2007 post, written as I sat in my first planning meeting for this Congress: “Bottoms on Seats: How do you make that memorable?”)