This post isn’t about how to run training in Japan, it’s about how to get your body ready to do training in Japan, if you live 7 time zones away in Switzerland.

Normally, I would be enjoying a Bento box right now in Tokyo, preparing with my Japanese co-trainer, the interpretation team, and colleagues there for 3 full days of facilitation training for a large group of local facilitators and change agents.

I’m still doing that, at least most of it, except I’m eating muesli, it’s 3:30am and I’m still in Geneva.

For the last few years, I’ve had the great pleasure to join Change Agent Inc. to deliver a Foundations of Facilitation training programme in Japan.  This year, as with many other programmes affected by Covid-19, we are taking the training into virtual space. All the preparations are going well, the content is tight, and we are all now seasoned at online delivery from a technical standpoint. But biological? I will be delivering training for 8 hours a day, from 2:30am-10:30am, for 3 days. This is not a one-off 90-minute webinar in JST – this takes more thorough preparation to get body and mind ready for this.

“Have fun in Japan!”

That’s what my husband said to me last night at 7pm as I walked down the stairs to the basement bedroom, arms laden with clothes, pillows, and cables. Not quite the expertly packed samsonite that I would have been taking on a long-haul JAL flight to Narita. At least I can pop back for my forgotten toothbrush in 2 minutes. By 7:30pm I would be asleep.

Now at 3:30am I am up and at my desk. This is Day 4 of my preparation to be on Japan time by Wednesday.  I have 2 more days to get to the point where I am asleep by 5:30pm and up at 1:30am and ready for work by 2am for last minute tech and sound check, with a “go live” at 2:30am.

I have been following this schedule, which I planned weeks in advance, to gradually shift my normal 10pm sleep time up, and retain an 8-hour sleep window each night as much as possible:

  • Starting point: 10pm sleep – 6am awake
  • Day 1: 9pm sleep – 5am awake
  • Day 2: 8pm sleep – 4am awake
  • Day 3: 8pm sleep – 4am awake
  • Day 4: 7:30pm sleep – 3:30am awake
  • Day 5: 6pm sleep – 2am awake
  • Day 6: Ending point: 5:30pm sleep – 1:30am awake
  • Repeat for Training for 3 days

So far on Day 4 I am on track, and although I am still a big foggy in those early hours, it wasn’t that hard to get to sleep and get up early as the change has been gradual. The house is quiet and a little creepy at this time of night and I have to be careful not to make noise and wake up others. In a reflective moment, just me and the other noctural animals, here are a few observations:

After Day 3, your hours are anti-social. The alarm wakes others up and moving around to get dressed is bothersome. Others will also wake you up when they go to bed later, which can affect your sleep. So, at this point, you will need to move to another room in the house, if you can, if you are co-habitating.

“Jet lag” will present itself in other ways. You will eat breakfast in the middle of the night and have lunch when people are having breakfast, and dinner will be at the time of a mid-afternoon snack. That will be weird, and you won’t be very hungry at those odd times. But you need to eat or else you will be starving at midnight and that will wake you up. You also can’t rely on the sunshine to get your body on track as you would if you were onsite – try to go outdoors when you can as soon as it is light, and have a good dark room with blackout blinds for sleep if needed.

Your periods of overlap with others IRL will reduce dramatically. No evening television, no family meals for a few nights. You’re basically gone if others go off to work or school during the day. Just as though you got on that plane. You need to make arrangements for others to take over things that you might normally do in the evening. Tell friends who call and text you regularly in the evening that you won’t be available as normal.

Protect the rest of your day. It is tempting to take on additional meetings or work during the “regular” workday after your training ends at 10am. You could effectively be working every minute of your waking hours if you are not careful. A meeting from noon to 2pm after your training seems perfectly logical and you have that time free in your calendar, right? But you have to remember that you will have just worked a 10-hour day, and that will be like scheduling every waking moment. I guarantee that this is hard to explain to colleagues who wonder why you can’t join their meeting even though you are done with your training and not yet sleeping, and it’s only 4pm.

Take it seriously. It is pretty easy to let things slide and default to normal in the run up to your workshops, but the result could be a zombie on the training team sitting on the other side of the video camera that makes little sense in English and even less when translated into Japanese. This is part of the preparation stage of facilitation and training processes, so needs to be built into your schedule, recorded in your agenda, with all alarms set and followed.

I’m excited about the training course, it will be enormously fun and full of learning. I am a little more nervous about this biological part as this is the first time I have had to get my European body on to Japan time without physically moving it, and I want to do this in a mindful and structured way. Maybe tomorrow when I get up at 2am, I will start thinking about how to reverse my schedule to get me back on to Central European Time at the end of it all…


I just finished From Ideas to Action: Bring ideas to life through Ideation and Prototyping – my first of two courses with IDEO U for the IDEO Foundations in Design Thinking Certificate.

The final project for this online course, run over 5 weeks with hundreds of participants from all over the world, was to create a pitch for a product or process that you had worked on through the Design Thinking steps of ideation, rapid prototyping, and iteration – and to reflect on your learning.

We use elements of Design Thinking (DT) in our Bright Green Learning work regularly, from different visual brainstorming techniques (lots of cards and post-its), to prototyping ideas through approaches such as the  LEGO Serious Play method (see my blog post What’s in a Brick? Using LEGO® for Serious Stuff“) and drawing/storyboarding, so I was eager to follow the IDEO Design Thinking courses to get additional ideas and tools, and a vision of their whole DT process.

I found the course to be excellent, video- and assignment-based, with ample feedback from other participants (built into the course requirements). I did get some useful new tools and a better understanding of the elements of each step. And some of the most profound insights came by observing and reflecting on myself in my role as a facilitator in these human-centred processes.

One big aha was to step out of my own way!

What I noticed? For the most innovative ideas to be generated, I needed to pay attention to some very subtle constraints that I might be putting on the process myself!  This is not the grumbly participant who doesn’t want to draw, the person on their phone all the time, or the person who already has the best idea and is completely certain of that. No, these constraints take the form of unecessary parameters that I build into the process that are based on my own mental model of how things should roll out to get results. These very subtle decisions that I am making as a facilitator and process leader might be inhibiting those participating, limiting the number of ideas and the innovation that emerges. Whew, that’s tough to accept!

Here are 4 obervations I had about self-imposed constraints in the Ideation process (generating initial ideas):

Unecessary Limit 1: The “right” ideas

In “brainstorming” sessions in the past I have not actively encouraged wild ideas from participants, but only realistic ideas, or at least I didn’t proactively encourage people to think of things that were really out there. In my testing of different ideation techniques, including some that I already use, I saw that wild ideas can spark others to have ideas that are a stretch, and that usefully fill the gap between boring and too far out. Now I will give people permission and encourage them to try to throw out some crazy ideas. There is always a prioritisation step next that will see the idea “everyone wears panda onsies” move down on the list (maybe, or who knows, maybe not!)

Unecessary Limit 2: Stopping short of great

I saw in my ideation testing that there are cycles to ideas generation. The first cycle squeezes out all the easy ideas, a veritable flurry of things that are already on the tops of people’s minds. The second cycle gets the crazy ideas. And then if you can pause long enough, even when people seem a little bored (when I as the facilitator would notice this, get nervous, and say, “OK, done, let’s move on”), with some prompting, you can get some really great, further honed and synthesized ideas. It was my observation that in each cycle you get less ideas in number, but the quality/innovation increases.

Unecessary Limit 3: Who’s invited

The third observation was around who you ideate with. For my product (unlike my normal professional work), I worked with a mixed demographic – that is, older and younger people (even very young people) from 8 to 55 years old. Of course your group depends on your ultimate product/process users, but how can you expand this past the usual suspects? I should not have been amazed at how creative the responses of the younger people were. They were not usually the final answers, but they certainly informed them and they expanded the continuum of possibility and fun factor considerably. (If you can’t have younger people in the room, then perhaps using the “Putting yourself in other people’s shoes” ideation method could help people tap into their inner teenager!)

Unecessary Limit 4: One thing at a time

Finally, the last observation is a very small thing, but could potentially have considerable impact on what is produced during an ideation session. Normally I would ask people to stop writing and listen while others are presenting their ideas, making a clear distinction between these two steps of generating and sharing. I might have enforced this with a look or a mention (very teacherly of me!) In these tests, I did not say that; in fact, I said that if someone’s idea gave them a new idea, they should quickly note it down before it was forgotten.  I noticed that people listened differently to report-backs of their peers’ ideas, and that these ideas in turn sparked further new ideas in the listeners. Allowing people to continue to write and think during the report backs, in addition to listening, produced some additional great ideas to work with.

My take away: Make sure you, as the facilitator, are not creating rules that subtly inhibit your ideation process! Ah, even after so many years of practice, the learning never stops…

One of the hardest things about using LEGO® SERIOUS PLAY® method (LSP) is just getting people to try it!

Imagine walking into the workshop room and sitting down at  your spot to see, with your water glass, pen and paper, a small mixed bag of 48 LEGO® bricks – a LEGO® Exploration Kit. What’s running through your mind?

You might fall into two categories of people, the first one who says “Cool! Let’s play! No PPT – finally, not your ordinary workshop!” or the other one who says, “What? This is serious business, and time is scarce. Skip this silly stuff and let’s get to work!”

But before you even get into the room, there is a whole discussion that needs to happen with the workshop host in advance, where the Facilitator might get one or the other of those reactions after proposing LSP. During this conversation the Facilitator will need to explain the benefits, and give a little of its background…

Whose idea was it?

In the late 90’s, confronted by the tidal wave of video games that were taking kids away from their bricks, it was LEGO® itself who founded the LSP process, with a couple of IMD business school professors, to help the company think creatively and re-imagine itself.

The method worked, beautifully. Today LSP has a growing community of certified LEGO® SERIOUS PLAY® method facilitators connected together in an Association of Master Trainers, of which I am proud to be one!

Who’s using LSP and why?

I would say that LSP is becoming fairly well known in the private sector, many of the facilitators I met at the recent LSP community meeting in Billund, Denmark – the home of LEGO – worked with businesses, but not all. It seems to be just beginning in the NGO and inter-governmental/United Nations world, where I find myself working most. I’ve run LSP processes now with a number of first-time user groups, here are three illustrative examples of the organizations and what they wanted to achieve:

  • a large international conservation NGO’s resctructured leadership team was undertaking a visioning process, and wanted to understand the features of a successful team in the future structure;
  • a global reproductive health supplies team wanted to identify organizational priorities and explore efficiency and effectiveness in delivery;
  • a small sustainability Think Tank wanted to focus on building excellent internal and external communications, and identify capacity and skills needed to do this.

The applications of LSP are vast, from strategic planning, design thinking, product development and marketing, rapid prototyping ideas, work process re-engineering, prioritization, as well as softer goals such as identifying what makes a good team member, how to build trust, and how to resolve conflict.

How can you do THAT with LEGO®? Thinking with your hands

The basic LSP process involves four steps:

  1. Asking a question
  2. Building a model (with the bricks)
  3. Sharing and explaining your model
  4. Reflecting on meaning

This four-step process happens over and over in an LSP session, with various other rules and parameters sometimes added. The process provides the builder the opportunity to think about her/his answer to the question (and the questions can be incredibly complex or blissfully simple), and then to use their hands and the bricks to build a metaphor that illustrates their answer (not a literal answer, but a metaphorical answer). Often people build as they think, they re-build, they explore their answer as they think and layer meaning onto the bricks. This process, of turning thoughts that might have started out rather vague, into 3D objects, helps people become more concrete about their thinking.

This nuanced work would be hard with a pile of only the traditional rectangular and square bricks, so the LSP brick sets are full of metaphorical pieces in addition to these – flags, mini figures, animals, flowers, propellers, etc. – to release the creativity of the builder. You still have to get familiar again with how things snap together, and even working with metaphor, so a skills building component is always included in an LSP session.

A number of Core LEGO® SERIOUS PLAY® application techniques have been developed by the Association of Master Trainers. These are illustrative of some of the most commonly used and thus most documented applications, and build on one another:

  1. Building individual models and stories
  2. Building shared models and stories
  3. Creating a landscape
  4. Making connections
  5. Building a system
  6. Playing emergence and decisions
  7. Extracting simple guiding principles

These generic techniques can be applied widely to different team and organizational goals, and are customised through the framing and question that is asked (What are our blind spots? What will our organization look like in 5 years? What does a perfect co-worker look like?), and normally involves some sequencing, where models are built and deconstructed (also a good lesson in letting multiple ideas come and go) with a strategic set of relevant, thoughtfully framed questions.

What changes in the individual? 

There is some nice research underway exploring the value of LSP in working settings, and the changes that can occur in the individuals and teams participating. Some that we heard about and discussed at the LSP Community Meeting included:

  • helping people enter a more reflective and thoughtful state, rather than getting off-the-cuff answers that might be the first ideas that pop into your head, thus the easiest ones, and perhaps not the most creative ones;
  • helping people appreciate other perspectives – building the different models individually and sharing them helps people see what other people see (literally);
  • helping people explore sensitive issues – building a model and using the model as a metaphor, even holding it or pointing to it as one speaks, helps to externalise the issue from the builder, making it easier to explain and less risky. The thinking has already been done, so people are not trying to think and talk at the same time;
  • helping people develop more creative confidence – to feel more confident being creative in the workplace, especially in a rapidly changing environment where innovation is needed, both at the organizational level, as well as in terms of products and services.


It definitely takes courage to try something new, but I can report that all the groups that I’ve worked with using LSP have loved it, for the uniqueness of the process, the fun and engagement it provides, and ultimately for the deeper insights and creative results it produces.


You travel a lot, I travel a lot.  International work is exciting and takes many people to the four corners of the earth. Maybe we go to similar places? Faraway places, or those close by; hot places and cold places; highly populated urban areas and sparsely peopled rural areas. North, south, east, west. You’re a planner, I’m a planner. Let’s work some scenarios.

You are travelling far from home, on another continent. Let’s say you are approximately 5, 702 kilometers from home. You find yourself in a situation where you are relieved unceremoniously of everything you have, except perhaps a small overlooked cabin-sized suitcase in the back of the taxi with some clothes and toiletries. But you no longer have your well-packed work backpack, your handbag, and your tube of flipcharts (just as an example.) You will spend several days to several weeks without some things, and the rest of your life without others.

This post is all about what to do before you get robbed. What can you do to help your future self in that situation, if it would ever happen to you, to make it a little less painful, traumatic, and confusing?

So, let’s make a checklist!

Since you will probably not read all the way to end of this mega-checklist, and hopefully you will never need to, I will put my closing thoughts here, and repeat them again at the end:

My overall advice in such a situation is: be nice, stay calm, say thank you. In the absence of the physical things that accompany us in our daily life, and in an unfamiliar environment, you will need all the new friends you can get.

Documentation and Identity

Scenario: You will have lost your passport, driver’s license, work permit, and so on and so forth. You are now only who you say you are.

  • Have the number of the local embassy that can help you.
  • Travel with extra passport photos in a separate place (or a concealed money belt).
  • Travel with copies of your identity cards in your suitcase.
  • Put copies of all these documents into Evernote or other cloud storage.
  • Update this when you get new ones (rather than procrastinating this).
  • Memorize your log-in to your cloud storage.
  • If you have 2 passports, leave one at home in an accessible place.

Money and Finances

Scenario: You will have no money, cards etc. Not. one. cent.

  • Have the telephone number to 24-hour assistance to cancel your credit cards.
  • Have the number to cancel your bank ATM card.
  • Have someone at home that can Western Union you money (in a perfect Catch22, you will need a passport/ID to get your money, but you can’t get your new passport without money – therefore you need friends who have their own id and money).
  • Use a money belt – split things into different places. Make sure it is not very obvious, or else that will go too.
  • Take out anything in your wallet that is non-essential for your trip or irreplaceable, old photos of kids, cinema card, etc.

Work Computer

Scenario: Your computer and ipad will be gone.

  • Don’t put any files on your desk top.
  • Have all files in dropbox or equivalent cloud storage.
  • An online data backup system, like Crashplan, can restore files to the latest update.
  • Update everything the night before you leave.
  • Have your computer serial number available (in your suitcase and at home).
  • Have a login and memorise it.
  • Use a cloud email like Gmail that you can access from any computer.

Communication

Scenario: You won’t have a phone or email; your Apple watch, remarkably, will just tell the time.

  • Back up your phone the night before.
  • Have an automatic upload for photos to the cloud when you get on wifi and do that before you leave.
  • Keep your Apple watch charger in your suitcase. (Having said that, it is actually amazing how long the battery lasts when it is only telling the time.)
  • On your phone have a log-in, use apps like find iphone, google maps with location sharing, find friend which might help you located your phone. Have a way to wipe your phone from a distance, and someone who knows how to do this, as well as check these apps to see if your phone is still findable.
  • Make sure you have at least 1 or 2 telephone numbers memorised – you laugh, but how many telephone numbers do you know by heart? (and your childhood home doesn’t count)
  • Make sure the people at home will answer their phones at night (as things always happen at night)- find out if they have some kind of night time filter where you have to ring three or some magic number of  times before the call gets through.

Health

Scenario: You might be hurt, taking medication (malaria, or other) and in a Yellow Fever zone.

  • Have copies of your health insurance card and Yellow Fever card (yellow international vaccination certificate) at home and in Evernote.
  • Have a copy of your health policy in your suitcase.
  • Split any medication into 2 places – malaria medication for example as it might not be easy to get a replacement prescription where you are.
  • Have a phone number of your Doctor in case you need to change medications mid-stream and need to ask about side effects. They will ask you exactly what you were taking, so…
  • Have prescriptions scanned and a copy in your case and in the cloud.

Insurance

Scenario: You will need to replace lots of things.

  • Make sure you have travel insurance to cover any loss, and enough of it to cover what you have with you.
  • Keep receipts of things you have with you in an accessible file.
  • Don’t take valuable irreplaceable jewelry, watches, etc. (remember that value is in the eye of the beholder, such as flipcharts).

Work Documentation, Paper Calendar, Paper GTD (Getting Things Done) File

Scenario: You are cursing your analogue tendencies; missing your retro paper calendar, and the lifetime to do list in your paper GTD file that has 10 years worth of “someday/maybe” items that you probably weren’t going to do anways, but now really can’t.

  • Photocopy/scan any documents before leaving that are not already digital (notes, etc.)
  • Update your online calendar with your paper one the night before you leave.
  • Keep a birthday book at home (one that has all the birthdays in it, unless you want to tell the whole story when you uncharacteristically forget an important birthday).
  • Scan your GTD file the day before you leave and put it into Evernote.
  • Don’t keep unique items in your GTD file (precious photos, etc.)
  • Scan any receipts as soon as you get them and upload them to the cloud.
  • Scan paper time sheets or keep digital ones.
  • Put pens and paper in all places (it is maddening not to have a pen).
  • Have some reading in all places (also maddening not to have anything to do or read).
  • Have an itemised list of what you are travelling with – a hard copy with you and at home, and a digital one on the cloud. You can also take a photo of everything you pack.

Travel

Scenario: You are somewhere where you don’t live, you need to get home, and you have no tickets or official identification needed to cross a national border.

  • Have your locator number in your luggage, or in a belt.
  • Have a print out of your ticket in another place.
  • Have someone at home who has access to your emails and can send these things to you (or to the new friend with the phone and computer).
  • Local contacts? They can help you get in touch with the police, give you some money, provide you with a sympathetic driver, lend you a computer to email, a phone to text on, and pen and paper. Maybe they can get you a magazine or newspaper, or a deck of cards, don’t be picky.
  • Make a packet of this travel information, and include your packing list – keep 2 sets with you in different places, 1 set on your desk at home, and 1 set in Evernote.

What the police will want…

Scenario: You will spend many hours inside a police station, watching policemen do their job which was pretty quiet until you came along.

  • An itemised list of items stolen and their approximate value.
  • Sim card number.
  • Registration number of your phone, including the make of the phone.
  • Serial number of your computer, and make of computer (and any other details you know).
  • Passport number (a copy if possible).
  • Photos for the police report (if you don’t have them you will have to go get them taken, so you will need money to get these, and a friend to give you money).
  • Proof of entry into the country (e-ticket).

What the embassy will want…

Scenario: You are at the embassy which is an hour from where you were staying, you were kindly provided a driver, and will need to produce the following:

  • 4 or so passport photos of the correct size. Make sure you know the size or you will do this twice, even for emergency passports, you cannot submit photos that are not exactly the right size. (Note: to get these you need money, and for money you need that friend).
  • Copy of your lost passport and number.
  • More money (30 Euros for example) to get an emergency passport.
  • Application (remember you have no pen – they can usually give you this).


The above list makes a good starter checklist – what would you add? You can make it with those little check boxes by each item and keep blank copies in your travel file, or geek out and laminate it and use an erasable whiteboard marker to fill it in each time. (I have not yet done this but the idea appeals to me.)

I hope you never get robbed. But if you do, these precautions will make the long days that follow a little easier. You will notice small things that you have not noticed for years. Your pace will slow down. You will read anything lying around and appropriate a pen and scraps of paper from the hotel to write things down while they are fresh in your mind. You might sit for hours trying to recreate your GTD file on little slips of paper, or play 100 games of solitaire on a spare deck of cards, or finally learn how to use Google hangouts so you can talk to loved ones 5,702 kilometers back home. This not a sad story, it is a learning story, an exercise in reframing that can be helpful when preparing to travel and setting policies on when and how to travel with work.

Oh, and let me also repeat: Be nice, stay calm, say thank you – as you noticed from the checklist above, you will need all the new friends you can get.

As trainers and facilitators, we need not necessarily be confined to working in our native languages. We have probably all had experiences working with translators (who translate the written word) for materials and interpreters (who translate the spoken word) in meetings using both simultaneous and sequential interpretation. But normally these opportunities are confined to more formal presentations and settings, where people are sitting down with headsets bolted to tables or connected to a little fiddly box, and often to shorter timeframes.

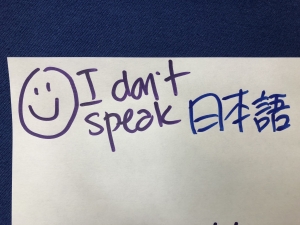
What if you wanted to play a game, run a quiz, or get people on their feet for an interactive exercise, in Russian, Arabic or Japanese? (these are languages that at least I do not even notionally speak)

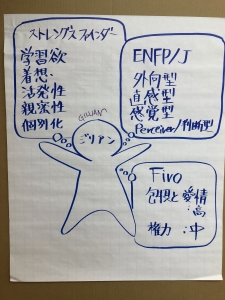
With our Japanese partner, Change Agent Inc., and a fantastic, local bilingual Co-Facilitator, I had the great pleasure recently to lead three days of Bright Green Learning Academy workshops in Tokyo with an impressive group of 30 Japanese Facilitators and Trainers. Our training courses are highly interactive and experiential, and it was a training about facilitation and working across cultures.  It was fascinating to plan how to run the workshops very effectively in a language that the lead trainer (me) didn’t speak at all. It worked remarkably well due to a number of actions taken in advance and during the workshops. Bear in mind that to do this well, it takes a lot of extra work, but if your goal is real learning exchange, then it’s worth it.

Preparation, Preparation, Preparation

To make this work, preparation is absolutely key. You cannot simply show up, speak your language, and let the interpreters do all the work, using your English slides, flipcharts, and materials. Everything needs to be translated in advance, including:

  1. Participant Materials – This is obvious – everything the participants get needs to be translated into their language.
  2. Facilitation Materials – If your co-facilitator speaks your language, you might not need to translate all the facilitation materials. But you will want to go through your Facilitation Agenda in great detail with your co-Facilitator to make sure he/she completely understands the content and process, as they will then be able to answer questions without asking you.
  3. Job Aids – All the handouts, group work sheets, quizzes, etc. will all need to be translated. It is helpful if you number your English versions, and then have the same numbers and layout (as much as possible) for the translated versions, so that you can hand them out while giving instructions, and are certain that they are the same documents.
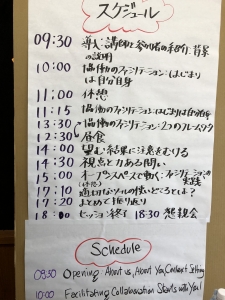
  4. Flipcharts: Instructional and Templates – In advance (like months in advance), I sent through photographs of all the flipcharts, both those that had group work instructions, and those that small groups use to fill in to guide their group work and record their answers. See below for an example. I thankfully had photos of all of our flipcharts from other English delivery of the courses, so could send those along for translation and creation in Japan.  When I got to Japan all the flipcharts had been made beautifully, and were recognizable as they were exactly the same as the English versions in look. When I had to refer to them, such as the schedule, either we put a few words of English on the Japanese version (as below), or I put an English version of the flipchart below the Japanese to orient myself. When I introduced it, though, I used the Japanese and just kept an eye on the English to make sure I was in the right spot!

Note that it takes longer than you think to translate all these materials well, and format them nicely (and in some cases print them). All these materials need to be sent weeks and months in advance if possible. It is also important to have a professional translators, which Change Agent had, so that the translations were done particularly well, something always appreciated by participants.

Delivery with Interpretation

With all your materials translated, and with a mirror English set in your hands, you are ready to start working with the interpreters. On the day prior to the workshop, it is useful to set up a meeting with the interpretation team so that they have a chance to ask you questions.  The excellent Japanese interpreters I worked with had been provided with both the English and Japanese translation of the materials and had carefully gone through it highlighting concepts, acronyms, phrases that they needed some further information about. This meeting took us about an hour, and also included their tips for me on how to work successfully with them.

In our case, as we were a relatively small group, in a small room, I was the only person with a headset. When I spoke, the interpreters would consecutively translate into Japanese. So I needed to speak slowly and chunk up my inputs so that they could follow. When a Japanese participant spoke, or my co-facilitator, the interpreters would simultaneously translate into my ear. So for the participants, when they were interacting with each other and with me this was seamless, and almost immediately I could understand what they were saying. In order to do this, the interpreters would move around the room to be close to the speaker and use a small whisper mic into which they would simultaneously interpret into English what was being said. They used a clipboard to cover their mouths when they spoke into their small hand held microphone (about the size of an iPhone) and could do it so quietly that no one noticed or heard them speaking, except me through my ear piece! This meant that when I spoke, it doubled the time needed, but when participants were speaking, there was no additional time needed in the agenda. That was an incentive for me to keep my inputs concise, and pacing felt more natural.

With a highly interactive agenda, including lots of movement and format changes (we were delivering facilitation training so walking the talk) this worked well, as participants did not need to speak into microphones, nor wear headsets. I also did not need a microphone, as long as the interpreters could hear me clearly. They did use a microphone themselves when they were consecutively translating my words, so that they could be heard easily by all the participants in the room.

A couple of tips from the notes that I made during our workshop:

  • Wear something with pockets as you still need to put the little control box for the headset somewhere (that lets you turn up the volume, and turn it on and off to save battery – check the battery!)
  • Meet up with interpreters in advance, not only to allow them to ask questions, but also so they can get used to your voice and speech patterns.
  • Keep eye contact with the interpreters during your session. They will give you signals when you need to slow down or explain things further, or if they need a little more time to translate what you said.
  • Check in with them regarding their hours, break times, and things they may or may not do. (Not in this case, but once I had interpreters tell me a little late that they would not translate videos, thus making our small group video report back exercise rather challenging.)
  • Also see if there is anything that drives them crazy – when I work  in French and English, two languages that I speak, I have had interpreters ask that I only speak one language and not mix them mid-sentence, which can be tempting to do. In some cases, there are two interpreters, one who translates into one language and one who translates into another. So when they see me take the microphone or stand up, that would be a visual signal and they would know what language I would be using and the related interpreter would be ready. This doesn’t work if you keep switching languages! This is not always the case, but a conversation with your interpreters in advance will uncover any of these things.

All in all, it is amazing to be able to work effectively in many different languages, even if you don’t speak them. Taking particular care of the preparation and delivery with translation and interpreters can help you make sure that you achieve your goals, your participants achieve their goals, and that your words and materials are not irretrievably lost in translation!

Bringing together a large global community of people for learning is a considerable investment in time and money. Planning can start 6-8 months or more in advance, and for large communities entail hundreds of flights and hotel rooms, vast conference facilities, a team of interpreters, an army of VIP handlers and rafts of protocol.

Meeting hosts can get easily bogged down in the mechanics, which are also important for learning. Comfortable, happy, secure, well-fed people can concentrate on learning in an environment foreign to their own everyday workplaces.  This should never be underestimated. But this blog post focuses on the programmatic part of community learning meetings.

It is very tempting, also, for the meeting managers to focus on what THEY want to learn. After all, they manage the overall programme and their reward system involves having good knowledge about the various country projects and activities and people that are under their purview. Perhaps communication between country projects and HQ is not always forthcoming, as people are busy doing the projects and reporting takes extra time and effort, plus how do you organize all that data dribbling in in various formats over the year?  The meeting manager wants to download everything that has happened in the last year in every project because they want to tell these stories, and also write the donors’ reports, and the proposal for the next project installment, etc. etc.  Information is king!

But information is not learning, and it also doesn’t make sense to fly everyone in for three days to a location far far away to give PPT speeches one after another to a plenary room full of bored participants in three languages.

Of course, if necessary, there are things you can do to help make a long list of speeches more palatable to people. See my past blog posts 18 Presentations in a row? What can you do?  and Preparing a Pecha Kucha: One pragmatic approach  for some tips. But it is better to try to expand your mental model of learning from what you, the organizer and programme manager wants to learn, to include what participants want to learn.

Do you know?

It can be as easy as asking – two different groups that we have been working with have recently hosted large global and regional community learning meetings, and their processes started with a survey to participants asking them what content areas they would like to learn more about, both from external content experts and from each other. These kinds of surveys produce a long list, but also indicate group priorities that can be woven into plenary sessions, for the topics with the most support, and themes for parallel breakout sessions for others. Considering the placement of learning themes in the programme is important – reserve plenary sessions for topics that the majority of people are interested in as people don’t have a choice for plenaries (except whether or not to go) and often no voice because Q&A in a plenary of 250 people is never going to be long enough to hear from more than 2-3 people waving their hands wildly in the air. So unless you build in table-level discussions, people cannot ask questions or customise their learning very much in plenaries. It is all supply side thinking that goes into designing these types of whole group sessions – what do we want people to hear and who do we want them to hear it from?

Learning from Case Studies?

Having lots of other opportunities for learning takes the pressure off of plenaries, and can satisfy the multiplicity of learning needs. Thematic parallel sessions can feature case studies from country projects and allow participants to choose where they go to learn. But even learning from case studies is not always obvious unless they are prepared with drawing out reusable learning in mind. There is a temptation in case studies to make them highly context specific. Often the case study presenter spends a lot of time on context, the more the learning appears context dependent the harder it is for listeners/learners to extrapolate the reusable learning elements. Of course it depends on your goal for learning again. The programme manager’s goal is to understand what is happening in Country X, what is working and what needs to be strengthened, etc. For other country project participants, they are not necessarily there to learn about Country X particularly, because they come from Country Y. They want ideas, innovations, things to try, things to avoid, useful processes and approaches they can adapt to their own context, based on evidence that they have worked in other places. They are not usually there to learn something point by point to replicate it exactly. This also means in your design, you need to have ample time before or after a case study is presented for people to ask questions and consider adaptation and application to their context. You can of course leave this up to them to pursue speakers at the coffee breaks, but you are missing an opportunity to foster immediate learning if your parallel session or breakout doesn’t feature some reflection and processing time.

Learning in Open Space Sessions

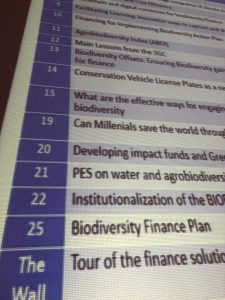
Another way to integrate learning opportunities into your programme is to introduce Open Space Technology (OST) sessions, which work even for very large groups.  In an OST session, anyone can propose a table discussion theme, and submit it in advance. These are scheduled by assigning a table number and a time slot for each proposed topic. During a series of rounds, those not hosting discussions at a designated table can attend other discussions of their choice. Putting something like “Community Open Space” on an agenda with no substantive pre-cooked themes might seem risky to programme organizers. But in all the times I have organized these, for groups from 25 to 250 people, they have come together beautifully, with a smorgasbord of offerings and been highly appreciated. When OST sessions are featured towards the end of a learning meeting, they allow people to fill gaps in their learning needs, test new ideas they gained from the meeting with other potential collaborators, and also give the programme organizers a chance to add in things that they missed, provide more time for discussion on a hot topic, or satisfy new learning needs that emerged during the event.  For his to work, you need to give people advance notice about this opportunity on your first day, but don’t be surprised if OST topics only come in the morning of your session.  The mechanics of Open Space and some tips can be found here Opening Space for Conversation (and Eating Croissants) and generally you only need your plenary room (with table seating, not theatre format), table numbers (so people know where to go at the designated time), cards for collecting host ideas, and then your schedule on PPT for table allocations per topic (see below). Again, programme managers can participate, both as hosts and participants, so your learning is also assured!

Community Marketplaces and More

If you really just need data from every country as the overall Programme Manager, poster sessions can be useful ways to encourage this sharing, as country project officers need to fill in your e-template with key information and get the files to you for printing (or bring them printed) in advance. However, poster sessions can be variable in terms of their attendance and utility for other participants.  If the posters are placed strategically (by the coffee table), you get browsers who might scan them. But you can get more attention if you create some buzz around the posters, perhaps adding tables for the display of documentation and 3D objects that attract passers-by.  Having a dedicated place for the posters is good, and even better is having a dedicated session that gets people into the space and programmes that time. Call it a “Community Marketplace”, give it 2 hours during your agenda at the end of one day, serve drinks in the space at the end of the time slot, and have microphones available to announce in-session events. What events? I recently worked at a large community meeting that had such a Marketplace and during the two hours there was an MOU signing between two Ministries in one country (so a few super short speeches, a handshake, applause and lots of camera equipment), and the announcement of winners of a Photo Competition (again microphones, photo opps, prizes and lots of clapping).

The Marketplace went one step further and scheduled times when regions were standing at their posters to answer questions. At the onset of each 30 minute regional “session” (in quotes as in the marketplace it is a bazaar environment with lots of talking and milling around, you can’t get too stressed about the chaordic nature of this kind of event), the microphone was given to a regional representative who said a few words about the relevant work in the region, what is most interesting, and announced the countries who would be standing at their posters for the next 30 minutes. Then people could go and find them if they wanted. This worked fairly well, and for the most part people went around to talk to some of the countries featured during their time slot. As there were multiple reps from each country this morphed into an open ongoing exchange, and still the calling to attention each 30 minutes of a voice from a new region provided some scaffolding to help structure and give some buzz to the Community Marketplace session.

Of course, learning also happens in coffee breaks and lunch, and extending these by 30 minutes can help conversations deepen and give time for reflection. Instead of 15 minute coffee breaks, can they be 30 minutes (for larger groups this is the only realistic option anyways), and can lunches be 90 minutes rather than one hour? This also gives the Programme Manager time to find the people she/he wants to talk to for more information on their activities before they fly home.

Ultimately, it’s not an either or – either the Programme Manager learns or the participants do.  In fact, with the participants also in mind, the learning from Community Meetings can be even richer. You just need to not worry too much about controlling every aspect of the agenda by having everything in plenary and all front-loaded. For your courage, you will be richly rewarded with enthusiastic feedback and the most important result – real community learning that makes the next stage of the process even better!


Learning and Knowledge Development Facility recipes for success

As winter arrives in the Northern Hemisphere and 2017 comes to a close, it is a time to reflect on our work and give thanks for all the opportunities and lessons of the past year. It’s also traditionally a time for cooking!

We seized on this idea recently with UNIDO’s Learning and Knowledge Development Facility (LKDF), where Gillian has worked as a Learning Expert for several years. LKDF wanted a fresh and engaging way to capture the lessons and successes of its innovative Public-Private Development Partnerships (PPDPs) and share them with the public, partners, and donors during a meeting.

From a forklift operator training project in Iraq, to a project in South Africa that uses virtual reality to safely teach students how to use log-cutting equipment, young people are learning the technical skills they need to find jobs and become part of a skilled workforce in their countries.  How could the learning be interestingly captured and shared from eight projects around the world?

“Recipes for Success”

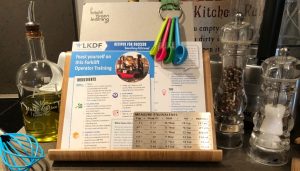
With holiday cooking on our minds, we captured the lessons and good practices of the projects with specially designed recipe cards called “Recipes for Success”.

We began by sending a template and a sample recipe to project managers ahead of the meeting, asking them to provide information about their projects. We worked with one game manager in advance to create a fun sample recipe we could share, which gave people an idea of what we were looking for – we wanted “ingredients”, directions, preparation, and “cooking times” for their projects.

An editing job spiced up the answers and clever formatting converted them into recipe cards. Tips and variations were included, such as “This recipe is for counterbalanced trucks below 5 tonne only” and “This recipe is designed for a maximum of three learners to one instructor so it is makes a small portion with a lot of impact (driving experience).” Although not your typical easily reproducible recipes, they gave the flavor of the project, provoked interest for more information and provided a funny and memorable takeaway for participants.

You’ve Heard of Speed Dating, and Speed Meeting… How about Speed Eating?

On the evening of our meeting, partners gathered for a not-so-typical meal to learn more about each project.

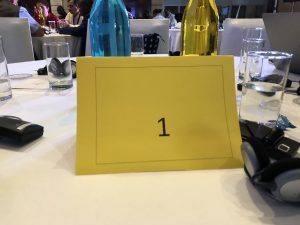
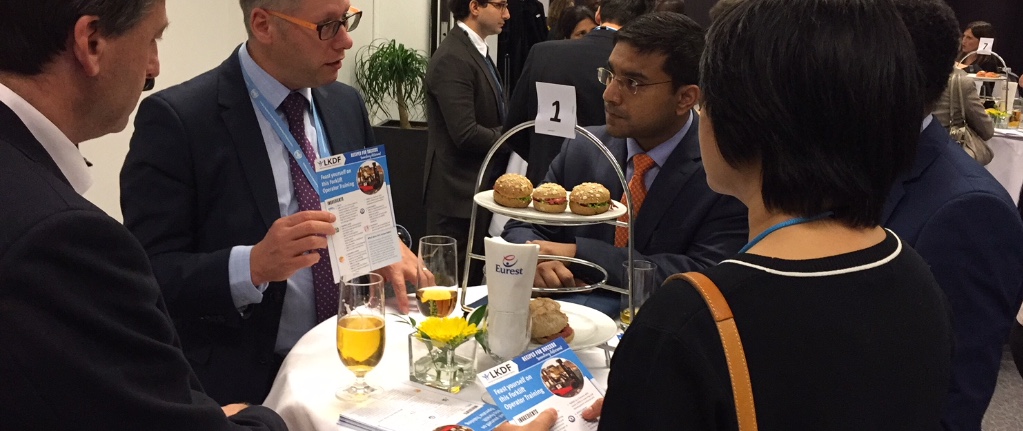
In a room with 10 small, numbered tables, Recipe Holders (project managers) had 6 minutes to share their project “recipe” with a group of 5 donors, colleagues and industry partners. Each Recipe Holder had a stack of recipes to hand out and a 3-D object from their project, from a beautiful hand made shoe (from the leather panel training project in Zambia) to a set of branches (from the virtual reality forestry training project in South Africa).

After six minutes a bell rang, and each group moved in chronological order to the next numbered table, where they met the next Recipe Holder. On each table was also a set of real appetizers, so as the participants talked to the project managers and collected the recipes, they were also able to have a bite to eat. (That’s dinner sorted!)

Inspired by the global love for eating and cooking, especially at this time of the year, we found a fun and more engaging way to share learning and good practices. If you think back at your year, what did you learn? What would be your Recipe for Success?

More food for thought

Bite-Sized Learning

Sharing information is hard. We have so much we want to share that we tend to push it out in large quantities and in the same old ways. How can we cut through the tidal wave of information, find the best nuggets, and make information stick?

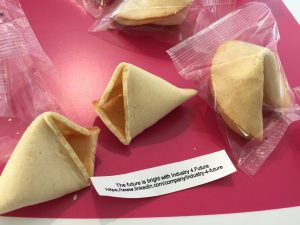
One way is to make it bite-sized! Fortune cookies can be a good way to make information stick. Besides being tasty, they can provide a little, physical reminder to join a LinkedIn group, recall a key lesson from a team-building exercise, or follow up on a commitment.

There are other ways to make it short: learn how quiz-based micro-learning can deliver a wealth of information in manageable “nuggets”.

Rural spring landscape with dirt road

You just finished your exciting learning workshop, the walls are plastered with carefully completed templates, there is a stack of A3 sheets from group work, a pile of cards that captured individual reflections to salient questions, e-templates were filled in. Learning was captured, key messages identified, ideas prioritized. Lots of learning and exchange filled the hours of the workshop, the artefacts demonstrate this and they are in your hands…

The question now is, what can you do with it? Read more

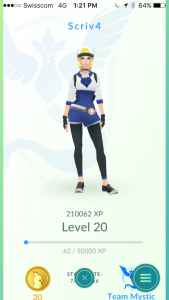
Released in early July, Pokemon Go – the new location-based, augmented reality game – has been the perfect summer-time companion. It gets people outdoors and moving around day or night. But is it just a walk-around-and-catch-monsters-in-your-backyard game? Maybe I am just rationalizing the hours of playing (that’s me above, Level 20!), but I see some interesting insights for adult learning practitioners.

With Pokemon Go, I observe in myself an interesting blend of intrinsic and extrinsic motivation to learn and play, by design.

Intrinsic motivation -participating because you find it fun or personally rewarding- comes in part because you get outside, often with de-stressing effects – see this interesting article This is Your Brain On Nature. Parks and green spaces in cities have a high concentration “Pokestops”, where you can collect Pokeballs which you need to capture the monsters, and Gyms, where you fight and train.

You can also start a collection that doesn’t have any physical components or manifestation (no stuff or additional storage space needs – again brain calming – Marie Kondo would approve). And these little monsters, graphically interesting and beautifully rendered in the game, are virtually free except for your electricity bill as you need to charge your phone several times a day (and of course data, but it doesn’t take very much to play the game).

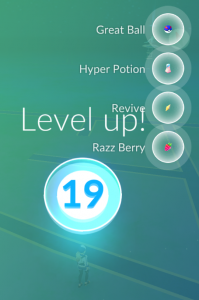
Extrinsic motivation (participating for an actual reward or prize) comes in part with the game’s leveling up system – this gives you something to work toward, both for the satisfaction of “progress” (intrinsic motivation), as well as for the label or badge, and also what comes as the reward (a great ball, hyper potion, etc. all useful in the game):

There are some other features too that tap into these things, are just fun or provide useful tools to continue progress in the game, or “bragging rights”, the latter of which cannot be underestimated (I am enjoying playing the game with my sons and seeing who can get the most unusual Pokemon, or level up first). There is definitely a social aspect to the game, believe it or not. I went into a “secret garden” behind the Parliament building in Copehagen at night on a recent work visit and witnessed legions of Pokemon Go players of all ages sitting around in the dark chatting and walking around that ethereal place, known locally to be a perfect hunting ground for rare Pokemon.

It’s not that big a stretch to ask yourself if there are lessons or tips that we learning designers can take from a game that gets learners to take their progress into their own hands and master something for themselves. Building in the motivational aspects, the visual interest, the social learning and the fun – these are not always traditional starting points for learning designers, but perhaps they should be! I think I’ll stop here…

(Note: It has taken me a little while to post this blog post, partially because I have been travelling with work non-stop for weeks, catching Pokemon from Hanoi to Seattle, and also because I was a little embarassed about how much I have been enjoying playing this simple game. For my efforts, I am now at Level 24!)

It seems so simple. A deck of post-card sized cards, printed on both sides and connected with a ring.

One side or each card has a question:

The other side has the answer:

The whole exercise takes just 1-2 minutes – to read the question, think about it and have an answer in mind, and then turn the card over to see if you got it right by reading and considering the answer.

Twenty cards, twenty quiz questions and twenty answers, about 20-30 minutes of learning, chunked up in small bites. Learning Nuggets!

I would never recommend actually eating an elephant, but as the old saying goes – How do you eat an elephant? One bite at a time… But what does this have to do with learning?

I have worked on many fascinating projects, such as the one for which we produced these learning nuggets, that generate a mountain of learning (an elephant of learning). The learning can be very intentional and structured, using for example a set of KPIs or a donor’s reporting framework to guide it, or more organic, using the partners or project proponent’s learning questions that emerge during the process (or both.)

The learning can be generated through interviews, online reporting systems, annual reports, workshops and meetings (and more). And the outputs can take the form of stories, case studies, spreadsheets, good practice reports, how-to guides, videos, photos (and on and on).

The Micro-Learning Nuggets answered an expressed need – many of the project proponents did not want to read long documents, or wade through a vast jungle of information. So the Learning Nuggets exercise was a way to consolidate and distill out the most important learning and deliver it in an accessible way – a quiz-type exercise where people had to work (a little) for the learning through a few minutes of “effortful retrieval” through applying their own knowledge and experience to the task, and then getting validation or course correction, with some new information.

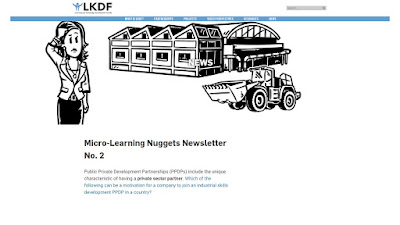
We have used these cards in workshop exercises in many ways as you can imagine with people learning about industrial development PPDPs; we have shared them with our partners as a way to transfer lessons learned through the project (and they can in turn share them in their institutions); we have also recently launched a Micro-Learning Nuggets Newsletter, which is a curated online format for the Nuggets. Here is a sample of the second Micro-Learning Nuggets Newsletter (Note: You can click on the images below to see them in more detail in a larger format):

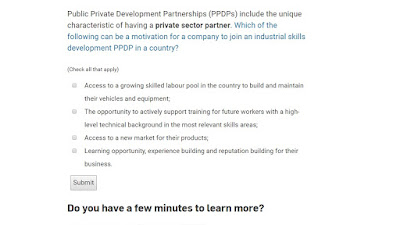
Once a month, an Micro-Learning Nugget Newsletter goes out with a topic, and one related question that has a multiple-choice answer that the reader can consider and click the chosen answer and then submit their response. They then get a “Congratulations! D is the correct answer” with some additional information, or “Sorry, incorrect! D is the correct answer” with the right answer which shares the learning. Here is an example of the Learning Nugget as an online quiz question:

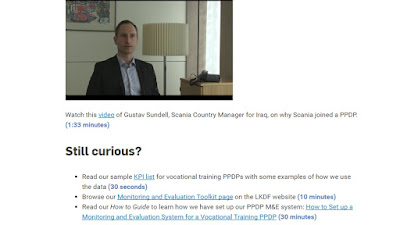
The Micro-Learning Nugget Newsletter then offers just a few additional links for learning more if you are “Still curious?” This is great because it let’s us link to selected resources all over the website, thus connecting the learner to existing documents (or specific parts thereof), knowledge products, videos, social media – all curated to the topic of the month’s newsletter, and timed out (very important!) from very short to a little longer.

What I think is most interesting about this method for packaging and sharing learning, is that it is very simple – just one quiz question – but each one is based on the large body of evidence collected through captured experience, interviews, annual learning workshops, reports, Chief Technical Officers and partners experiences, and more. But instead of a drop box full of documents that people rarely use, this transforms and brings back the knowledge in bite-size Micro-Learning Nuggets, be it on a card or in your in-box once a month.

We developed two animated videos that took a similar approach – to boil down parts of the vast learning base into 2-3 minute videos. I wrote a blog post about that process: Condensing Learning Into 4 Minutes or Less? Making a Simple Animated Video for a Complex Project. 

I had the great honour and pleasure to be the process steward for a multi-stakeholder consultation recently around a complex new idea (which is exactly when you want and need a multi-stakeholder consultation) in the sustainable development field. The issue was one that had significant potential environmental, social, economic and political implications that people and their organizations felt very strongly about. In the room were representatives from a number of sectors – multi-national corporations, government officials, NGO and civil society actors, etc.-, and the potential for a good deal of power asymmetry to be expressed.

Pre-work for the consultation had shown a diversity of opinion on our topic. This 2-day face-to-face meeting needed to surface all the reactions, opposition, ideas, and suggestions from this diverse group of experts in order to make the idea more robust, more applicable and have more chance of success. Among our desired outcomes, we wanted to be able to anticipate and address the wants and needs of the sectors and organizations that could be implementing it in the future. We were clearly discussing a good idea with a lot of potential, thus the good turnout to the invitation to join, and the high level of attention and engagement of the people in the room.

The consultation process was designed to maximise the contribution that every individual participant could make, their opportunities to provide comments to each aspect of the idea, and the time they would have to explain the rationale behind their input. The focus for the committee presenting the idea was to listen deeply, be curious and ask good probing questions to further their understanding. At the foundation of this consultation was the firm belief that any question, input, challenge from the group could only make the idea better, more appropriate and more applicable in its second iteration. So we needed maximum authenticity and a safe space to share what might be opposing views.

This post isn’t actually about the process that we used to do this – that’s another article that I will write at some point. This post focuses on an observation that provided some powerful learning for me about the assumptions we all hold and bring into our processes and work with other people.

The first day of our consultation went very smoothly. The group was high-level, well prepared and worked together diligently to provide comments, document them – discussing, analysing and developing some very useful key messages from their small group analysis. There was laughter periodically in the room in spite of the seriousness of the topic, great questions were asked, the wall templates were filling up with colourful nuggets of incredibly useful and thoughtful contributions. Everything looked rosy.

I was getting very nice feedback from people at the end of the day and during our group dinner. And then the question came.  A member of the idea committee asked earnestly, are people being too nice?

Where’s the clash? Where’s the conflict? Are people giving their real opinions? This took me a little aback. I would say in a very useful way. It gave me the opportunity to think about assumptions (which I always enjoy) – all the different assumptions that people hold that are creating the reality we are sharing. Including me.

I could see that the assumption on the part of the person earnestly questioning if we were getting what we needed, was that difference in opinion in their experience was signaled by overt public disagreement, which can lead to passionate speeches, high emotion and possibly visible conflict in a face-to-face meeting of minds. This was clearly absent in our process so it caused a question mark to pop up for this person and then a desire to go around and check with people to see how they felt about the environment we had created to provide inputs. Hmmm, interesting.  I felt my face – was I wearing rose-coloured glasses?

For me, as the process steward and facilitator, my assumption was that people were happy because they were able to provide their viewpoints in a structured and constructive way. So the absence of open conflict was a sign that the process was providing them this opportunity, and so they were satisfied and comfortable, able to both provide their views and get to know each other and laugh from time to time. I actually very rarely have any kind of open conflict in my workshops and processes because I try to use different methodologies that aim to capture all inputs (rather than those of the loudest or most persistent), provide anonymity when needed, value inputs through multiple levels of discussion and analysis that allows people to work with ideas rather than refute them. I use Appreciative Inquiry to inform my question articulation and keep the pace moving and visually stimulating, and mostly out of long, open, unstructured plenary sessions where speechifying and checking your email is tempting, and the feeling that you are not making progress is tiring.

So the question made me usefully pause and notice again my assumptions and gave me an opportunity to check in with the group. This was a good idea for all – it would help me understand if the process was providing space to capture opposition to our central ideas (rather than being designed  for harmony at the cost of good input), it would help the person who feared that the lack of open and vociferous dissent meant that people were being too nice (and that nice meant no opposition); it would reinforce our principle for participants that all views were appreciated – the good, the bad and the ugly. We wanted them all!

I decided not to just ask the BIG question to the group in plenary at the beginning of Day 1, as that would be a risky format to do it and in that situation people might not feel comfortable to single themselves out and speak up in the awkward silence after such a question so early in the morning. So instead for the next set of discussions around the inputs, which were a little higher level and bigger picture, we asked for the “elephant in the room” (things that have not been spoken but need to be spoken) as well as key messages from their analysis and small group discussion.

The addition of that little question worked very well. It was an unexpected visual, amusing and energising question at that moment in the consultation (we were talking about biodiversity and had already spoken about elephants once in a more realistic context). Groups could identify one big elephant or a herd of small elephants. It invited everyone to think about what might be some of the underlying and potentially unspoken or softly spoken issues, at any level, of our consultation.

It also gave another way to analyse the patterns of the contributions, and it allowed us to see if there was anything new that we had not heard rumbling up before, or if the elephants identified now were more thought-through conceptualisations of things that had been emerging but perhaps not yet fully formed in all the different discussion activities as we went along. We found more of the latter which was heartening and also found it to be a valuable way, towards the end of our consultation, to help summarise and crystalise collectively the most important action areas for the idea moving forward.

It’s not often that you get a stop-and-think-question like, “Is this going too well?” that helps you test your assumptions (and those of others) while you still have everyone in the room. In the end, the consultation went well, the energy in the room was high, and we got those comments, ideas, gaps and elephants, with and without my rose-coloured glasses.

I facilitated a big global workshop last week- some 190 people attended- where we used music in a number of different ways in the event. First, as it was a large group, we used it for crisp starts and stops to our sessions: the music stopping gave a subtle audio cue to people, signalling a transition from the informal networking time, to the formal start of our session (more elegant than me shouting in the microphone for everyone to sit down).  We used it just prior to the start of the after lunch sessions to give an energy boost after the hour spent enjoying the lunch buffet. And we used music at the end of the day to create the mood for reflection and to usher in a reception and other evening events. We also wanted local music to give people the feeling of being in the host country (because we spent a lot of our time indoors in a space that could have been located anywhere on the planet). It also filled the vast, high-ceiling-ed and rather anonymous ballroom with warmth making our conversations feel more intimate.

Music can be a wonderful and useful instrument (pun intended) for a process designer when planning the choreography of an event. But I find it is one seldom used. TED does a good job of selecting songs with messages in the lyrics to start coffee breaks, and then tends to end those breaks with short videos (that can again have the effect of forward attention getting and a crisp start.)  Other than that it seems that music is infrequently  considered in a deliberate fashion to help create the overall atmosphere for dialogue and learning.  

What it takes to put a workshop to music

There might be some reasons for this – adding music adds tasks to the long list of materials, equipment, roles and responsibilities for a workshop. You need audio equipment, speakers, a playlist, and someone paying close attention to cue and cut the music. More importantly, you need a special talent to create the playlist in the first place – someone with a good broad knowledge of music who can select just the right piece for the right mood and, if there are lyrics, appropriate ones. All this adds considerable time to what might already be a busy and finely tuned event.

Not as easy as it sounds

Recently at our Bright Green Learning Academy training (Module 8: Practicing Facilitation Approaches and Methodologies) one of our participants ran a brainstorming on this exact topic: which pieces of music fit where in a workshop design? Interestingly, although it seemed an easy task, we all found it incredibly difficult to do on the fly, and found that some of our individual great ideas were certainly a matter of taste. The big lesson: Creating the sonic fabric of the workshop takes encyclopedic musical knowledge, careful consideration and time, but it can have thrilling effects when done astutely.

It turned out that the person who ran the exercise in our Module is himself a music aficionado and he took the exercise a step further a couple of weeks ago. He took a set of criteria  given to him by the meeting facilitator and used his own vast musical knowledge to create a sound design for an evening workshop (a Toastmasters meeting).

Here is what he proposed, with at least two suggestions for each part of the meeting. The jazzy feel matched the demographic in attendance and the after-hours feel of the evening event. Read through his proposals below and see if you can feel the surge of the music as the event progresses and the deliberate sonic ebb and flow proposed. Notice his thinking behind the choices:

Entrance: Soft energy/welcoming
Entrance:   Stan Getz & the Oscar Peterson Trio  
Why? Easy and welcoming.
or 
Chet Baker 


Break:   Higher energy  
Break:    John Coltrane  – My Favourite Things  
Why? This piece is lively and gives a great jazz take on a known melody.  It’s also 13:30 minutes;  just right for the break period.

John Coltrane  – My Favourite Things
or
Stan Getz & Bill Evans  (sax & piano) 
or 
John Coltrane  – A Love Supreme   (a bit livelier)
Exit:   Positive vibe for teamwork and a good send-off: 
Exit:    Uptown funk (sax cover)  followed by Blue Train
Why? As the meeting ends, cue up this tune (Uptown Funk) and play it right after that final gavel hits the President’s desk.  There is a punctuated start to the piece which gives way to the funky sax solo.  It’s an attention grabber.  It’s says ‘Hey look here!’  and conveys a positive feeling for the exit. The piece however, is only 4 minutes long!   Bear this in mind because it is good enough as a punctuation mark to the evening but not long enough to keep things flowing for the 30-minute cleanup.Therefore, follow it up with Blue Train which will easily carry you through the length of the clean-up process. Just mind the time of the first track.  You’ll need to make a smooth transition after the first song ends without there being a gap of silence which lasts too long. This confuses the listeners and puts a glitch in the sonic fabric (and we don’t want that!) 

Uptown Funk:   Sax cover of Bruno Mars’ Uptown funk.   (Lively funky sax send-off)
or
Play that funky music:  Sax cover
followed by:  
John Coltrane  – Blue Train
Sounds technical…
The technology to add music to your meeting or workshop doesn’t have to be complicated,  For smaller meetings you can connect to the songs on YouTube from your telephone or iPad and broadcast them on a speaker via a Bluetooth connection.  For larger events like my conference, you need a sound system, but if you are showing any videos during the event you will probably have already amplifiers  hooked up and available
Bringing your workshops alive with the sound of music definitely takes some careful work, but using music strategically in your event can add real richness and energy to the learning landscape, connecting with people on a different level, and might help take your collaboration and results to new heights. 
(A big thanks to Christian Kranicke for his excellent soundscaping and for being willing to share it!)

I have recently been working with a team on training design for a rather technical three-day workshop to be piloted soon. Once the course has been tested and further refined, the next step is to develop a Training-of-Trainers programme to support the capacity development of a number of trainers who can disseminate this learning workshop globally. That sounds like a logical step and helps contribute to broadening the impact of the course and content by having a number of good trainers delivering it, in multiple locations and in numerous languages.

I have given many Training of Trainers (ToT) courses over the years and have been very happy with the design described in this blog post: Training Camp! An Un-ToT Design. This design provides for high customization by the trainers, as they tend to all have different levels of ability in both the technical aspects and training process. I find that this Un-ToT format works well to produce a group of trainers in the end with a handle on the materials they will need to  deliver the course independently in the future.

So, the course design is one thing, but how do you develop the materials for the trainers – the Trainer’s Manual – what does that look like?

Obviously the trainers get the Participant Materials, but what else do they need in addition to that by way of materials? I always produce a written Trainer’s Manual, that I provide in the ToT and use both to support the ToT process and that also provides trainers with an on-demand resource as they go forward and deliver the course themselves. I think it has higher utility to the trainers to produce this additional resource rather than provide only the Participant Materials and some supplementary handouts.

Here is a sample Table of Contents for a Trainer’s Manual:

Section #
Section Title
Contents
1
How to Use this Manual 
Explain how the manual will be used in the ToT and beyond in the course – this section can also be used to welcome facilitators and give them information on where to go for more information – dedicated website, contact information, etc.
2
Facilitation Agenda 
Include the annotated Facilitation Agenda that the trainers will use in delivery of the training. This includes timing, process information, activity descriptions, etc. – this needs to be in front of the Manual and easily accessible as people will refer to it frequently.
3
About the Host Organization 
Provide relevant background on the group designing the training so that trainers have the relevant information to share with participants, as they might not be staff of that organization but external trainers.
4
About this Training Workshop 
Describe the origins of the training, rationale and what it hopes to help participants achieve. Provide a description of participant profiles that can help the trainers and others identify the right participants to attend.
5
Master Materials and Equipment List 
This list helps with procurement of stationary and ordering equipment for the training room – flip charts, markers, LCD projector, post-it notes and so on.
6
Materials to Prepare in Advance 
Indicate what needs to be done prior to arrival onsite – this can be posters to print, handouts, job aids, etc. in aggregate.
7
Materials to Prepare Onsite 
This list includes items that can be prepared in the room before, such as flip charts, templates, etc.
8
Room and Table Set Up 
Provide a diagram of how the room should be set up, and where to position equipment like flip charts, screen etc. This can be shared with the venue staff in advance.
9
Day 1 
Each day has its own section.
10
Session by Session Description
(See below for detail)
11
Annexes
  1. Participants Training Manual (Separate – this is the manual that all participants will receive.)
  2. PPT Slide Set (If PPT will be used – separate on a USB key/ CD or URL/Dropbox for download. Include electronically the Trainer’s Manual with handouts etc. in Word, and the Participant’s Manual in case this needs to be reproduced locally.)

Within each of the Session descriptions (I always divide my days by Session, so I can keep them distinct and provide an easier way to refer to them to participants, trainers and speakers, etc.), I write up each of the Sessions in the Trainer’s Manual with the following information:

  • Session Number and Title
  • Materials (What’s needed for this specific session)
  • Preparation (What do trainers need to do to prepare – flip charts, room change, quiz, find a place for a game, number tables, etc.)
  • Timing (How long does this session last – 09:00 – 09:45)
  • Sequence (This is the sequence of events and the script AND it always includes possible answers to questions the trainer is asking participants, or answers to a quiz or learning activity. If participants don’t quite understand the question or ask for an example, this helps trainers provide one, and gives them a sense of the kind of responses to look and push for.)
  • Flip charts/Job Aids (What do these look like, what questions are asked, what format do they take?)
  • PPT slides (You can add in print outs of slides with notes in this section, or you can include this in an annex. NOTE: If you have a very long slide set or one with lots of images and graphics, this can make the Trainer’s Manual data file incredibly heavy. If this is the case, I sometimes refer simply to slide numbers in the Sequence part of the section (like “See slides 1-5”) and then provide a hard copy of the slides and notes in the Annex which can be printed separately to the Manual document.)

    All these sections should have an open and “airy” layout on the page that allows trainers to take notes in the margins or has a designated place to make notes. In order to deliver this training, they will have to make these words, concepts and activities their own, so providing a space to reflect and customise the materials as they go along will be an important part of the Training of Trainers session. 

    How to Put It All Together? (Literally)
    One last thought, I have experimented with different formats to provide the above materials. I think I like ring binders the best with a pocket in the inside front and back where you can put the USB key or CD. The rings help people take things in and out that they might need in the training delivery (notes, the Facilitation Agenda, the PPT slide printouts, handouts to copy, etc.) and then put them back in to keep them organized. It also means that anything new they develop they can pop in and not have to keep separate and potentially misplace. I would always print the title of the workshop on the spine so that it can be seen on the shelves with their many other Manuals.
    Trainers of Trainers, anything else to add that helps keep us on track in a ToT? 

    (I love the fact that I really do learn or re-learn something new every day…)

    You might be the Facilitator, in charge of weaving together threads of themes, helping people make sense of complexity, ensuring time for reflection and assimilation of concepts, framing and debriefing activities that will help participants share their thoughts or co-create radical new ideas. You might be on stage bringing energy to the group when they need it and watching participants to make on-the-spot modifications to match their needs and interests. 
    You might even be introducing the Minister, Ambassador, Permanent Secretary and CEO. Effectively you are there to make sure that the investment of tens of thousands or even hundreds of thousands of dollars in convening the right people for this workshop or conference is fiscally responsible and has the results that ensure a return on investment by the hosts. That’s your job as Facilitator.
    And you might also be doing the following:
    • Finding volunteers to translate job aids into different languages;
    • Printing and making photocopies of job aids in two languages (and finding paper for the copier and then taking it completely apart to clear the paper jams);
    • Putting the job aids on the 25 tables in the plenary;
    • Making the background PPT slide set that runs behind the programme (giving it to technicians and changing it as things change);
    • Clearing the tables of cups and other ephemera and replenishing materials needed on the tables;
    • Putting the chairs back around the tables and smoothing table cloths before the next plenary so that it looks tidy and inviting to participants;
    • Taking care of things people leave in the room (walking lost and found – phones, cables, USB keys…);
    • Making signs to indicate the breakout rooms locations;
    • Getting people into the rooms on time.
    • Standing in front of said signs to help people find their rooms;
    • Finding interpreters for parallel sessions;
    • Performing materials husbandry tasks – dividing up materials needed by parallel sessions and delivering them to the rooms at the right time, finding lost markers, saving enough materials for the last sessions;
    •  Finding the rapporteur to hand over the written results from the working groups.
    • Double check everything and field what quickly becomes Frequently Asked Questions.

    So you also might get to do these things at your large event. These details make a difference you know; they contribute to the visual aesthetic of the event; they signal care, respect and professionalism; they make the event feel smooth to participants and reduce any anxieties that can come between attendees and their learning and contribution to the event. 
    It’s definitely not a problem to do them and you are certainly willing to pitch in, and they need to be done. By you? These important roles could also be assigned in advance of the event to other team members who could do them sometimes even more quickly and easily than you – the operative word here, that might occur to you exactly in that moment you are taking apart the photocopier for the second time rather late at night, is definitely in advance
    To enable this better division of labour it is great to think systemically about the event in the weeks before and make a check list of all needed roles to assign before your big meeting and conference (as with a small one, these things don’t take so much time, but with 180 people then that is a lot of tables to straighten up after a plenary) and then ask who might like to take them on. There might be a short list of roles already that you can add to from what you know about what makes large events work.
    As the more time that is needed for these things, the less time you have to focus on, and prepare for, the participant-facing facilitation work you will do – not to mention grabbing a couple of minutes of your own to clear your mind, rest a little in the hubub of the conference, refocus your thoughts and look at the scenery that might just be outside your meeting room…
    Facilitating large groups? Here are 3 more related posts: (Module 10 in our Bright Green Learning Academy is also on this topic)
    1. When Numbers Soar: Working with Large Groups
    2. Going Large: Tips for Running Facilitation Teams at Big Conferences
    3. Building Peer Learning into Mega-Events and Conferences

    I didn’t wear a helmet, riding boots or a crop when I spent three hours last Sunday morning with Mr. Bean and Frederica- two former polo ponies living on a farm in Bavois, Switzerland. That’s because I didn’t ride them – I spent my time leading them around a chilly arena, slaloming cones and over low barriers (without a rope!), or at least trying to.
    This was during one of Sarah Krasker’s equine-assisted learning workshops where she provides individuals ( coming in teams or alone) an opportunity to explore their leadership abilities through experiential learning. You bring your non-verbal communication skills, energy and purpose to bear with giant animals who don’t get office politics or do something because it’s a nice thing to do. If the horse can’t understand your direction, is getting mixed signals, or doesn’t trust you it will simply abandon you for a good, hard, longing look at the rest of the herd in the field out the window.
    We were three people, two horses and trainer Sarah for the morning. All of us had picked different aspects of leadership to explore. In our three hours, we worked with the horses twice with reflection and debriefing after each session.
    Our goal in the barn arena was simply to get the horse to follow us on its own accord. This seemed unlikely (why should they?) but we were assured if we were giving off the right energy (Sarah called it an “energy bubble”) and signals and made it seem more interesting than anything else going on at the time for the horse it would happen. For that we needed to communicate direction, intention and passion for the task ( walking around the ring or weaving through the cones). Horses being herd animals, we were explained, like to follow a trusted leader. Mustering these forces within you would lead to a satisfying picture of a horse following you around. However, hesitation, a dip in conviction or attention or energy, alternatively means that the horse will just stop in its tracks and look at you patiently, stock still, 900 pounds of immobile weight, with those big beautiful brown eyes. No amount of pushing or cajoling at this stage would get it to move another step.
    It took me the first round to connect with the horse and understand more of how strong you have to be to get the horse to follow you. Not muscle strong though; it takes concentrated, ongoing focused energy and mental engagement to get the horse to start and keep moving. My first time I only got a few steps that initially heartened me but quickly showed that the window was more interesting than anything I was offering at the moment.
    But the second time, with resolve, a vision in mind about what task completion looked like, a firm but friendly voice and not taking no for an answer, I blocked my energy, gave instructions and turned my back and walked around the ring a couple of times with Frederica following along behind me. Granted, I did start with the rope for the first few steps, but then we unclipped the rope and (to my amazement, although I didn’t let on of course) she still followed me around the ring for a couple of tours. The second time I needed to quality control the slalom by slowing down a little and insisting a little more firmly that she go around all the cones, and she did! (I must confess, at first I thought these just might be very well-trained horses that know their trail and would do it by themselves, but on many occasions, even with the rope, if the leader hesitated or lost their conviction the horse would simply and quite abruptly stop in its tracks. Now that’s feedback!)
    It was a thought-provoking morning in the barn and it got me thinking about how I communicate vision, the responsibility for safety that leadership brings (task based as well as emotional), how to make sure that what you are asking, which is out of the ordinary – not business as usual,  is more interesting than the familiar other horses or the window. Leadership most often means taking people along to a new place, a new situation, or a new practice.

    Working with the horses and Sarah this way provides a great opportunity to get outside the four walls of the office and separate yourself from the day to day. This can give invaluable time for reflection that the barrage of emails and meetings doesn’t always provide for, and a useful experiential learning moment that can move your thinking ( be it at a trot, canter, or run) about your own leadership role while enjoying the warm hay breath of the horses.

    (Trainer Sarah Trasker with Mr. Bean)

    I am enjoying being the Learning Expert for a very innovative programme (Learning and Knowledge Development Facility) that aims to promote, capture and share learning from a series of international public private development projects (PPDPs). The objective is to create a platform and a process for sharing learning among all the project stakeholders and with other interested parties for continuous improvement in the existing projects and to create efficiencies in future project development and implementation.

    For this project, among other things, I recently wrote a series of How-To Manuals (see the blog post: How to Write a “How To” Guide: Two Approaches to Creating Reusable Learning) based on individual learning gathered through interviews and collective learning from facilitated workshops and meetings. These detailed documents are all available for practitioners in the project to use as well as anyone else interested.

    But, they range from 20 – 30 pages, with some shorter executive summaries that aim to distill further key points. With piles of reading already on their desks, the project managers challenged us to create some new, shorter learning products, not just for them but for their colleagues and others who were interested in the project, who wanted to learn more, but were just starting to dip their toes into it. 

    The project is about developing Public Private Development Partnerships (I’m not going to describe them here, you have to watch the video!) It’s quite a nuanced concept. And because of the complexity of writing about and describing the PPDP approach itself (one of my long How-To Guides was about PPDPs – How to Develop and Implement a Vocational Training Public Private Development Partnership – even the name was long!) that was where we decided to start.

    So we made an animated video – a 3 minute 23 second explanation of what PPDPs were, how they worked (and of course the benefits!)

    All in all, it took us four weeks from the telephone interview that produced the narrative, to receiving the link to the final video. We chose an aggressive time frame as we wanted to show the video at an upcoming meeting. For this project we worked with Simpleshow.

    This was my first experience working with a creative team to create an “explainer” video. There were a number of lessons that I learned along the way that I want to capture, for my own future reference, and also for sharing with anyone who is tempted toward the process of condensing and sharing learning in 4 minutes or less.

    Lesson 1: What’s the message?

    As I mentioned above, the idea started with a 33-page “How-to Manual” which structured a rich multitude of lessons learned by many different actors. How on earth could that be condensed into 4 minutes or less? Four minutes was the upper limit given to us by Simpleshow, with a suggestion that even this could be too long. (Note: There is plenty of interesting research done on video length and viewer attention span – like this article by Powtoon Explainer Video: How Long Should Your Explainer Be? We went plenty over, relatively speaking, what seems to be a generally suggested time limit of 1-2 minutes.)

    It was obvious that this amount of content was far too ambitious for a 2-4 minute video. So we needed to think again. When we considered the questions that come in about the project, the first ones and perhaps the most fundamental are really the basics – What is a Public Private Development Partnership? Who is involved, how does it work and what are the benefits? In answering those questions, our message is really basic: This is a very cool approach which you should know about and might want to get involved in. So we started there.  You really need to be crystal clear about the central message you are trying to convey. Too many messages make for a messy animated video.

    Lesson 2: What’s the story?

    For a video to be good, there needs to be some kind of clean and simple story or narrative with some characters, a challenge that people are trying to solve together, a barrier to surmount. Our story had all of those components. To get to the essence of the story for our video, Simpleshow sent a questionnaire with some very good questions along these lines. We answered it and sent it back and then set up a call with a project manager and a story writer that lasted about an hour. I discussed with them the answers to the questions – What is a PPDP? Who’s involved? What makes it special? What problem is it trying to solve?  And they asked more questions, and I gave more answers. After a while it formed into a simple but compelling story.

    Lesson 3: Whose voices? Which characters?

    If you watch many explainer-type animated videos, you will notice that there is almost always one voice that is the narrator. This voice introduces the characters, and effectively tells the story for them while they move around and animate the story.  (More on this narrator voice later.) As such there are a lot of decisions around characters and voice in a video. First, you need to identify your characters. Our first list was very long as there are a lot of important actors in PPDPs. But you really can’t have too many characters as it can be hard to keep track of them and in some cases hard to tell (animated) people apart. Remember that they are not distinguished by their voice, as they do not speak – one central voice tells the story, so they need to be differentiated in other ways.

    In our case, the main actors involved were actually organizations, as we were describing an approach or a process. So we had to decide which organizations were the most central to our story, and what characters would represent them. We ended up with four main characters with actual names (Peter, etc.), and with some minor characters without names (e.g. teacher, government official, other student).

    You do need to be thoughtful about names – selecting those that are not too similar.  For names we tried to use known names from where our characters originated; the most important name choice was our central character, a woman graduate in Zambia. For that I researched the most popular female names in Zambia and decided on Thandi, which is near the top of the charts of popular names for women in Zambia, For next time, I would suggest even more diverse names for the other organizational characters as the project is international. We changed a couple of them from those suggested by Simpleshow, which was perfectly fine with them, but could have changed them a little more to capture the true diversity of the project.

    Lesson 4: Getting the story crystal clear

    The next step was to write up the narrative – the story as told by the narrator. This was the script and was written from the perspective of a storyteller which was not one of the characters. The script was drafted based on our telephone conversation. Simpleshow wrote out the script. word for word, exactly as the narrator would read it, and sent it for review along with some ideas of visuals (in words) and potential images that could accompany them (characters, icons, etc.) I checked the accuracy of statements, changed terminology, answered some questions, and looked for points of emphasis.

    It was important here to remember that some words can be very politically charged, how some characters are described can be consistent with their own terminology or quite incorrect. You need to remember that you are the expert at the topic, the video maker works on a myriad of different themes and although they do their best,  it is your responsibility to catch things at this stage. I shared my comments with colleagues to make sure that I was not missing anything, and indeed I had! At this important script stage we needed to sign off on the narrative as written, because it is not efficient or practical to change the text after the images are drawn.

    Lesson 4: Sketch stage – Choosing the right images and icons

    I considered what was being suggested in terms of images and iconography and made some tweaks. Sometimes the initially proposed icons might not be quite right to represent the actor – for example, a technical assistance donor will not resonate with an image of a bag of money, but with a growing plant instead.  Other images benefit from changing to increase accuracy or authenticity. For example, I changed an image that was represented on a chalkboard to make it more consistent with the reality of the project (from a flow chart to an engine diagram as the project works with heavy machinery), or changing what one of the characters was wearing to be more like that we see in the vocational training centre workshops in the project.

    For this, I used photos from our project, and also googled factories in Zambia, and sent links to the animators, and generally tried to help make the story and images as accurate as possible with the reality of the project. It was at this point also that I received a first sketched of the characters. For Thandi, our Zambian main character, I commented on her dress and hair, and googled lots of Zambian universities and factories for photos to see what students were wearing. Although I have been to Zambia on more than one occasion, I wasn’t in a heavy vehicle vocational training workshop! So I passed this by colleagues who had been working in Zambia, and had been to the vocational school until we all agreed. All the images need to be checked carefully for accuracy and authenticity as again, it is practically impossible to change them (or very costly to do so) once the voice actor is engaged and the animation completed. You definitely don’t want someone watching the video a month after production saying, “That’s not how you pronounce ‘Thandi’ in Zambia”!

    Lesson 5: Voice actors – What voice best matches the content?

    Speaking of pronunciation…the video narrative will be read by a professional voice actor (I enjoyed googling that fascinating field of work). The company has a pool of voice actors and sent me some audio clips to listen to, and from which to select the one that seemed to fit the content best. I found out from the company we worked with that most animated videos they made were narrated by men, and often with American accents (at the request of clients).

    We decided early on that we wanted a women’s voice, so the Simpleshow sent through some female voice clips for me to listen to, with some different accents. It was interesting to hear all the varieties of voices, and their different qualities, intonation, brightness, etc. We decided that we wanted a British female voice. I listened to a few more audio clips and chose one. The voice in the original clip I found a little too bright and chirpy, which didn’t fit as well for our content, so I made some suggestions along those lines. When the actor recorded it she matched our request and instructions.

    Lesson 6: Signing off final stages – no going back

    At this point I had signed off on the text to be narrated, and I needed to sign off on the images and icons, and what would happen to them which was described in words (wondering, searching, happy, ‘wiped away’). I was asked about how to pronounce ‘Thandi’ ( with “h” or without – I double checked with a Zambian friend to be sure!)  Also how to pronounce ‘UNIDO’ ( spell it out or read it.) It was great that they asked, I am sure the voice actor needed to know. Again this is something you might anticipate and give some instructions before the voice actor does her work.

    At this point, the text and images go out of your hands and the company puts together the animation and the voice actor records her text. You can listen to the final results in the video above!

    We would ideally have liked another review step or a quote for how much that might cost (it might be significant if the voice actor needs to re-record something to emphasize a word more or less, or a sequence in the middle of the video needs to be re-shot). I understand that is why there are so many opportunities for iteration and sign off steps. It is however still challenging to try to imagine how the voice will work with the images, and how the images will move. There can be unconscious messages communicated when some images stay longer on the screen or have a more central place in the viewing pane. In the future I will try to pay more careful attention and try to anticipate this, and thus give some additional instructions to the artist and voice actor on this aspect if needed.

    What might happen next?

    The video launch received a very enthusiastic response and good feedback. People are thinking actively about how to use it. The team recently translated it into French  as one of the new PPDPs is in a Francophone country. That took only 2.5 weeks, from request to final French-version of the video, and provided another broad set of possible accents and specialised terminology to select from (with no changes made to the animation except the last ‘thanks’ page).

    The video has been put on the webpage and shared widely with partners. It will feature in an upcoming training course on PPDPs in the introduction, and is being sent to potential partners through email and in workshops and meetings. It is such a short and easy introduction to PPDPs, and is much more engaging than any PPT slide set or oral introduction, both of which would take longer than 3 minutes 23 seconds.

    Overall, it was a very exciting and fast paced process, and it’s fascinating to see ideas move from a conversation, through written words, to images and then jump off the page into an animated video. And it is not as mysterious as you might imagine. I enjoyed writing down my learning and things I want to remember, not least because I might want to reuse my learning in the next set of animated videos that are already in planning!

    Surfer Hollow Wave Ride

    There I was, prone, my nose the requisite hand-width from the logo on the waxed board. Then, on command, execute sequence: paddle the air like crazy, then up on one knee, then two knees, stand up, body turn, arms out and ride that imaginary wave.

    Surfing seemed pretty straight forward there on the sand. Side-by-side on the beach we had 10 surfboards, and 10 wannabe surfers, being put through our paces by the surfing instructor before we ran into the water with our boards. Cool! Well…

    I spent the first half hour of my 90-minute lesson just trying to get on the darn board without falling off the other side. That was already rather humiliating, but I had the water to hide in (frequently and head first). Once I could actually get on the board, turning it around so it was facing in the right direction was my next challenge, and doing so without getting caught broadsided by the waves that were coming in with frustrating regularity, as waves do I guess.

    Then I found myself miraculously on my board, facing the beach (at frighteningly close range) and hearing the surf instructor shouting “PADDLE!” at me. I paddled, and rode my wave onto the beach –  on my stomach. It was surprisingly comfortable but, I was assured by my sons, not the way to do it.

    There were several thousand witnesses on the beach that day, watching me fall off my board, belly surf onto the beach and twice get up onto my knees but no closer to the standing cool of the little kids and my sons dude surfing around me. All in all, I spent at least an hour humiliating myself and the rest of the time underwater.

    Benefits, you ask?

    That was a sunny day in Rhode Island, let’s go to the other side of the Atlantic Ocean now, to Newcastle University in the UK.

    Thirty volunteers were recruited recently for an experiment that began by subjecting them to a barrage of problem-solving, memory and reaction time tests to set a baseline. Then they were randomly assigned one of three activities to do for eight weeks and went home.

    Members of one group had to walk briskly for three hours a week, a vigorous exercise that kept their hearts pumping and their brains deliciously filled with oxygen-laden blood.

    A second group played Sudoku and did puzzles like crosswords for their three hours a week. Comfy in their lounge chairs, their brains were constantly being challenged and titillated solving these brain teasers.

    The third group spent their three hours each of the eight weeks staring at a naked man named Steve. This was actually in the form of a life drawing class, where Steve was the model.

    And eight weeks later, where were our volunteers now?

    As expected, the walkers made great strides in their general health and fitness. The puzzlers became addicted to Sudoku and presumably proudly got their solving times down from double to single digits and competitively went on to harder and harder puzzles.   And the life drawing group? They enjoyed it! But when the scientists re-ran their cognitive tests, which group do you think made the most brain progress? What’s your guess?

    If you guessed Sudoku, you would be WRONG.

    The life drawing class made the most progress in cognitive skills of memory, reaction time and problem solving –  why?

    BBC news, who reported the experiment, quoted clinical psychologist Daniel Collerton as saying “Learning something new engages the brain in ways that seem to be key. Your brain changes in response, no matter how many years you have behind you.” Learning something new improves your brain function and memory! Yes!

    Now, let’s go back to my surfing lesson, as embarrassing as it was. That was (obviously) completely new for me. Trying to do all those coordinated moves, that the instructor was telling me, in the right sequence, for the first time, definitely engaged my brain as well as my body. The life drawers in the study saw brain benefits from developing their psychomotor skills by thinking about moving their hands to draw.

    The life drawers also derived more health benefits and calorie burn from standing three hours a week for their drawing class (better than sitting – unlike our puzzlers, you can’t do Sudoku standing up). Although I was not standing, ever, I also was not sitting on my surf board (I was falling off it most of the time).

    And finally the life drawers in the class were the most socially active of the three groups in the study, talking to each other and learning together, this social side also reportedly contributes to keeping your brain sharp.  My surf class camaraderie also produced opportunities for social interaction that did not always involve collisions, but lots of tips, cheers of support and peals of laughter (including my own saltwater chuckles.)

    The Newcastle study concluded that “any group activity which involves being active and learning a new skill will boost your brain” and its cognitive function.

    So the next time you’re laying on the beach and see someone learning something new, like surfing for instance, remember that they are improving their brain function and you are just getting a sunburn!

    I have been working for the last few years as the Learning Expert on a very interesting partnership project called the Learning and Knowledge Development Facility (LKDF). This project focuses on “promoting green industrial skills among young people in developing countries”.  The focus is on developing Public Private Development Partnerships (PPDPs) in selected Vocational Training Centres (VTC) in a number of countries, and promoting multi-level learning within and among them in innovative ways, as well as capturing this  learning and reintroducing it back into the different projects and into new PPDPs.

    In addition to developing the learning elements and designing and facilitating the peer-learning components, I have had the great pleasure this year to write a number of “How-To” Guides – four in all. They have taken two different approaches to development, described below. But there is something critically important that must come first…

    The first question to answer when writing a How-To Guide is “Who will use this?” Who is the audience? If you are crystal clear about that, then it makes it much easier to write with those people firmly in mind. Our audience for these Guides was project managers who are developing and implementing PPDPs and those who might be interested to do so in the future.

    Approach 1: Interview-based 

    The first How-To Guide was based on a co-generated set of “Learning Opportunities”. This set of questions, combined into one document, was effectively what the different partners wanted to learn from their participation in the different PPDPs and the LKDF. In our Learning Opportunities document each partner has its own set of questions under each agreed heading – one for the UN partner, the donor, the private sector partner, and the VTC. This took a question format and formed the basis of ongoing query throughout the project. We use these questions in our face-to-face learning workshops (self-reflection and group reflection) as well as for the interviews that provided the input to this particular “How-To” document, which was titled, How-To Guide: Developing and Implementing a Vocational Training PPDP.

    The Learning Opportunities – that is, what we wanted to learn – included 5 main headings, paraphrased here: How is the PPDP different than a more traditional project of a similar kind; What steps make up an effective PPDP project development process, and an effective implementation process; What is the value added of the learning platform; and how can policy-makers be most effectively engaged and policy change supported.

    Each Learning Opportunity had a number of assumptions that we were making, and then related sub-questions identified per partner (exploring their experience, their role, their learning both internally in their organizations and as a part of a multi-stakeholder partnership, what was working and what could be different and better in the future).

    This document was used to create a one-page interview questionnaire tailored to each of the Partners. The interview was timed to take 30-45 minutes (it tended to take 45-60 minutes) and was administered by telephone or Skype. After the interview the notes were recorded under each question to create a set of response forms that ranged from 4-6 pages in length. For our How-To Guide we undertook 13 interviews (some had 2 people on the call).

    Then the exercise was to take the inputs from the interviews and write the How-To Guide. For this I used the following process:

    1. Divided the questionnaires by Partner (UN, Business, Donor, and VTC)
    2. I did a first read through of those in each sector to get a general overview of the key messages, and to see what themes were repeatedly arising among them members of the same sector.
    3. As I used the 5 Learning Opportunities roughly as the chapter titles for the How-To Guide,  I went a second time through all the interviews (still clustered by sector) in more detail, picking out key words that were repeated under each Learning Opportunity 1-5, and I wrote those key words in the margins of the questionnaires (so I could see them at a glance). I was especially looking for success areas/things working well and why, challenges being experience and actions that partners had taken to mitigate the challenges (or try to), and learning and advice for the future.
    4. I then put aside the Interview questionnaires and created the overall Table of Contents for the How-To Guide, and blocked out sections with titles and placeholders to write into. Creating a Table of Contents is a great way to see if there is overall flow to the Guide. The Chapter headings I chose (and changed a few times) became: What Makes the PPDP Approach to Vocational Training Successful; How to Develop the PPDP Concept and Project Document; How to Implement a Vocational Training PPDP Project; How to Form a Dialogue with Policy Makers During Vocational Training PPDPs; and How the LKD Facility Fosters Learning. The Chapter titles were based on the Learning Opportunities, the interview questions and what had emerged from the interviews (some questions produced rich responses, others not so much).  I found it very useful to have the framework set up before writing the main body of content.
    5. I then wrote the Introductory sections of the How-To Guide: About the project; About the Guide, Useful definitions (what is a PPDP?), Who is involved, etc.
    6. Next I went back to the Interview Questionnaires. I wrote bullet points into my Guide framework under the right headings, amalgamating and summarising the text from Questionnaires. I used the key word reminders that I had written in the margins that repeated, drafting them into more generic lessons. If it was a sector specific comment or a general comment, then I noted that.
    7. I organized these bullet points into sub-sections that were emerging based on content from the questionnaires such as: Reported benefits; General considerations; What to watch out for; Steps to take; 10 things that have worked so far. I also included some observations and tips by and for specific partners (e.g. The Business Perspective or The Donor Perspective).   Each chapter was organized differently depending on the kind of inputs Partners gave in their interviews, but always with the Guide user/reader, and the questions they might have, in mind.
    8. The rest of the exercise was writing the bullet points into narrative, making them parallel, reorganizing for flow and logic, and editing for readability.
    9. This was then sent out for feedback to the Partners who gave suggestions and questions and sent the document back through an editing cycle before finalisation (formatting and printing).

    This produced a 27-page How-To Guide: Developing and Implementing a Vocational Training Public Private Development Partnership which had quite a lot of practical detail. To give the high points from this, I created a 7-page Executive Summary from this document (which was almost harder than the longer version!) This whole process as you can imagine, took weeks!

    The next three How-To Guides followed a very different process.

    Approach 2: Process and project documentation-based

    Learning is everywhere in a project like this, and the astute project manager identified some good reusable learning content in the project and process documentation that had been written in the early set-up stages of project development. Experts on M&E and learning (like me) had written a number of longer documents proposing M&E systems, learning processes, management training programmes etc. for the project. These included interesting rationale, research, substantiation of what was proposed and support from good practice, expert opinion, etc. How could the re-usable learning be extracted from these early documents? (Processes which had now been tested for a couple of years!)

    It was an interesting exercise for me to sit down with the proposal for the M&E system, the Management Training Programme, etc. and work with the text to identify what was generic and what could be used by other managers undertaking the same or similar processes. Again we needed to be clear on our target, and we enlarged it a little for these three How-To Guides to not only those who would be working in vocational training PPDPs, but would also be useful for those setting up and managing PPDPs in general.

    Here are the steps I followed to turn specific project-related documentation into something that others could be interested to use:

    1. An initial read through of the document provided some obvious sections to cut out – details of our specific context (a little was left in the section About this Guide and the PPDP Approach to give people an idea of where we were starting), excerpts from our Project Document, references to specific partners and their roles, etc. All this could be neatly cut out immediately.
    2. A second read through provided the opportunity to take things out that we didn’t do, hadn’t done yet, or didn’t work in the way it was planned. In some cases, it was interesting to refer to this and talk about what happened (or didn’t) and why. This also provided a good learning back and forth with the project management team and some ideas of what to do in the future.
    3. At this point a number of things were also identified to add in, links to other knowledge products that had been produced along the way, videos, examples from different country experiences, and samples of agendas for events and questionnaires that had been developed since the original project documentation had been produced. This greatly enriched the learning shared.
    4. Then an overview was needed – so I wrote the table of contents and framework for the How-To Guide based on what was there now (and this also identified a gap or two, and in some cases where there was too much information – more to cut!)
    5. The final steps included writing transitional text so the sections were logical and would read smoothly, filling in explanations for an external audience, footnotes for other resources, revising charts and tables so that they were accurate (I needed to remake a number of images so they fit the new context and language of the How-To Guide).
    6. A final review by the project managers completed this exercise (this approach had more back and forth during the process than the interview approach). Then a final edit, and off for formatting and printing.

    This approach took a few days of work per How-To Guide, as the existing content was mainly there and the main work for a learning practitioner was to identify what is most interesting and reusable from the original documentation (which took weeks to write and was an investment already made, additional value added through this How-To Guide development process). The resulting How-To documents were:

    How-To Guide: How to Set up a Monitoring and Evaluation System for a Vocational Training PPDP
    How-To Guide: How to Develop and Manage Knowledge in Vocational Training PPDPs
    How to Guide: How to Set up a PPDP Management Training Programme

    I think that both of these two approaches work well together. The first approach above is highly participatory and involves all partners in an iterative learning exercise. It can easily be repeated annually and additional updates to the How-To Guide can be written as learning continues and deepens. New questions could be added and new Guides produced.

    The second approach maximises existing investments made in project and process documentation. Rather than keeping these proprietary internal documents and on shelves here and there, it aims to draw out the reusable learning from these to share internally and with outside learners. This exercise also provides a valuable moment for reflection about what was done based on the original plan, why or why not, and might also point out what is yet to be done.  With this reflection, the result is a more accurate How-To document produced based on real learning from experience. These How-To Guides also tend to be more specific as the project documentation is more focused on specific parts of the project (e.g. the M&E system, the learning platform, etc.).

    And taking the last-mile steps to create the How-To Guide out of the project documentation, rather than just releasing the original project documents, which go out of date and are often long and rather dry, gives the material new life. It does the work of identifying that learning which is most useful to others, rather than letting this work of pulling out the lessons to be done by the reader (and who has time for that!)

    Colloque BIOFILMS 5 à Paris.

    They cost millions to put on and convene the best and brightest of a community – how can you channel that collective strength for collective impact and, in the end, how can you tell?

    I just returned from 7th World Water Forum in Korea, where numbers of attendees were reported at 41,000 people. I also worked at the 6th World Water Forum in 2012, with 35,000 people. That’s a lot of talent in one place.

    Is there an Expectation of Learning and Impact?

    It is interesting to think about the cost-benefit for individuals and organizations for participation in such an event. If you were on the Learning Team for such an event (do these events have learning teams – maybe that is Suggestion #1!), what might be some of the ways to first, identify desired learning (organizational and individual level), foster that learning through design and format, help record outcomes for monitoring and sharing, and see what changes people are making based on their learning and participation?

    I’ve seen and worked with some different approaches and, taken together, they make for an interesting thought exercise and potentially an opportunity. Here are a few ideas for consideration.

    1) Use a Facilitation Team to ensure interactive learning in Conference Sessions

    Conference don’t have to be panel after panel of 9 speakers giving their ideas from a podium of behind a table and a short Q&A (IF the speakers don’t go over their time) for those bold enough to stand up in front of hundreds, or lucky enough to get the attention of the person with the roving microphone.

    Interactive learning is possible even for very large groups, and even in theatre set up (although round tables are MUCH better – this can work for 400-600 people in a ballroom, at least it has for us in the preparatory meetings for the 6th and 7th World Water Forum.) I have written a blog post about facilitating large groups (When Numbers Soar: Facilitating Large Groups) and it is certainly possible with good design and professional and confident execution. It might take a moment to flip your audience from passive half-listening/texting observers to active contributors, but once you have their attention the opportunity engage and crowdsource ideas, suggestions, solutions, etc. from such a large group is incredible.

    A good facilitation team can also help create consistency and support reflective practice throughout the event, when these questions and practices are built consistently into the agenda of events. With the whole facilitation team introducing this in all parallel events.

    2) Introduce a Conference Activity Handbook

    At another large conference I facilitated recently, we created an Activity Handbook that was put into each conference pack, and had a couple of different purposes. First, it guided participants through the conference, each session had an entry that engaged the participant in some way, from a place to write their goals for the event (Session 1), to places to record answers to specific technical questions, a self-assessment that started one session, a quiz to warm up on another, an action planning template for the final Session (to record follow-up to the conference of people, ideas) etc.

    The resulting Handbook once completed, was a take-home artifact from the conference that reminded the participant of his or her learning, thoughts, ideas, and actions. It also included other key information – contact information, URLs of resources, etc. all in one place. But unlike any Conference brochure, this participants interacted with daily and became a living record of THEIR event.

    Even in a larger event where people are moving around to different activities all the time, such an Activity Handbook could be helpful to guide people through their experience and structure reflection. If there are facilitators, they could start and end their sessions with a reflection question recorded in the workbook (“Open your Activity Handbook to page 16 and take a minute to reflect on what you want to learn today – make a few notes for yourself and I will give you a couple of minutes to share this with the person sitting next to you”,or “What was the most important key message from the sessions you attended today”, “What is one thing you might do to follow up on something you learned today?” etc.)

    If people need an added incentive to complete their Activity Handbook, offer a completion gift to those who complete their book, such as a mug or water bottle with the conference logo, available in the exhibition area at Stand X – ask people to come towards the end and show their completed booklet for this gift. (There was such a gift at the recent World Water Forum, although you only needed to answer a few questions to get it, but almost all people I spoke to found their way to the exhibition hall stand with their voucher to collect it). As people get these items in their conference bags anyways, why not give them a little homework to get it?

    3) Ask Organizers to Develop and Participants to Contribute to Next Action Plans

    One of the features of the World Water Forum process was the expected output of an Implementation Roadmap (IR) from the different thematic streams of the conference (every conference seems to have an organizing principle of some sort – often thematic). The organizers’ reporting templates from the different thematic sessions were made consistent with this and individual session organizers were asked to collect ideas from participants in their sessions that could be integrated into a thematic IR.
    The idea of this Implementation Roadmap was to capture in one place all the ideas and actions that stakeholders attending identified and felt are helping achieve some desired change in their subject area, so that they can be executed after the conference and this execution monitored. Each IR had one or more coordinating organizations who volunteered for this role (because it is central to their work), and participants in their sessions could indicate how these Implementation Roadmaps could improve, if they wanted to be involved in follow up, and what they could contribute.

    Of course this only works if there is engagement and good coordination prior to the conference, real interactivity in the sessions (see Facilitation above) and if there are resources made available (time, energy and potentially funds) for this follow-up. The organizers must take this seriously and support it. More information on the IR process can be found on the 7th World Water Forum website. As this event is each 3 years, Coordinating organizations can be asked to report on progress and results from their Implementation Roadmap work. Central coordination over the interim period to keep momentum is an important additional role for the main organizer. Without this, probably only a small percentage of these would produce results, based on the sheer will and investment of the thematic coordinators.

    4) Follow Selected Individuals for a Conference Impact Study

    We did a Curriculum Impact Study at LEAD International when I was the Director of Capacity Development there and this was a really interesting and effective way to see how a learning experience impacted individuals participating in the programme. This could be an interesting addition to a large conference M&E and learning process, and help answer the questions – what changed? and was it worth it?

    In the LEAD process, we identified a select cross-section of participants (different countries and different sectors – we had 18 in total), and invited them to participate in our study. This process took some time, so they had to be aware of that and committed (in the case of a conference, could they get a reduction on their conference fee by participating?) We started prior to the formal learning events, and went on for a designated period afterwards.

    The study started and ended with an interview that we administered. The initial Orientation Interview included key questions that established a base-line of the individual and their organization, and identified an issue or issues that they and their organization would be dealing with over the next two years where they might apply their learning, etc. After the initial interview (also to explain the process), the exercise was journal-based (there were three Journals) with key reflection questions at periodic points that were triggered by dates, reminders, and email. The journals were collected and analysed (and returned) and case studies following the learning and learning application process of the individuals were written (not using the original names and organizational names).

    This impact study provided a more detailed way to understand the impact of the programme on their professional and personal lives. Based on your overall goal of a conference (such as more conservation impact on the ground), such a study could help understand what participants do to prepare, engage during and integrate into their practice afterwards. It also helps identify places where the organizers can support participants more – maybe the preparation needs to be more directed and different, maybe the sessions need to be more interactive and engaging – as people spent most of their time in the exhibition hall (or maybe more needs to be programmed there), or more support in identifying or using the learning, etc. This kind of impact study of individual’s experience with your mega event can give insight into this.

    5) Design a More Deliberate Learning Programme

    All of the above need good design, preparation, coordination, guidance, consistency across a complex event with many moving parts. Lessons? This needs coordination, guidance, and consistency, and a central team with an overview of the learning goals and enough advance time to prepare the different elements so that the experience is reinforced throughout the conference.

    Of course, this also costs money, but then you just invested millions to get everyone there. Doesn’t it make sense to invest a little more to make sure you get as much impact out of the conference as possible?

    Fotolia_1339788_XS

    I saw this first last year at the Balaton Group Meeting where Junko Edahiro, a fellow life-long learner and enthusiast in the field of productivity, was using her “nu board” to take notes during the meeting. I usually use my iPad and Penultimate to take photos, written notes with my stylus etc, etc. and they sync to my Evernote account so I can search them later.  (See our blog post “Fast and Easy Workshop Reports with Penultimate“.) But as soon as I saw the nu board, I knew I had to have one! (Thanks to my Japanese Balaton Group friends for their kind gift – they are made in Japan!)

    If you were sitting next to me in The School of Life gathering in London (on the timely topic of keeping New Year’s Resolutions) last week, you would have seen me taking notes in my small nu board with a thin black marker, filling a page with notes, taking a photo of the page with my phone (I was actually putting it into my mobile Evernote app), then erasing the whole page with the top of my pen (a mini white board eraser), and start writing again. I did this again and again throughout the 2-hour event.

    The nu board (available in A4 and A5 size), is effectively a bound book of thin white boards. In between each board is a transparent page that you can either write on to overlay additional text/drawings, or use it to protect your previous page from wrist smears.  You simply write with the nice thin marker (the board comes with the white one below, and the blue nu board pens, available separately, have a harder and thinner nib for even crisper writing)…

    Then you take a photo of your page (as I mentioned I put mine into Evernote, but you might keep photos in a different database system) and then simply use the top of the marker that comes with your nu board to erase the page (its very easy to erase if you do it right away, if you wait you need to use some elbow grease)…

    …and you start writing again. There are 4 whiteboard pages in each nu board, so you can take 8 pages of notes before you need to take your photos if you want. I had just cleared one page when I was at the School of Life, as I had not yet processed the other pages (which were from the terrific TEDxPlaceDesNations I wrote about in the previous post), but the pace of the TSoL event made that fine.

    There is also a separate unbound, single page A4 nu board that I was told could be used, for example, during workshops or conferences to keep time for speakers (e.g, writing up 5 MINUTES), or give instructions to people at a distance (CLAP! – just kidding). I look forward to thinking up interesting ways to use that too.

    Nu board is a very clever and simple idea. It is a paper-free solution that takes away the problem of having a bunch of handwritten notes after a workshop or meeting that you need to store somewhere (of course you can take a photo of those too, but then why use the paper?) The improvement on my iPad is that the pen is thinner and I can take denser notes on the paper (the stylus I have for Penultimate is thicker so your writing is bigger, thus less words on each page – fine in some contexts, less so in others).

    The mobile photo archiving is high tech, but the nu board is wonderfully tangible and low tech in your hands, giving you the satisfaction of writing, drawing and decorating your notes page, just like you did at school – but you don’t ever have to torment yourself about whether or not to throw those old school notebooks away. Presto! with a swipe, its all gone into your digital archive…

    (If you want another reason to try something like this, have a look at this LifeHack article Here’s Why You Should Take Notes By Hand (instead of with a laptop) which discusses a new Princeton/University of California study that shows that those who hand write their notes learn more than those who take notes on their laptops!)

    We like to use this blog to capture our learning as we go, through the interesting and varied processes that we have the opportunity to co-develop with our partners and support in different ways.

    Many of these initiatives produce news! They develop new standards (like for aluminium stewardship along the supply chain), test innovative models for development partnerships such as Public Private Development Partnerships, create new learning around sustainability issues like de-coupling or transboundary water basin leadership. They develop new partnerships that go on to make contributions to sustainable tourism or 3D mapping of natural resources, climate change adaptation and women’s empowerment, and more.

    We have begun to share this news in short articles on our website: www. brightgreenlearning.com with links to the different announcements and products. Are you interested in a “How To Manual for Developing a Public Private Development Partnership”? Or a link to 15 case studies and a summary report on “Evaluating existing policy mixes to identify solutions for EU resource efficiency” Or curious to read about how a big cement company manages biodiversity and water in its production processes? You can find this and more news there – and we are incredibly proud as Bright Green Learning to be able to contribute to these initiatives!

    82123824-0b93-4e37-906c-0607ad9c4930
    As learning practitioners we play many roles – we are process designers and facilitators, panel moderators, skills trainers, advisors, team coaches, and sometimes we are MCs (Master of Ceremonies), helping weave together the different learning threads of a larger event.

    I recently took on this role at the Women’s Forum, having done this on a number of occasions with other groups. This event had high production values, with beautiful lighting, a 360 degree stage, video cameras and screens in all directions recording and simulcasting, professional makeup and a “Madonna” mike (as they called it), and, I might mention, 1500 people watching every move you make (or at least the intention to).

    I personally find this role – Master of Ceremonies (we couldn’t come up with a satisfying gender neutral alternative -any ideas?) – more than a little nerve wracking. To get to a place of comfort in this role I tend towards over preparation. However, I won’t apologize for this; that’s what it takes for me to do a good job in this high visibility role. I want to help make participation meaningful for everyone in the room, add value and interest – spark curiosity and maybe some surprise to grab attention, and help connect the dots of the event for people. Now that I have done this for a number of events, I thought I would record and share my tips for preparing and delivering as an MC. I divided my reflections into four parts: what I do in the weeks before, the day of the event, moments before, and onstage.
    red seats
    Weeks Before

    1. Get the Programme: Be proactive and request early versions of the Programme and keep in touch with the Programme manager about changes. Make sure you always have the latest agenda (this can change daily nearer the event when speakers and moderators cancel at the last minute, or even miss their flight). You don’t want to introduce the wrong person in front of 1000 people. It might be tempting to wait until things settle to do this, but don’t; it will be a big job to get on top of it and identify the main threads all at the last minute. Plus your antennae will be up for interesting facts and initiatives in all the other meetings you attend and newspapers you read, and new ideas will come to you as the programme and its key messages percolate in your brain.

    2. Build Your Background: Read about the speakers and the conference themes. This research can be considerable if you are the MC for the whole event as I was, with 13 different sessions, themes, panels and speakers. I estimated that it was like giving 13 Toastmasters icebreaker speeches in 3 days, each one taking some 5 or more hours to prepare (research, collect ideas, write, edit, make notes, brief speakers/moderators, practice, practice, practice).YouTube is a great place to listen to other speeches given by your speakers, to hear their perspective and main messages, and to see how other MCs and moderators have worked with them.

    3. Get Inspiration: Once I had my session themes I looked into a number of directions for inspiration. TED is a great source, in fact I spent the week before this event at TED Global in Rio and found some good leads for interesting facts and angles. The news and current events is an obvious source and I read newspapers and periodicals cover to cover (even sports!) for a change in the weeks before the event, as you never know what facts or questions might come up on stage.
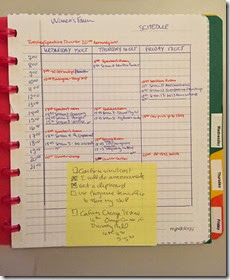
    notebook
    4. Make a Notebook: This is actually a step the “maker” and tinkerer in me enjoys. This year I used an A5 sized notebook, with the pages that you can take in and out along those plastic discs (because things will change!) Use any notebook that you can change the order of the pages and put new ones in easily. Use dividers by day, and then within the days each session has a page. At the top I have the title, timing (when to meet speakers, time of session), list of speakers with their titles, the objectives of the session, notes on the choreography (if there is a sequence to introductions, if there are chairs or if the speakers stand, etc.) and then my script (see below). This makes it easier to practice session by session and quickly check details if there is a question (how will you introduce me) or a change in the programme. Carry your notebook around all the time and use post-its to note any ideas that pop up on the appropriate session page, to integrate later.

    5. Write Your Script: I always write out my scripts completely first, then edit them and tweak them repeatedly, as I am more of a writer than an off-the-cuff speaker. I write out the narrative word-by-word first, including interaction with the audience (and put this in my notebook). Then I start to boil it down to bullet points with sub-text, and then the final step is to define headlines/key words to trigger my memory of the associated text.

    Note that I always build in interactivity (mapping the audience, introduction to your neighbour, etc.) early in my scripts to liven up the participant experience and engage the audience but also to give me a moment to look at my cards if need be. It shortens the length of what you have to commit to memory before you can pause and regroup/breath/centre yourself once onstage. So I write these breaks into the text. I also include short stories/vignettes that I can tell as they are easier, once you launch into them, to remember and tell than a list of facts. You want your introductions to be thought provoking, meaningful, and relevant to the audience. It should make then want to hear and think about the next session and not choose instead to go and get a coffee or stand in line for the photo booth. It’s not as easy as you think.
    black cards
    6. Prepare Prompt Cards: In all the photos and videos of me as the MC at the Women’s Forum, you will see that I have notes in my hand. They are my bullet points and key words written on black card stock and cut to hand size. I write on them with a white pen. This draws much less attention than white, dog-eared, A4 papers flapping around as you wave your hands. At TED Global I noticed Chris Anderson and Bruno Guisani had small cards in some sessions, held with a single metal ring on the upper right hand corner, so you can flip cards easily and quickly as you are talking. They also from time to time had a bright red Clip board. All of these things work, and look good, choose your favorite, prepare them in advance, and if there is any doubt that you might forget the three line title of the fifth speaker on the panel you’re introducing, use them!

    Put what you need on the cards, after practicing you will know the places where you trip up or forget or get the two parts of someone’s last name turned around (people care about this!). The cards I hold on stage have some of this bullet point text (especially the transitions – opening words and closing words for each idea/story), and the key words written larger that I can glance at if needed.

    7. Practice!- Once I make my cards, I carry them around and practice everywhere in the days before and during the event. I take them with me to cafés, I pace in my hotel room, I go through tricky text transitions, or complicated names, or super long titles ( and there will be many) before I go to sleep and before I get up. You can do this with your eyes closed.

    Doing this will also help you revise and change word order or transitions so the words and narrative seems more natural. Once you are familiar with the written script, you will be able to slow down and get comfortable as you know where you’re going with the text. And this will make that last minute additions or name changes less of a problem (e.g. when a speaker asks you to call him or her by their nickname rather than their formal name just before going onstage, etc.)  You want it to be super smooth and easy onstage and this takes a lot of work! I had several speakers ask me if I was using a teleprompter, which made me smile. Maybe it’s my line of work, but I haven’t seen one of these yet! ( I have heard of an iPad app, and have seen moderators use ipads once in a while, but I will probably continue to do this the old fashioned way for now).

    _GR17643 - Copy
    The Day of the Event

    1. Confidence and Looking Good– I will venture that this applies to anyone getting on a 360 degrees stage ( or any stage where you are being watched by a thousand plus in the room, any number on simulcast, and then for perpetuity on the internet.) We all have our strategies. I got my hair done professionally, it’s the only time a year I do! There was a professional makeup station in the Speakers Room, where we convened for our Speakers briefing 30 min before going onstage, because the lights and filming can do funny things to your features and complexion.

    You need to think about what to what to wear (stage and mike friendly clothes). I was always on my feet and walking up and down the steps before and after speakers, interviews and panels. For women, low heels are definitely best and your feet will thank you at the end of the day – I stand up about 10 min or more before the scheduled end of any session just in case it stops abruptly and you need to hustle up (elegantly of course) on to the stage. You don’t want any tripping. For the microphone, if you have a hand mike no problem, but I try to avoid that as I want to be able to clap and I will also have my cards in my hands. So a Madonna mike works best, and for that you need a belt or some hidden way to fix the Madonna mike to the back of your clothing (jacket, belt, or camisole). The sound team also discouraged earrings (actually taking them off me) as the can can clank or get caught in the mike.

    I try to wear something interesting and colorful, even a little sparkle if you can get away with it ( I’m thinking more of necklace or pin than full length evening gown and tiara). This goes for all speakers but especially the MC as people see you over and over again on stage all day. Remember that they will be looking at you at 8:30 in the morning and 8pm at night, and tired or hungry or in need of caffeine, you can at least try delight both minds with your words and eyes with your turquoise and magenta scarf.

    2. Speakers Briefing: As noted above, having a scheduled meeting of speakers directly before the event is incredibly useful and serves a number of functions. First, it lets you check that all speakers are present- there’s nothing like introducing someone who is stuck in traffic 3 km away. Second, it lets you go through the mechanics of the session with all the speakers together. You might have done this before with the panel moderator or even all the speakers, but it will only be when they see the stage and the huge audience sitting around it that they will really want to know who walks on first, what chair they should sit in and how long they can talk. Finally, it lets you check name pronunciation, title accuracy and give them confidence in how you will introduce them to the audience and frame their session. And of course it lets you establish some rapport and remind them of your name so they can talk to you on stage and thank you by name. These little touches make the session seem more friendly and less formal or staged – that makes the audience feel more comfortable and the discussion going on in front of them more accessible.

    3. Bring Food: You may not have time to, or want to, stop for the scheduled meals. It is hard to “grab and go” when you are the MC as everyone knows you and you will get stopped for an interesting chat everywhere you go. If you need to prepare, you might rather eat your Power bar in your room.

    girl holding a bag. closeup
    Moments Before

    1. Where are Your Cards? At this stage you are still keeping the prompt cards for the next session in your hand and now only thinking about one session at a time, literally relegating anything from the next few sessions to the back of your brain and the past and upcoming cards to your bag.

    2. Your stuff– When you’re onstage you don’t have any place to keep your stuff, bag, other papers, lipstick etc. Find that place first, so you are not looking under every chair for it at the end of the session, because as soon as you stand up, someone else will sit in your empty chair (even with a reserved sign there is something oh so tempting about a front row seat) and by the end of the session you will have sat all over the place. Bring the minimum, and put it under the chair of your neighbour or someone you know who will not be jumping up all the time to take the stage. This might seem like a small point, but it will take up residence in a small paranoid spot in your mind that you need to be totally zen and not worried about your handbag.

    3. Take a deep breath: Ok, you are about to walk up those steps. Breath deeply and smile. You might want to do some Amy Cuddy “Power Posing” to get you ready and confident to go onstage. I also write at this stage on my first card at the top in big letters “SLOW”, “BREATH”, “PAUSE”, for obvious reasons. If that’s the only thing I register in the bright lights and 2000+ eyes! then the rest will go much easier. Then you step up, confidently…

    SONY DSC
    Onstage

    1. Voice/Body: As there are books written about this, I will only repeat two pieces of advice given to me by Lizzie the first time I did this big stage work: 1) Pause before starting and look at the audience (I am an MBTI ENFP and tend to open my mouth first and think later, this helps enormously); and 2) Emphasize at least one word in each sentence. It can literally be any word, but do that and it immediately adds interest, voice inflection, and give you a natural pause (breath, think, collect visual feedback). Even if you only do this at the onset of your introductory remarks, it will help with flow. Try it!

    2. Try to Enjoy Yourself! I have to tell myself this over and over, and to be honest it starts to be true only about 1 hour into the day, when feedback starts sinking in. I know intellectually that it is a great privilege to have this role, as well as a great responsibility, and that the role should be fun and I should try to enjoy it. But it takes me a while to get here. Once I start seeing positive reactions with my own eyes and hearing it from others, then the mantra starts to have the desired effect. And this calmness and sense of enjoyment is critical for me to calm the voices in my own head so that I can deeply listen and connect into the richness of what is going on onstage.

    And there you go!

    I can not emphasize enough how important good event structure and design is. When you are done, thank that terrific Programme manager  for their months of effort in Programme development, identifying timely topics, the right speakers and developing the briefing notes that were sent out in advance. (Thank you Jennifer!)

    Being the MC isn’t just memorizing titles and names and the sequence of sessions. In its best and most helpful form, it is a guiding, weaving and connecting role. It helps people understand why the topic is interesting and important for them, why they should listen and why they should care. It connects the different sub-themes into a powerful whole. In creating meaningful frames, it helps the audience connect to the broader narrative of the overall conference, and invites them to draw their own learning. This is the work of the MC from my perspective.

    A gentle warning, this kind of work is both mentally exhausting (you are probably the only person in the room that is present and deeply listening 100% of the time) and physically exhausting (reread shoes part). And it is at the same time incredibly gratifying to support collective learning, one thousand people at a time, in this way. If you get the offer, take it, and bear in mind that it is more than just walking on stage on a very exciting day.

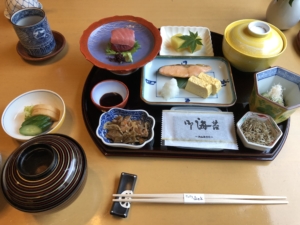

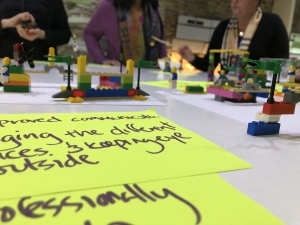
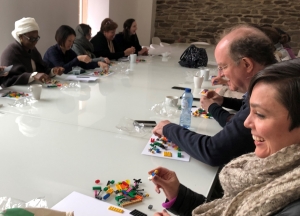
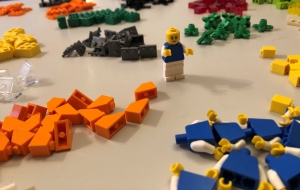
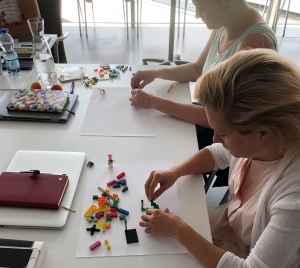
    I often get asked for interesting resources to help people learn more about Systems Thinking –  what it is and how to use it for understanding the complexity that surrounds us, and for making effective interventions for positive change. For those of us in the sustainable development community, working with this complexity is a feature of ever day life.

    There’s a new short video just out, called “A Systems Story”, which aims to introduce systems thinking and its key components (stocks and flows, archetypes, delays, etc) through a story. The example this video uses is not what we might expect to see – water resource management, the climate system, global commodities flow – the example that is uses to introduce systems thinking is love. 

    The Budapest-based start up that produced it,  BEE Environmental Communication, with team lead Sarah Czunyi, worked for the past few months to create the video with seed funding from the Balaton Group‘s Donella Meadows Fellowship Programme. Sarah was a Fellow of the programme last year and used the stipend to create this innovative educational video as a way to learn about systems thinking through trying to explain it very simply, and in a visually appealing way – all in 4 minutes and 45 seconds. 

    Whether as an eye catching start to a formal course on systems thinking  learning and applications, or a way to introduce a strategic planning workshop exercise that uses some systems thinking diagramming tools, the video can grab people’s attention and help spark a discussion about how things are interconnected, what possible influence elements of the system can have on each other, how things change dynamically and what kinds of effects an intervention might have on your system – be it love or climate change. 

    See what you think!


    This is an occupational reality that I need to remind myself about from time to time related to the work facilitators do. The resulting advice that I give myself may also be pertinent for trainers, event planners and staff members with bosses using “just-in-time” management or a firefighter approach to work.

    You are invited to join processes when they are very important.

    Leaders, teams and organizations invest in external support and help when the outcomes matter greatly – they need to gather information for the next submission of a critical funding proposal, they are bringing all their dues-paying members together for an annual inspirational meeting, once in every five years the Board meets to do strategic planning, they are trying to develop a historic industry standard through a multi-stakeholder process. These events can be milestones in the sustainability of an organization.

    What if you, as a facilitator, have all of these things happening in the same month?

    Let’s hope that doesn’t happen all the time, but it can certainly be the case that you have two or three big projects winding up very close to one another on your own calendar. Each one heating up in the weeks just before – potentially all at the same time.

    It is important, as the Facilitator, to put yourself in the host organization’s shoes and not be surprised when calls run over (maybe by as much as 1.5 hours), when they really want to see you and not just have a conference call, when they are eager to talk through an idea with you  even at 11pm at night or on Sunday morning when they are having their last preparatory team meeting. The event you are helping them with might be THE event of the year for them and they will be putting every ounce of effort into it. And they will make many exceptions to make sure it is absolutely perfect, which is great, and will invite you to make them too.

    What can facilitators do to manage these exceptions? 3 things immediately come to mind:

    1. Build in Resilience: This particularly in the form of time. Don’t schedule 15-minute interviews 15 minutes apart, don’t take meetings in 2 cities with only as much time as it takes to get between them in between, etc. Things will go over, they will be delayed because of last minute things on the host organization’s side, they will be postponed because the programme is not quite developed yet, etc. Building in resilience to take these changes (which may be last-minute-before-the-event for them, but be all the time for you, the facilitator) means keeping space in your schedule and in your head to work with these exceptions. 
    2. Husband your Resources: Try to maintain your routine even amidst these exceptions. Eat properly, exercise and above all SLEEP! Don’t wind up going to these very important events with a sleep deficit. This is another way to build in resilience so that too many late nights in a row don’t render you less than your usual creative and calm self. I wrote a whole blog post about this: Facilitators: To Your Health! 
    3. Planning, Planning Planning: And of course, this is perhaps the obvious one, but easy to short cut when you might be contacted late in a process, or when organizations are eager to save funds (understandably in the current global financial climate many sustainability organizations are particularly sensitive to this). This might sound counter intuitive, but more time budgeted for planning and preparing your event can easily mean less time needed for last minute fix-its for mission critical meetings. And again, good planning and preparation will build resilience into your system, because with all the known things planned and organized you can be more open to fielding the unexpected whether before or during the event. And unexpected things will happen – expect them! (These can be rather extreme –  I was holding an international learning event with 250 people in Moscow when 9/11 happened, we stopped everything and devoted a full day to dialogue to try to understand what was going on in the world from many international perspectives – from this, to a handful of people losing their luggage thus taking out one of your support staff members for a while to deal with that.)
    All of these things take some effort in the short term, but have long term benefits. For facilitators, like the ecosystems or humanitarian aid or precious metals our host organizations are managing, building in resilience makes our work more sustainable. 
    Print

    As facilitators (and human beings) we make all kinds of assumptions about what people want out of the workshops and processes we help them run. Some of these assumptions might be around getting results, or at least the sheer volume of results we can help a group of people generate over a day or two.

    It is typical at the end of our workshops that the walls are covered
    with flipcharts, completed templates, prioritised ideas, timelines, and next action sheets. We regularly put groups to work on key questions and then
    after reporting seek from the group their observations about the
    results  – what patterns do they see? What additional meaning can they
    derive when you put all this work together? We ask for reflections and take away messages. We might capture these nuggets of insight on cards or paper,  and quickly we have mountains of data that we facilitators
    assume are equally and fantastically valuable to the hosts of the event.

    While these ideas and summaries look like gold to us, we might instead
    encounter a programme manager who looks at the wealth of raw data and
    asks at the end of the workshop, “What am I supposed to do with all this?”

    Well, unless the process needs to be minuted for transparency or
    accountability reasons (and sometimes this might actually be the case), I see no reason why every single post-it note or flipchart needs to be typed
    up and put into a long, dry verbatim report, that potentially no one will use. Sometimes a simple photo report (like the ones I make in Penultimate – see blog post Fast and Easy Workshop Reports with Penultimate) will do as the archive of raw outputs. This can then be crystalized into a more useful and meaningful short report, with decisions and next actions concisely summarised.

    We all need to remember that workshop activities can serve different purposes. Some might produce concrete written results, but some might be designed to produce softer, more intangible results, such as team development, warming up for a creative brainstorming, or helping to shift mindsets or attitudes. These latter activities might come and go with no written trace, with results only to be experienced in a more harmonious working atmosphere or a particularly innovative outcome later on.

    Some discussions might be most useful for peer learning, so people might take their own notes of what is most useful to them. If the group has a central repository for group learning, this could be still be archived for on-demand learning in the future. In which case perhaps only highlights, contact /persons and places to go for more information need be captured in a searchable format (sent by email and/or uploaded on an online platform).

    Sometimes the results produced are for the participants and sometimes they are just for you. For the latter, it might be most useful to let “results” pass in an ephemeral way, or with some discreet note taking on a notepad by the facilitator or project manager. Such as the answers to the following questions: How easy was it for you to contribute to this exercise? What did you enjoy about the day, what would you like to be different tomorrow? No need to capture these things on a flipchart. Unless of course you want to refer back to it again at the end of the next day to see how you did, but that seems heavy handed unless the process of the day was a train wreck (and hopefully that would NEVER be the case).

    So as facilitators we might sometimes get a little carried away with
    writing things down and capturing everything.

    And our host organisations might get carried away too. It might be the case some times that our counterparts  think they want to know something but really they don’t have the latitude to make the changes that might arise from a highly generative exercise. Or they might be working with a different timeframe (short term vs. long term) or they might have other parameters, such as budget or human resources, that pose boundaries that need to be carefully explained to a group before it starts its work. As without careful consideration of these, the results are rendered almost useless.

    So the discussion of results forms an important part of the
    consultation stage of a facilitation design process. It needs to happen at the overall workshop level, but also for each session and activity. Facilitators much check their assumptions –  this conversation is a time
    where the facilitator listens deeply, and asks good questions. For
    example, for a session that aims to share “best practice”: Where will the good practice lessons generated go after the session? Is it for individual participants’ learning or should it be captured and archived? If the latter, then where will it be archived and in what format? Who will use this later? How will the results be fed back into the process in the future? And so on.

    I think we should always be very clear what results we want from a
    workshop discussion, an exercise, from group work, etc. Every session conducted should have a purpose, and the answers/outputs/results are in some way useful for the process.  Without this the whole exercise can become very expensive  busy work. Whether results are captured for long term use, or whether the discussion just helps move the group mentally from A to B, this should be crystal clear to both the facilitator and the workshop host.

    Whenever you are convening people you should always want results; whether they are written down or not doesn’t always matter.

    As Facilitators sometimes we get asked to prepare reports from our workshops. Normally we at Bright Green Learning encourage the teams to do this as report preparation is an excellent learning opportunity and helps the team to process the results of the workshop in a more in-depth way. (See our blog posts: Don’t Outsource It: Learning from Reporting and More Learning from Reporting: Using Reporting for Teambuilding)

    And it is true that when you use very interactive workshop methodologies, the meeting room after your workshop can look like this:
     Penultimate Blog room
    With walls covered with flipcharts, cards and post-its people usually say “what can I do with all this?”

    Typing them up is the first thought, and that can take a very long time and often be challenging to organize (this of course is also part of the learning process from the workshop – identifying what is useful input and important for the next steps in the project or process and what is not.) In my experience, you will rarely get a volunteer willing to do this! I also find that typed flipcharts, when they come back to you in Word format, can lose a lot of the context, feeling and creativity that went into the workshop brainstorming and discussions that produced them.

    Another option is a Photo Report, and this has been done for a while. I remember when we took photos with our digital cameras, then downloaded them off the data card, pasted them into PPT and then inserted the photo slides into Word documents, fighting formatting and creating mega-heavy documents that in the end we had to distribute by USB stick as they wouldn’t pass as attachments. (I will fully admit that even then this was probably not the most effective way to do this). Things have gotten a easier with smart phone and compressed files etc.

    However, EVEN easier now is the winning combination of an iPad, writing stylus and a nifty app called Penultimate.

    Ipad and stylus
    Penultimate was recently acquired by Evernote, which I also love, although even before this partnership I was a Penultimate fan.

    To use Penultimate for a quick and easy Photo report, you just need to start a new Notebook in the app:

    Start a new Penultimate Notebook

    Once you are in, you can take photos of your flipcharts, your cards work, your exercises using the photo icon on the page of your notebook.
    Penultimate photo icon
    Once you have the photo there on your page, you can resize it, change direction, copy it to multiple pages, and best yet, you can write on or around it (as above!)

    I use my notebook to create a living memory of my workshops, from both the content point of view, and the process. For example…

    I capture notes and maybe an important slide from a presentation that I want to remember:
    Penultimate screen with writing
    I capture a workshop exercise in action with some of the highlights of the discussion (and you can write more neatly than I did here!):

    Penultimate REnatus

    I record the results of a card activity theme by theme:
    Penultimate cards

    I can remember how I set the exercise up and how it ran:
    Penultimate Exercise
    And more!

    The number of functions is pretty rich for the purpose of creating a Photo Report from a workshop.

    As you can see you can select from a range of 10 pen colours (including white and yellow for writing on dark photos as on some of the photos above). There is also a selection of three line thicknesses, so you can make titles stand out or put emphasis on particular words or images. If you make a mistake you can undo it, or change your mind and re-do it. If you like lined paper, plain paper or graph paper, you can change it at any time.
    Pen icons
    As you can see, I use the photo function most heavily. Once I take the photo I always change the size of the photo, move it around, and sometimes put multiple photos on a page (see an example of this in the photos above). If you really need to read the text however, then 1 per page, expanded will work best.

    You don’t even have to worry about taking your photos in order. I walk around and snap images of key flipcharts or processes with my iPad  when I have a free moment during my workshop, and then I reorder them afterwards with the drag and drop feature – which is very much like you would use to change slide order in PowerPoint in the slide sorter view.  If you forget your iPad, you can also use your iPhone for the photos, but then you have to upload them to your iPad photo archive by email afterwards and then insert them one by one into your Penultimate Photo Report. It takes more steps, thus more time, but is relatively straight forward – it also means that other people can send you photos to incorporate.

    Once you are happy with your Photo report, you can send it as a pdf by email (if it is not too too big – it can actually quickly get too big for this in my experience), or you can open it in Dropbox and then share the folder, other options include Skitch (also an Evernote product) and Day One (a journaling app). Because I am also an Evernote user, I have it sync to Evernote and then I can just share the URL for that Evernote file by email with my workshop participants. This step will take some fiddling around. I open it in Evernote on my iPad, then open Evernote on my ipad where I then see my Photo Report. Then I sync my computer Evernote until I see it there too. At the end of all this it is easy to use the “Share” button to get a URL that you can paste into an email. It sounds more complicated then it is!

    Overall, if you are pretty quick with your photos, and then any notes you want to make on them, you can do it all in about 15 minutes –  an immediate and super quick memory of a workshop. If you want to make it very pretty and take it on like a scrapbooking exercise, then of course it can take longer, but it feels creative and fun! Gone are the hours and hours of typing up flipcharts into massive, boring Word document Workshop Reports – of course, you could still let someone else do that after you send your Penultimate report. They will thank you for making it more manageable than struggling with a huge roll of unruly flipchart sheets and a teetering stack of facilitation cards!

    stack of old papers

    IMG_9644CA17GYIE
    Today I had a real “You learn something new every day” moment – how often do you get an invitation to visit a nuclear power plant?

    This afternoon I joined some Balaton Group friends to take a walk through the Zwentendorf nuclear power plant, located on the shores of the Danube about an hour outside of Vienna.
    Our guide, the infinitely knowledgeable Wolfgang Kromp, Professor at the University of Natural Resources and Applied Life Sciences in Vienna and member of the Austrian Nuclear Advisory Board (and also a BG member), is an expert in all things nuclear and this historic plant in particular.

    We started our visit with a “marketing video” in the main building. This video was made in the 1980s after the results of a referendum of the Austrian people prevented the newly completed plant from going into production. With a vote in November 1978 of 49.53% YES and 50.47% NO (a difference of under 30,000 votes), the plant which had taken 6 years to build with parts from all over Europe and at a cost of over a billion Euros, would split no atoms.

    At that time, in 1978, the plant went into “conservation mode” for 8 years; that is, the workers carefully stored and maintained the machinery, and kept all the engineers on site waiting for a change in policy. But by 1985 it was evident that this would not come. At that point, the company started to sell off parts to various other power stations in Europe to recuperate some of the losses. Interestingly they started to buy parts back in 2005 because they repurposed the building into a nuclear security training center and a museum. Some parts came back, but some didn’t because they had suffered too much damage to be safe.

    IMG_9567[1]
    Our visit then took us over to the plant, where we entered the main entrance and saw where workers would come in and change out of their street clothes into bright yellow underclothes and a yellow or blue jumpsuit uniform, before going into the plant.

    IMG_9569[1]
    When they left for the day they would change out of their uniform (these clothes could never leave the building), wash and take a shower.

    IMG_9572[1]
    After that they had to stand on a scale and put their hands in a monitoring machine which would monitor gamma rays. If they were ok, they could leave and if not, they would suffer the “torture” of a hard body scrub, as Wolfgang put it, that would take off what seemed like layers of skin.

    IMG_9580[1]
    Then they would go up in the elevator to their work stations. This was interesting – nuclear power plants don’t have floors, they have elevations, so you go up to the top at 39.4 meters, and then come down to 35.5, 32.0 etc.

    We went up to the top of the plant and walked down to see the different parts of the plant.

    IMG_9588[1]
    At 39.4 meters we saw the upper hall (this is the equivalent of what was destroyed at the Fukushima disaster) and here we could look down into the reactor vessel, which would have been the core of this 700+ megawatt plant.
    IMG_9590[1]
    We saw the (empty) fuel rods as well as the pond for spent fuel rods (water would have filled these ponds to contain the radiation). 

    IMG_9584[1]
    In a working plant, the spent fuels rods are moved from the reactor core after four years of use (every year 25% are moved), and taken underwater by crane to the spent fuel pond. Here they would be kept until they could be moved, still underwater, to another pond (this poses a problem as often there is nowhere else to take them).  Most of the radiation in the plants is in these ponds. In the below photo these cement cavities would be filled with water – the far pond, accessible through the narrow vertical door between ponds, is where the spend fuel rods would be stored until moved further away.)

    IMG_9592[1]
    Water is used throughout the plant for cooling, containing, condensing. What I learned as well is that nuclear power plants are very inefficient. They only capture about 30% of the energy produced and the other 70% is released into the atmosphere or in heated water. For example, this 700 megawatt power plant would lose another 1400 megawatts into the environment in the form of heated water into the Danube and heat dissipating into the cooling towers and into the atmosphere. Because nuclear power plants are so far from cities, you cannot really capture the waste heat as it is not all that hot (300C compared to 600C in fossil fuel plants) and also costly to move long distances, among other problems.

    Here’s the Danube right outside the plant.
    IMG_9602[1]
    As we went down in elevation we saw the top of the containment vessel.

    IMG_9608[1]
    The turbines…
    IMG_9614[1]
    And into the control rod drive room (this is a translation from German and looked very much like a scene from Alien to me).
    IMG_9616[1]
    IMG_9621[1]
    We finally ended up in the control room, where three different teams of 3 people would take eight hour shifts to keep an eye on what looked to me like a lot of machines that go “ping”. Right out of the 70s.

    IMG_9624[1]

    IMG_9626[1]

    IMG_9629[1]

    Overall, it was a rather sobering experience. Everything demanded such precision, such fine tuning, quick reflexes and the ability to look at hundreds of dials and data sets at any moment. How on earth you could not make simple human mistakes in here I cannot imagine.

    Zwentendorf as a nuclear power plant was built but never opened as an active plant. Today it takes visitors and students on Fridays and is booked 18 months in advance. You can even take a virtual tour of the plant on the new owner’s website. Along the way it has been the inspiration for many unusual ideas for its use (such as a museum for “senseless technologies”, a children’s adventure land, a modern cemetery with the buried in glass cubes, and a venue for some Hollywood films). Today it is a renewable energy installation with citizen participation (with its 1300 solar panels sold out within a few days), a security training center, and a museum to remind the Austrian people of this decision so many years ago.

    What a fascinating visit – with great thanks to Wolfgang and the team at ENV for hosting us!

    IMG_9555[1]

    Like feel-good movies, Jane Austen novels, and rocky waterfalls heading for their pools, workshops are often built around divergence and convergence.

    Everything starts well enough, our heroine and hero bump into each other, there’s a fancy dance or a lovely stream meandering through a meadow, our workshop begins with laughter and high expectations and settles into its comfortable context-setting phase. Eventually Mr. Darcy jumps into a pond and things are looking bright.

    Then we start to brainstorm, our stream gets a bit faster and it crashes over the waterfall across hundreds of rocks as it plummets. Mr. Wickham rides off with a younger sibling and all seems lost. Our brainstorming produces lots of complex messages, ideas and contradictions. Time is tight and we have to stop for lunch.

    Will it ever come together? Will there be a lovely cool pool at the bottom of the waterfall? Will there be a wedding at Pemberley? Will we get some resolution to our strategic workshop problem that no one seems to agree upon?

    Well, therein lies the craft, at least when it comes to workshops and matters of Regency-period novels (waterfalls are nature’s choice, sometimes workshops seem like that too).

    How can you get that convergence, after blowing something apart so thoroughly to explore the broad diversity of participant views, or to probe taboo matters of sexual politics in the 19th century? Or for some geologically unknown reason (to continue with our waterfall metaphor here because I liked that picture up there and it kind of works).

    To get convergence, you definitely need time (especially if you do not have gravity on your side). Depending on how much divergence there is, you may need hours, many pages and many chapters, to pull things around. And if you don’t have this time or page count, or can’t get this, what results – that open or almost done feeling –  may feel slightly unsatisfying. Instead of coming together in a deep blue pool, the waterfall disperses and filters through gravel out of sight. Lady Catherine de Bourgh wins out and Elizabeth stays home alone tatting into her golden years. Our workshop thoughts and ideas stay on 20 flipcharts instead of being synthesised into one perfect one.

    I just left my workshop. We spent a lot of time today exploring many important issues, getting pages of great ideas, and diverging satisfyingly throughout the day. But for each big issue, we got close but could not quite reach the convergence we craved. Time was definitely an issue, we didn’t quite have enough of it, not quite enough chapters to let our thinking take its natural course, and a couple of surprise additions. Perhaps less issues to tackle would have been better with more time to get them to the happy end of their story, to their deep blue pool.

    We still have tomorrow, but I go to bed tonight feeling a little like our heroine is still sitting at the window expectantly. With some good behind-the-scenes work, a little redesign, and some bilaterals, I hope we will see Parsifal coming up the lane tomorrow…  (yes, I have to admit, I googled the name of Mr. Darcy’s horse!)

    If you love everything about learning, whether formal or informal, and you haven’t already seen it, you really need to take 7 minutes and 48 seconds right now and watch Rita Pierson’s TED Talks Education talk called  “Every kid needs a champion” (recently broadcast on PBS 7 May 2013).

    I learned about this video only a few days ago on NPR’s TED Radio Hour – this is a curated, thematic one-hour programme that mashes up a number of TED talks, compares and contrasts their messages and goes a bit further with their authors.

    This particular episode was called Unstoppable Learning, and Dr. Pierson’s NPR conversation explored what role relationships play in learning. As you can imagine I pricked up my ears at this. How people learn best is one of my enduring sources of deep curiosity. And developing good relationships and “being nice” are values that our Bright Green Learning team hold dearly. And of course you can’t just appear to be nice, you have to really be nice, caring and interested in the people who are doing the learning (because after all, we are learning too). I was just trying to explain this to a potential new collaborator a week ago. Dr. Pierson put her finger on it in one of the most memorable quotes of her talk, “Kids don’t learn from people they don’t like.”  This is a profound observation from a career educator (and in my experience it also holds true for adult learners).

    Rita Pierson also argued for teachers to take a more positive and appreciative approach with their students, even those – or in particular those –  who are not excelling in their work. She gave an example of a time that she gave a student a +2 and a smiley face, instead of minus -18 on his test. She said that’s because -18 “sucks all the life out of you” and +2 says “I ain’t all bad”.

    I love this reframing, which is so motivating and still somehow such a rare approach for educators and learning practitioners to take. There is a reflex in many educational contexts to focus on what learners missed or need to improve, rather than on what they are doing right (and as they say in Appreciative Inquiry, in every organization or situation, something is working, even if it is only +2 out of 20).

    Rita’s short talk brought tears to my eyes. I also grew up the daughter of two educators and see how students were touched by their work. Her words sounded absolutely right to me and I realised that she had articulately described my values around learning and education and those I would hope all teachers would take (including those teaching my own children).

    I wanted to write this blog post to remind myself of where I could go for inspiration in my own learning work, and to connect to Rita’s talk so I could listen to it again. I didn’t know when I started this research that I would also be writing it in memorium, as Dr. Rita F. Pierson died unexpectedly last Thursday, on the day I discovered her on the NPR TED Radio Hour. Her death has left a gaping hole in the progressive educational community. She was a real thinker, shaper and feeler in the field of education and someone that everyone working in learning should listen to…have YOU listened to her amazing  7 minute 48 second TEDTalk yet?

    You can read more about this remarkable woman and her impact in Remembering Educator Rita F. Pierson on the TEDBlog.

    Years ago I regularly went fishing with my father, who was and continues to be a real outdoorsman – someone who seems to know how to do and catch anything in the woods, lakes, fields and streams.

    I followed along, doing my best, and apparently listening (although that is not what children normally do in my experience) and learned how to cast, toss my bait into the little space between the bank and the shady dock, bait my own hooks and neatly clean my catch.

    Now fast forward 30ish years – through university, several international moves, 70+ countries of work-related travel, and not much fishing to speak of – I am begged to go fishing by my own two sons. What do I recall from my childhood learning?

    My first observation is that if you don’t use it, you actually don’t lose (at least completely). I can remember how to string a rod, tie on the hooks, sinkers and bobbers. I know that fish hide in shady areas, or swim very deep when the water is too warm. I know that you can’t fish at midday when the sun is at its hottest, and that early morning or dusk is better to catch feeding fish. I also know that if you don’t catch anything in one spot after a while, you need to move your fishing location, and keep moving, until you find the fish.

    But, we are still not catching any fish over here, four thousand miles from my father, the resident expert.

    I think there are a few things impeding us. First, I think that I am struggling with a new application of this long ago learning  – a brand new context. I am no longer walking through high grass to Ohio farm ponds. In this Swiss lake, unlike the Great Lakes and ponds where I fished as a kid, I don’t know much about this lake, its bottom topography, temperatures or depths. I don’t know all the species of fish, I don’t know what they eat (salmon eggs, worms, doughballs?) and when they eat it (not so much the time of day, but the time of year – are they spawning?) This latter would never cross my mind, but when I described to my father that we had seen big carp and couldn’t get them interested in our bait, the first thing he said was “they might be spawning”. I googled it and indeed carp spawn here in late May and early June depending on the temperature of the water. I didn’t know that. Clearly some of it a good fisherman who had fished all over would figure out – like a lifetime practitioner of any field would intuit some things in a new context.

    So there’s another thing – I built up some good experience of fishing long ago, but I don’t have decades of watching this water, understanding the fish and their behaviour, and knowing the broad range of tools (baits, spinners, lines) that a veteran fisherman would have (nor the graduate degree in freshwater fishery biology that my father has.) These things come from much more experience, and a lot of trial and error. My father no doubt took all the trial and error out of my early fishing experiences (kids get bored so easily), so some of this I will have to repete myself. And I will have to be curious, instead of irritated, when things do not come out the same as they did those long ago years. I will have to test a few of my own hypotheses, and remember what works when it does. It would also be good to make friends with a local fisherman who might be able to give me some clues to fishing in this particular ecosystem at 46.2 degrees north and 6.15 degrees east.

    So what does this tell me about learning? Well, even when learned at an early age you can remember some things and even develop muscle memory for physical activities, like casting and reeling in my case. So you will not start out again as an absolute beginner. As you use this memory, more things will come back, although they might not be exact memories. And early experiences and memories that are good will no doubt drive you to keep trying, even when the new context is different, and potentially produces different results than the past.

    For me, when I am experiencing this, I will try to:

    • Acknowledge that, although everything seems familiar, I am out of my original context for learning so will pay particular attention to what I am doing and challenge any old assumptions;
    • Seek local expertise – get a local “guide” who can help me, and help translate my knowledge into something more appropriate for the current context;
    • Try things – which is fun, if I look at it from a that perspective – because I have a learning curve again (even if I didn’t 30 years ago).

    Ultimately I guess it’s about relearning. I found this interesting quote by futurist Alvin Toffler, “The illiterate of the 21st century will not be those who cannot read and write, but those who cannot learn, unlearn and relearn.”

    So keep on learning (and relearning), and let’s go fishing!

    Say you run a small social enterprise that is services-based  – like a small learning and process facilitation group that works on sustainable development issues for instance. Then you really need to work to manage the throughput of projects so that you can maintain high quality, uphold your social values and work within the capacity of the team. 

    That might sound easy, and it is, if you have a good underlying policy for the kind and amount of work you accept. We sat down recently and made a checklist of things that we would like to be true in order to say “yes!” to projects. 

    Because we are working mothers part of our social values include time for children and families, our sustainability values help us focus in on environment and development projects, and our learning edge means that stretching for partners and us is also a goal. Because we’re small, we need to watch the scope of work, and because we work in multi-faceted processes, we know that sometimes there are tradeoffs, 

    Here’s the checklist we generated. When these things, or the majority of them, are favourable, we can say YES! 
    • The project deadlines and events don’t clash with important family birthdays, events, school holidays or another booked event;
    • There is sufficient time between facilitated event delivery dates to recuperate energy, change gears (and change clothes) i.e. not back-to-back events – we’ve done some of these and they are hard!
    • The project aims to contribute to sustainable development – this can be broadly defined (environment, natural resources, green economy, population, climate, conservation, etc.) and can be any sector (business, government, UN, international NGO etc);
    • The project has potential to be high impact – that is, there is scope to maximise the outcomes through our input (e.g. good learning or process design, good facilitation and delivery etc.) This is important because sometimes we get asked to “preside” over or only moderate at events and are brought into a tight process in the very final stages, then our contribution or ability to use our tools for learning is small and cosmetic. In this case, we should probably turn it over to someone who specialises in more formal moderation or stage work;
    • The project stretches us in some way, and also if possible the project partner.  We love to learn, both about sustainability subjects as well as using new tools, or learning about new partners and sectors. We also like to bring new things to our partners;
    • It is within our capacity and scope. Although we do regularly put together teams to deliver larger projects, we need to make sure that the scope of work fits within our current capacity to deliver, even if that is just taking on management for a larger team;
    • The reporting for the event-based project is conducted by the project team. We are happy to contribute ideas for a final report for an event, but we don’t take on event report writing for a number of reasons which are written up in more detail in these blog posts (effectively it externalises the team’s learning): Don’t Outsource It! Learning from ReportingMore Learning Through Reporting: Using Reporting for Teambuilding and more provocatively Why Your Facilitator Can’t (Always) Listen
    • If there is travel involved, it meets out travel policy. This includes cabin indications for long-haul flights and travel days coverage for long journeys so that we can work along the way. This is most important when there is a period of heavy travel, and because with small children we prefer to spend the least number of days away from home and so don’t tend to add on a couple of days before an event to relax and recover after a long trip; 
    • Our small size also means that at the moment, we happily provide costing estimates for projects on request, and that on larger bidding processes where substantial design inputs are needed to bid, we tend to send these on to others in our network of facilitators and trainers; 
    • The project fees comes within our standard rates. We have a sector-differentiated rate schedule that we use and maintaining this helps us to do a quantity of pro-bono work annually, whether it is adding a couple of pro-bono days onto a contract for an NGO of CBO (community-based organisation) partner or run a full workshop for a non-funded network or other event (like our TEDxGeneva Change event last year) or provide design inputs or advice, etc. 

      In addition, and this is not so much a criteria but an added bonus, we also love working repeatedly with the same partners, which lets us use our learning from past projects to make the onboarding process shorter and more economical for the partner, and lets us go further with more nuanced knowledge of the dynamics of the organisation.  

      When all or most of these are a “Yes” then that makes is easy for us to say “Yes!” 

        If you’re like me, you have a drawer somewhere of gadgets that just didn’t quite make it into your daily routine. Or you have some apps on your iPhone that you tried but never got into the habit of using and now you are not exactly sure what to do with them.

        I wrote a blog post a while ago about “Domesticating Your Facilitator” which used the theory of domestication (how innovations are tamed or appropriated by their users) to think about how to onboard a facilitator in an organisation which has not used one before. (I also had to laugh because in that blog I mentioned a  previous post I wrote in 2006 called “New Technology: It’s Not Just for Christmas” where I talk again about domesticating a new video ipod (sic) that I received for Christmas and unfortunately I am pretty sure that this toy has indeed ended up in that drawer.)

        I am very curious about the process of appropriating new things, so that they become useful to us and not just paper weights or pretty icons or interesting titles on our e-bookshelves, and this includes new learning.

        This is on my mind in particular this week because I’m in Bangkok running a Training-of-Trainers (ToT) workshop where a group of smart trainers from around the region are being introduced to a new set of training modules on ecosystems for business that includes hundreds of slides, dozens of pages of facilitation notes, and a new sequence of presentations and activities, quizzes, case studies, icebreakers, discussions, group work etc.

        All in 3 days.

        And the last day of this three is a demonstration of one module that they will run themselves with a new group of interested and eager learners from outside our ToT group. So my role is to set them up for success and to help them appropriate this information so that they can use it immediately on Friday, and especially thereafter.

        For me that is a part of the domestication process. Like my video ipod, receiving it and letting it get dusty in my desk after an initial burst of enthusiasm makes it much harder to use. For trainers, participating in a ToT, where you hear and work through some of the material and then go home and put that enormous binder on a shelf in your office until weeks or months later when you deliver the training (the likelihood diminishing as each week passes) is akin to putting that gadget in a drawer for “future use”.

        When you have an opportunity to deliver that material on your own, you will take it off the shelf, open it up and probably in the middle of the night the evening before your training (but let’s hope not) and at least on your own without the ToT trainers and your peers in the room, you will have to learn it all again by yourself. At that point, unsupported except by strong coffee and Google, you will try to domesticate the material out of sheer necessity.

        So how can a ToT programme change that pattern and help trainers move that process up to during the ToT (and not afterwards)?  How can you precipitate that moment when someone moves beyond passively accepting the material to making it their own?  Turning it into a tool that actually works for them, and domesticates it so it is a part of their life.

        Here are a couple of things that we have built into the design of our ToT to help do this:

        1) Let people read the materials
        This might sound glaringly obvious, but it’s not. We often try all kinds of things to get our learners into that big manual. We send it electronically in advance, or portions of it. We hand it out in hard copy the night before and ask people to leaf through it (after the opening dinner and reception and on top of their jet lag). We page through the manual with them in plenary and tell them what’s in it. We do an exercise from it on page 13 etc. All these things are good of course, but it is actually amazing what happens when you block out a half hour or an hour in the ToT agenda early on (like the first morning after introductions and context setting inputs) and just give people time in the workshop room to read through the materials- to see how they are organised, the logic of presentation, and the content itself.

        2) Have learners identify for themselves areas where they want more inputs
        I combine this reading exercise with a job aid (a worksheet) that asks the trainers to note down the topics on which they feel they would need more support and information, and where they have specific questions (e.g. Day 1, Session 3 of the training, I have question X.) Their questions are organised on my worksheet into content questions and process questions so they think about the materials from both of these points of view.

        This action gets them even closer to the materials because it asks them to imagine using it and identifying aspects where they have a level of comfort already and where they don’t at the moment. Thus narrowing down where they want more (as opposed to me deciding this for them and probably getting it totally wrong). Testing the content against their existing competencies shows them that actually they know some of this already, and that there are spots where they could usefully learn more in order to use it effectively.

        3) Have learners share their “learning edges” with peers
        Once people have identified the areas where they want to learn more, their “learning edges” (because not everyone wants to admit where they don’t know something), I send them on a “Pairs Walk”outside the room. On this walk, they use their worksheet and materials to share the questions they have with one other person in the safe environment of a comfy chair in another part of the venue or outside in the grass. It is often at this point that your partner can answer some of your questions – point to a place in the manual with the answer, or share an experience they have had that speaks to your question. This peer learning exercise has many merits in addition to getting some answers to your questions; it demonstrates the value of the peer network for support (so even months down the road, you might shoot an email to one of the other trainers to answer your questions), it shows you even more about what resources are in the material, and gives you and your peer the opportunity to “display ownership and competence of the materials” (which is a part of the “conversion” stage of domestication.)

        4) Aggregate the remaining questions and answer them together in Open Space
        Now that some of the questions are answered, what remains are the trickier or less obvious ones. Now back in our ToT room, I collect the remaining questions from the Pairs on cards and we cluster them to see what categories of questions trainers have left. The categories that emerge lend themselves beautifully to Open Space Technology (OST) sessions which can now be scheduled and run to discuss and answer these questions. (I have written a lot on this blog about applications of OST: Opening Space for Conversation (and Eating Croissants), and Training Camp: An Un-ToT Design as it remains for me an incredibly useful framework for learner-centred workshops.)

        Anyone can host one of the OST discussion sessions. It can be one of the ToT “master” trainers, or can be one of the participants if they feel comfortable to do that. Running three or so in parallel means that the learners can choose which to attend and customise their learning to exactly what they need. They can stay with one group or move around, giving them complete control over how to use their learning time.

        5) Follow up with group and individual learning capture
        For each of the Open Space conversations I create an RLO (reusable learning objects) template – which is flipchart template that invites the group or conversation host to record resusable learning. This is not a running record of the discussion, the aims is to pull out things for people to remember and (as in the name) reuse. It also means that people who were not in the discussion, because there are several in parallel, can benefit from the useful nuggets that come out of the discussion. You can post these templates for a Gallery Walk which can be done in pairs again, or use them for a very brief highlights report back the next morning.

        I usually run the above sequence, or something similar, about three times in a ToT, because as one question is answered others crop up, as people really dig deeply into the materials. And of course as the demonstration course with the outside participants starts to loom on the horizon (offering another important “conversion” opportunity to participants.)

        Participants at our ToT yesterday were delighted with this sequence. It feels different. It feels like they are coming to the materials, rather than the materials coming to them when they get to decide what they want to learn rather than a ToT trainer deciding what people should learn. Even if the two match up pretty well, the level of engagement and active appropriation of the materials is completely different. Participants are given, and take, responsibility for their learning in this kind of process. 

        We still have 2 days to go on our ToT, and will have another two OST sessions today. By Friday when our 25 new external participants walk into the room and the trainers deliver Module 1 of our series to them, we should have made good progress in helping the trainers domesticate this new material for themselves – making it more familiar, more useful and personal, so that it doesn’t get stuck in that drawer (like that ipod) forever.

        What makes some people look down a steep and slippery mountain and say to themselves, “Weee heee, I can get down this slope REALLY FAST!” and yet fill other people with absolute terror?

        What makes some people approach a public speaking event, standing on a stage in front of 900 people, with excitement and anticipation, and give other people the cold sweats several months in advance of the event?

        Part could be fear of the unknown (although for my son, he approaches every ski-able mountain with the same glee, whether he has been down it already or not). Certainly some certainty about what is around the corner, or down the hill, or some familiarity with my audience, is helpful. You can check out the plan, get some local knowledge (who’s been down that hill or worked with that group before?), do what you need to to inform yourself about what is coming.

        Part could be confidence in your ability to handle new and unexpected things. This could come from a great deal of practice, so taking hours of lessons, clocking hours of snow time, and getting back up over and over again can help (if you don’t hit a tree and break your arm one of those times, which can set you back both physically and mentally, let me assure you).

        This also works with public speaking and facilitation – after I have done a run of workshops, I feel like I start from a position of confidence in front of a group. And even after a dud workshop session or presentation for whatever reason (and we have all had them -my first Toastmasters Table topic was a real blooper), you need to reflect on that and try to remember more of what you learned next time (lean forward, dig in those edges, prepare yourself, keep cool). Learning from more experienced speakers and facilitators (as well as skiers) is a great way to learn – be it in lessons or from mentoring/shadowing/keen observation.

        Part could be sheer bravado, but I am not sure how I can map that over to public speaking or facilitation – except that if you believe it enough there might be some self-fulfilling prophecy there. This might relate to just that instinctive feeling that you can do something; that you have the right tools and equipment and muscles, and master them, you have good general awareness, and feel that normally when you try something and give it your best, it works out. (This could be a pre-tree collision feeling, but can come back with some additional effort and if you don’t give up, I am assured.)

        All I can say at this point, is that I look at an audience at a workshop, or in an auditorium with much less trepidation than I do that mountain slope and I’m doing my best to apply my learning from one to the other!

        In the learning field, especially when the approach is learner-centred, we talk of the “learning journey” that people go on as they build their capacity/understanding/competency in a new area. We may also use the words “learning narrative” to describe this learning process to others.

        It’s interesting to think how a learning practitioner builds his or her ability to design a compelling learning journey. And I wondered today how storytelling and story writing might help us…

        If you look at the structure of a story and that of a learning process (let’s take a week long workshop for example) you might find some of the same steps along the way.

        Where a story might introduce the characters at the beginning, in a learning course you would introduce both the participants on the learning journey (e.g. other learners in the room), as well as the issues that will be playing a big role in the week.

        After introductions, you might have some time to get to know the characters, including their backstories and ambitions. In a learning workshop you might at this stage have some group development exercises to help people to get to know more about their colleagues, and also go deeper together into the issues and themes of the workshop. As in a good story, all would not be described in a linear or obvious way; you would discover interesting new things, facets and added complexity, as you read. In a workshop it could be the same, new aspects of the theme would be uncovered as the group digs into it and adds their own different perspectives to it (e.g. through group discussion and work, rather than only presented through straight lecture format).

        Then, just when you get comfortable (hey, I get this stuff!) there needs to be a challenge – some tension in our story (and our learning) – what ever will our heroes do?!

        (And of course there might also be some antagonists – in workshops they call themselves “Devil’s Advocates”:-)

        Our challenge may be a real community challenge-like transboundary water conflict or unsustainable fishing practices – to which the workshop participants, with the community members, are trying to contribute some thinking. It might be a learning case study to solve together or a U-process that helps them reflect on a problem, perplexing issue or an unhelpful paradigm. At this point in our story, and our workshop, as we try to overcome the challenge, passions and emotions may be high – can we do it?

        Yes we can! (At this point the ending of our story may be personally biased, I tend towards resolution and happy endings, and I think that learning environments often benefit from the same). In our story, this can include that ending summary that we see when the characters get together and talk through what happened (like at the end of Secret Seven books or Scooby Doo episodes). In our workshop it may be a final report back on the conclusions of the group work, presented to the community or to each other. This could be followed by a collaboratively built summary reflection on what happened and what people learned, and some final words.

        In stories, as in learning, there are lots of interesting ways to make the narrative exciting for the reader (and workshops for our learners). Unusual and complex situations and scenarios (who gets the land: the farmers, villagers, foresters or loggers?), thought experiments, seeing things from different perspectives, excellent questions, incredible backdrops (I once held a learning workshop on a beach in Thailand, at a wastewater treatment plant in Morocco, and a mountaintop in northern Mexico) and more.

        So, where can you find insight and inspiration for the design of your learning narrative? Read any good books lately?

        I use Evernote (“Remember Everything”) for many things from tracking my kids’ football schedules to contacts for my favorite conference centres, but the most useful things for my learning and facilitation work include:

        1. Keeping track of photos that I take at my workshops, including all the flipchart templates, job aids, handouts, game descriptions. I use these both for reporting purposes, but also so these materials become reusable (thus I don’t have to think again about how to frame this or that activity, or can write over a formatted job aid etc.)

        I also have a great set of individual visual facilitation icons in there that I created for myself during a training course I took. Now I can scan that archive to remind myself how to draw those little star people holding trophies. The great thing about Evernote is that you can search text in photos, so I can find things easily again (even more so if I write the client’s name or session key word on the flipchart itself before I photo it).

        2. Keeping track of articles that are useful to my work. I had an enormous stack of printed articles that I could not part with sitting on the floor of my office for years. One Saturday I went through them all and either found them on the internet and copied them into Evernote, or took a photo of them (you can also scan them) and put them there.   I recycled my paper stack (which I could not search) and now have both a clean office floor and a great archive of articles (which I can search). Some were from as far back as 1984! Almost everything is on the internet these days – even 2002 editions of Water Resources Impact Newsletter which featured a special issue way back then on Distance Learning and E-Learning in Water Resources Education, interesting from a historical perspective on this fast moving field.

        I wrote about this process in a post called What to Do With a Stack of Reading? Create a Personal Knowledge Management System. I could always google, but with my personal archive, I can be sure that every one of the 269 article there is relevant for something I am doing.

        On the articles, just a tip, after the first push to input existing hard copy, now it is easier –  I have installed a button on my browser which will let me instantly clip an article and automatically put it into Evernote. Because I can have certain notebooks synced so that I can access them offline, I can do my research on the plane if needed.

        So enough about me, I wanted to write this post to point to a set of daily tips that are being written on using Evernote. The first two are linked below, and you can follow the others on Damian’s Blog: .net from Geneva, Switzerland:

        Evernote Tip 1 is: You say: “I like Evernote, but I’m not sure I’m using it correctly” – I say “don’t worry, there is no one ‘right way’ “

        Evernote Tip 2 is: What is an Evernote Notebook? So what if I have 80 notebooks?

        Apparently there will be 31 of these being written daily this month (but timeless). By the way Evernote is free, and for inspiration you can check out the Evernote Trunk for cool examples of how people are using it, like with IdeaPaint which you can use on your wall to turn it into a giant whiteboard, then take photos of your drawings and ideas with your phone and store them in Evernote, which you can then search.

        I won this gnome two years ago, a prize selected by my cousin who was organizing our annual Ohio family reunion. It was the gift for the family member who had travelled the furthest, and as I had come from central Europe, I easily won this award, and she knew I would. She had picked this piece of tchotchke for both me and for herself; our sensibilities were similar, and this Travelocity gnome reminded us of how far we had gone from our own farmtowns in the Midwest. She herself had lived in the UK for many years and had often contended for this title, and today…

        If someone saw this gnome in a second hand shop, it would be no more than a piece of useless plastic, probably not weather proof so not even a garden variety gnome. However, with a story its value changes. But don’t take my word for it.

        I was fascinated recently by a Studio 360 piece called In Search of Significant Objects, which told of a social and anthropological project which “demonstrated that the effect of narrative on any given object’s subjective value can be measured objectively”. That is, that an object had more value when there was a story attached to it.

        I have seen this myself at a recent house moving “giveaway” party, where a friend of mine was downsizing to a smaller apartment and laid out all the things, clothes, vases, belts, shoes and assorted stuff that she needed to give away. She invited a dozen or so friends and colleagues over to take things away. Initially some of the best things went; however, an enormous pile of objects was left until she started to pick things up one at a time and enthrall us all with their origins, with stories of travels to hard to reach places, special gifts from visiting dignitaries, traditional dresses worn at historic events, and made in secret moments of important meetings by the personal tailors of powerful people. Almost everything went, and with each item, the story of its origin and provenance which was now complemented by the new owner’s own story of where she acquired it, from a remarkable woman who had already lived 40 lives.

        The Significant Objects project proved this too. Rob Walker and Joshua Glenn conducted the experiment by buying unwanted objects at thrift stores, for an average of US$1.25 a piece, then invited writers to create new backstories for each object and then sold them all on Ebay, for over US$8000. You can see some of the objects – from candle holder, Fred Flintstone Pez dispenser, craft doll, to a jar of marbles –  and read the stories on the Significant Objects website. ( An odd and somehow beautiful little story about the jar of marbles that gives the artifact a completely different meaning increased its value for a new owner from $1 to $50 dollars.)

        I am curious about these findings in terms of what they can bring to learning and my work, I am not quite sure yet. Will people find knowledge and information, or your work or ideas more valuable when there is a good story behind them? I guess the best speakers know that. Will people value and remember the things we give them (both physical and conceptual) when we join their well-crafted origin stories to them? If we stopped and thought about our own stuff and stories, would we throw away less/buy less meaningless stuff?

        I’m not sure how much I would get for my garden gnome, but now, remembering its story, I want to keep it.

        I recently had the opportunity to work with a team of sustainability leadership experts who have been delivering a learning programme for the past few years in different countries in Africa. For many years they delivered very different programmes, but a few years ago they decided to join forces and work towards harmonising their content and process, and share investments in curriculum development.

        How did that go?

        Well, that was our main question in a recent 3-day workshop to share learning and create a set of Practice Guidelines for the group. The aim was effectively to create a Manual, based on this learning and best practice, on how to run the programme.

        You might think it would be more efficient to sit in your office and write that manual, rather than try to jointly write a document in real time, face-to-face with 10 people. However, co-creation is the way to go if you actually want people to use the manual, and is a good way for it to be fortified with the interesting stories that people can tell (but won’t necessarily write down in an email or survey) on their experiences over a few years of implementation. You get more spark in the room, and it acually gets done. When you think of it like this then it makes much more sense to get together and collaboratively write such a document. But just the thought of such a discussion might leave people wondering “Where do we start?”

        Well, I have done similar learning workshops in the past and have found it very effective to start with the final product in mind as the main organizing principle (as opposed to creating that final document from the notes of less structured discussions), and we did that this time too. We started with the Table of Contents of the Manual we wanted to write.

        Imagine holding the Manual in your hands –  how you would want to read and use it? When you think of it like this it becomes easier to chunk it down into parts and discussions that can both fill in the sections, and be used structure your workshop. We had a two-flipchart page agenda that we worked from (see above for page 1). I then created our workshop programme such that every session we had corresponded to a specific section of the Table of Contents. I marked the session number on the Table of Contents flipchart so people could see that no time was wasted, every discussion had a purpose and a place in the Manual.
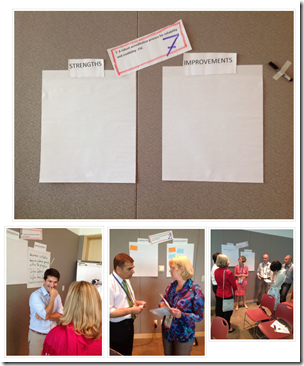
        Another helpful tip, if you use this Table of Contents technique, is to make those little checkboxes by each section and sub-section and then ceremoniously tick them off when the group has completed a section. It feels wonderful to see those checkmarks going up and the remaining areas counting down. I also mixed things up a little and didn’t always run the sessions in the order of the Table of Contents, but people didn’t worry, as they could see that in later sessions we would be getting back to the parts we jumped over.

        You can dive right into this exercise, but I think it’s better to start with context-setting discussions about why to do such a learning activity, what will make the guidelines immediately useful, and what will make them “stick”. It’s no good having guidelines that no one ever uses, and instead keep re-creating the wheel. So we started with a few facilitated discussions that helped us answer these questions. (And we also put that in the Manual in the Introduction).
        Getting started

        1.  We started with a check-in where everyone shared 1 set of guidelines that they currently use and why they like to use them (as an aside this also got us into a humerous discussion of what guidelines people don’t like – like their cell phone instructions – and what to avoid!). This exercise connected people with one of their own successful user experiences. It also gave us some initial good practice on which we could draw.

        2. We then talked more generically about “What makes good guidelines” and we created a list of features based on the examples we had in mind and others we liked. We then discussed what would make them “stick” for us, knowing what we know about our work rhythms and preferences. This gave us more good tips for our own guidelines,  which we now know needed to be super concise (no long narratives), user-friendly (bullet points and well signposted), practical (checklists, A5 ringbound format), etc. We flipped this into criteria and used this list again half way through our workshop to check that we were on track, and again at the end. At this point we also clarified who would be using the Guidelines and that was helpful again and again to narrow down what exactly we needed to cover (as in not everything under the sun).

        3. At that point we went into the Table of Contents discussion. Based on an initial draft I had made, we added and took away sections until we were all happy with it. By that time we could check off our first 3 or 4 boxes which was very satisfying!

        Mix it up

        As this is effectively a “write shop” in addition to a workshop, you need to think of ways to animate it so that the easy things get captured quickly and the areas where you need to share the diversity of approaches and potentially make some agreed decisions get the most time in the agenda. So I used lots of quick visual capture techniques based on clear questions (e.g. Who are our partners, what are their benefits, what are their responsabilities, etc.) that let people work individually, in pairs, trios and quads, with short plenaries at the end, to collect that information together. In the end, although it is often done in parallel, people still get to input on everything, so ownership at the end is high.

        We used crowdsourcing techniques with post-its (individually, in pairs), carousel discussions with wiki-like features so that we could easily find the groups that made the comments if they were not clear; we used metaplan cards, and for some things straight stand-up facilitation at a flipchart (but little of that). We varied the card colours, the markers, the templates we were using, and we plastered the room with the products of our work and discussion (always keeping our Table of Contents flipcharts right in the middle where it could guide us).

        At the end of each night the sections we had worked on during the day were recorded into a Word document in the final Manual format, and we used some time at the beginning of each day, on an LCD projector, to have a quick look at the text to make sure we agreed, and to appreciate how the document was building. This collective review helped make sure that everyone was engaged and agreed with the document’s text.

        This approach -working with different techniques and in diverse constellations of small groups with lots of real time capture- is very efficient and produces a wealth of content with which to work afterwards. It provides discussion time to share and exchange stories of how, in this case, each group has run different aspects of their training programme and what has worked for them.

        In the end we created together a 42-page manual capturing our understanding and practice of delivering this sustainability leadership learning programme – from mission and vision, to shared policies that had been agreed over the years around travel and participation (amazing how hard these are to recall when you need them), to the best recruitment process and forms,through to the optimal implementation schedule to follow through the year, reporting obligations, and many annexes with advertisement texts, Terms of Reference for the governing bodies, feedback form templates etc.

        It was wonderful to have had the chance to talk through, visualise and share all the many practices that go into delivery of a great learning programme. And too often we and our organizations don’t find the time to reflect and collect our learning and record it in a way that our teams, our partners, and others can share in that learning (now and potentially after we pass the baton).  Not to mention the fact that we, ourselves, can also forget our own best practice!

        Write it down (and do it in a way that inspires more learning)!

        How do you capture the reflections of participants on ideas shared during your event? At the end of the TEDxEcoleHôtelièreLausanne programme, we scheduled the university’s music committee to perform a musical interpretation of the event. We knew that they would need up to ten minutes to get their instruments set up and ready to go on stage. A great opportunity to capture some reflections from participants!

        We prepared a slide with three questions on it, and handed each participant three colour-coded cards to match. The questions (see photo):

        Whilst the band set up, participants discussed these questions with people seated next to them and then wrote their personal response on the cards, which we collected and posted on large boards for everyone to read during the aperitif that followed. The cards generated lots of interest as people learned how differently people experienced the diverse talks. And an important bonus too: it helped them remember things which they may have already begun forgetting in the mash-up of ideas that comes with TEDx events.

        The analysis that we did after the event was also really interesting. We started by sorting the cards according to colour / question, and then regrouped the cards according to the talks they refered to. Laying them out on a table under the speaker’s name immediately gave us a bar graph for each question. We could see which speakers were most quoted, which ideas people will most act on, and which people see as potentially having the biggest impact in the future. And then looking at this data collectively, we could see how these three questions elicited very different responses! There was no apparent correlation between people’s favourite quotes, facts and figures and action or impact. And, perhaps most interestingly, the ideas that were most seen as potentially having the biggest impact were among those that participants were least likely to act on.

        Doing this cards exercise is a quick and easy way to gather a very rich reflection on what people valued about each talk. It also highlights the deficiencies in asking a simple question such as ‘which was your favourite talk’ because how do people respond? With that which hooked them with a great quote? That which they will act on? Or that which could have huge impact in the future? We are looking forward to the results of the online survey to see if we can see a pattern! What is clear already is that all the speakers were valued for one reason or another, and we’re pretty stoked about that 🙂

        p.s. It also enabled us to provide some much appreciated feedback to the speakers… an important part of the often-forgotten post-event speaker care!

        (Warning, this is a long blog post and rather detailed in terms of design thinking for Training Trainers. If you are a ToT organizer or trainer/facilitator it might be useful. If not, then you will want to check your Dilbert RSS feed right now.)

        There seem to be cycles in our learning work and we seem to be in a “training” cycle now – with several ongoing projects to help groups create learning environments for themselves and others. I am not as fond of the word “training” as “learning“, for me the former seems to come from the perspective of the provider, with the latter from the perspective of the user of the knowledge or information. From a design perspective, I find more inspiration when I can put myself in the knowledge user or learner’s shoes. I know that for the learner a Training of Trainers (ToT)  exercise is a step with a group into the unknown…

        There are many ways to create ToT environments and we also know that a great deal of the work that a new trainer (or learning facilitator) needs to do is individual. (See my blog post on “Training-of-Trainers from the Trainee’s Point of View“.) And if much of the work is about individual assimilation of content and methods for creating that learning environment for participants, then the ToT design should feature lots of guided individual and group learning spaces.

        Many of the ToT designs that I see follow a set sequence:

        • an overview of the workshop that is being shared, with rationale, and partners behind it;
        • an introduction to the group of Trainers (trainees in the ToT) and their experience and motivations;
        • an expanded set of sessions that follow the workshop outline – each with a demo of the content by a content expert and then Q&A;
        • a session on adaptation to the local context with a discussion, group work and individual action planning;
        • a run through of the workshop with the new Trainers on delivery (the whole or parts of it).

        This is a logical sequence and I have used it or something like it myself, sometimes with a full demo up front so the new trainers can experience it as participants, followed by the deconstruction of the workshop to go through the content and exercises that would be delivered when the trainers are back home.

        I am currently thinking about how to do this a little differently these days, to make it more learner centred, and to draw upon some of the interesting “camp” designs that have featured in other sectors for peer learning. This interests me more as I come to the realisation that so much of the “translation” work for new trainers (moving from reading the Trainers Manual to them standing up and delivering it) is individual and can look very different trainer to trainer.

        What if you combined ideas from the family of non-traditional events such as Bar Camps,  Foo Camps, Unconferences, and the inspiration for these – Open Space Technology – for a ToT, to come up with a Training Camp?

        What might this look like? Here is a possible design for a 3-day Training Camp…

        Training Camp Day 1:

        • You could start similarly to the more traditional ToT, just to put people at ease, and to provide context to Trainees, and to give some of the background that is needed to work together (why are we doing this? who we are? what we are bringing to the discussion). Then do an initial slow Walk Through of the base workshop (the one everyone is learning.) Expect everyone’s eyes to glaze over at some point.
        • Then you might give the Trainers 30 minutes or so of Individual Work to look through the Trainer’s Manual again (let’s assume that you were able to send the manual in advance and they didn’t want until that morning at breakfast to read through it) and highlight some things they would like to explore further. You might make them a simple Job Aid/worksheet to capture questions/types of questions that would help them frame the kind of sessions they would like to have to learn to use the information in the manual;
        • This could be followed by an hour of Pairs Work to talk through some of their questions to weed out any easy ones (this could even be a Pairs Walk if you are in a beautiful location and people’s curiosity is already getting the better of them). This could be followed by a Plenary Exchange of what kinds of things people are identifying for more focused work.
        • Finally, you could open up the Training Camp space, and ask people either individually or in Pairs/Trios to propose learning sessions that they would like to host that afternoon, and schedule those using a simple matrix of time and space, as you would for setting up an Open Space Technology session (See photo for set up). The kinds of things people might want to discuss could include specific activities in the workshop design, content pieces they want to understand better, strategies for getting their participants attention, ideas for daily check-ins, how to identify and involve local content experts. Each session should have an output –  a set of tips, a checklist, a guidance note, or some key steps to follow, etc. – which could be captured on flipcharts and/or electronically and shared with the rest of the trainers, and put into the Trainers Guide (for the future). 
        • Then the scheduled Training Camp session would run itself for the rest of the afternoon. At the end, you could have an individual  reflective time where the trainers could make some notes for themselves on what they learned and what they want to remember. I am a fan of worksheets and job aids with good prompting questions, and I can imagine something like this to both complement the Camp sessions, and also to use at the end of the day.

        Training Camp Day 2:

        • You could start the second day with a Table Discussion and Exchange of what people learned from the sessions on the first day (they could share their flipchart artifacts). What were some of the things that they learned that they thought were most useful for their own delivery of the training course under consideration? Take some of the most useful things from the table discussion into a Plenary Collection.
        • At this point it would be interesting to do some Pattern Spotting, and let people generate some of the things in terms of delivery that they think they would like to work on further with the content experts attending. This could be collected on cards, clustered and the grouped into Tutorial Sessions with those content experts. These could then be run in parallel, but have an open format where people can go where they want and ask the content experts questions on a self-service basis, and once satisfied go somewhere else. If there are big questions that everyone shares, then this can be done in plenary.
        • In the afternoon, hold a session on Adaptation. You can give the trainers an hour to think specifically about what it will take to contextualise the workshop to their local context (the trainers may be from different sectors, countries, organizations etc.) They could do it individually or in groups from the same country/organization. Again a worksheet with some prompting questions can help people think about what they can do about identifying local content experts who might speak at their workshops, how they might want to adapt the timing to different workday rhythms in their country, what stories or cases studies they might want to use or identify to replace those already in the workshop to make it more relevant to their learners, etc.
        • For the next 2 hours of the afternoon set up the Training Camp space again, with three parallel sessions organized in 3 rounds of 45 min each this time.  Invite people to host conversations about adaptation – not everyone needs to host a session.
        • At the end of the day, ask people to find a partner and then to identify a piece of the workshop that they would like to co-facilitate on Day 3 for feedback. For this, take an agenda, blow it up to A3, and make slips from the sessions of about equal delivery size (say 30 minutes) that are either presentations that the Trainers would make, activities they would facilitate or discussions they would run. Put all the options on the slips of paper out on the table and invite Pairs to take one and prepare to run that session in the morning. (See photo above)
        • Give the Pairs the rest of the afternoon to work on their design and delivery preparation for their session. Have the content experts hold Office Hours (in the same room), where the pairs can come to find them if they have questions during their preparation. Let people go wherever they want to prepare. Create a materials table where they can find any supports they need, along with flipcharts, computers for PPT etc. While they are doing their planning, make a schedule of the sessions following the chronology of the base workshop.

        Training Camp Day 3:

        • Start Day 3 with 30 minutes of free time for people to finalise their preparation for the sessions if they need it, or to practice.
        • Then bring people’s attention to the schedule of the day, and how it maps over onto the whole base workshop schedule. To do this you could make a large flipchart schedule of the base workshop, and highlight the sessions that will be demonstrated (use numbers for easy referral). Not all the sessions will be covered, as in one day there will not be time, so you (the ToT Trainer) will play the role of curator, and make the necessary segue ways where there are gaps. Ask the trainers to do this in their sessions too.  
        • Before you start the demo, give people a way to take some notes which they can use to provide feedback on each session. This could be done as a handout, with each session (named and numbered) and a space to write in feedback. But I think it would be interesting to give people index cards and ask people to take notes on those for each session (during and/or immediately afterwards). (See photo above) That way at the end you can collect the cards for each Pair and simply give them the cards to go through individually.
        • Start the demonstration. After each Pair runs their session with the group, take a few minutes for people to write down their feedback, what worked and what the Pair might consider doing differently next time. This appreciative frame will help make sure people are constructive in their comments. Either have them fill and hand in the cards with a few oral plenary reflections, or have people fill in their comments matrix and take a few reflections. Either way make sure to get some feedback for the Pair, and encourage people to take any notes for themselves as well. Also use that time to make points yourself (as the ToT trainer) about that particular part of the programme.
        • In the last hours of the day, hold a session where people individually or in groups will make a Next Actions list for themselves – what will they do when they get home? What is left to do to take the workshop from the Manual to their first live delivery of the materials with a group of learners? Again you can give them an action planning framework to fill in for the steps they want to take (I warned you I was big on worksheets and job aids!)
        • Close with some brainstorming on what the organizers and the ToT Trainees think would help them succeed – what could the group consider putting into place that would make it easier to share their learning, to continue the peer learning, to share any innovations or tweaks that the individual trainers may identify?  This is a perfect social media opportunity! Make some agreements on how to make this a reality.
        • Clap, make noise, have a party!

        So, three days may be a bit of a push for this, but possible – if you have 20 ToT Learners, and only a 3-day slot. No matter how long it is, a Trainer who is going through a ToT exercise with a group of other trainers, needs to have a set of tools, a map of what they are learning, and people they can count on to help them when they get lost or need support or inspiration. The metaphor of a Camp, and the open space, with the individualised and group learning that it provides, may be just the model for helping Trainers find their way with a new workshop or process.

        Today I left my phone at home again and only discovered this 20 min before my flight was boarding for a 3-day work trip to Stockholm. Thankfully I had my iPad and computer, both with Skype; not the same as a telephone but would do in a pinch. However, that doesn’t take away the fact that it will be extremely inconvenient at the conference I am going to, where I will be coordinating and working with a number of colleagues scattered around the venue on a joint workshop. I will feel completely foolish telling them that I forgot my phone – people will look at me incredulously.

        Ok, so I’m not happy about this, well actually I am extremely annoyed with myself for walking out without my phone. This is not the first time in recent months that this has happened (at least only the second). So what can I do about this worrying trend (at least two data points into a trend)?

        Recently I have joined the ranks of mobile workers everywhere. I took an interesting 18 month, 50% job with a global organization whose HQ is in London. On top of my other travel, weekly or biweekly trips to London now seeing me passing, two feet and two wheels, up to four times a week through Geneva airport.

        In spite of the fact that I have lived over half my life without one, I feel amazingly lost and rather lonely without my phone. I’m sure I am the only person over 5 years old on this plane without one. Thankfully, by virtue of my age, I’m wearing a watch and don’t rely on my phone for that ( see Sir Ken Robinson’s interesting TEDtalk – Bring on the Learning Revolution –  about generational shifts in learning and watch wearing). A watch is another essential (for me) in a workshop setting.

        Inspired by both Atul Gawande (Better and Checklist Manifesto – how checklists save lives) and David Allen (of GTD fame -checklists are blackbelt moves), I decided to make a Mobile Worker’s Checklist.

        Just a word about checklists here, you might be saying, “What? That’s all, that’s the answer? I make lists all the time.”  But do you reuse them? That’s the difference. You need to make a master list, update it until its perfect, and use it every time. Now that kind of  list takes a lot of things off your mind, and avoids foolish mistakes which you are bound to make as a mobile worker. Repetition and familiarity make you very cavalier with travel, but one really can’t afford that. We might not be doctors or pilots, who also rely on checklists, but a mobile facilitator or trainer or co-worker without a phone can cause serious team communication problems too. So here’s my checklist:

        Mobile Worker’s Checklist

        1. Communication (this has to come first)

        • Phone with charger (USB and wall)
        • Plug adapter (international)
        • USB hub
        • Power bar (to plug in multiple devices when there is only one awkward socket behind the hotel bed)
        • iPad if one day trip with Bluetooth keyboard and charger
        • Laptop if multiple day trip with power and USB key with docs, your whole music repertoire and movies to watch when you’re shattered

        2. Travel

        • Keys (home and destination office)
        • Tickets with boarding passes printed
        • Passport
        • Airline cards and insurance card (international)
        • Oyster card (local travel pass)
        • Train pass (home country)
        • Currency and bank cards
        • Loyalty cards for destination Office city (from coffee to hotel)
        • Envelope to keep receipts labeled with trip date

        3. If conducting a workshop

        4. Clothes and toiletries

        • As needed
        • List of what has been left in destination office (eg sports clothes, toiletries, sweater) so you don’t pack it again (and you will forget if you don’t make this sub-list and keep taking the same stuff back)
        • Vitamins (because you are getting up at 4am and going to bed after midnight)

          5. Documents

        • GTD file (still on paper)
        • Agenda (can’t let go of paper mirror of electronic)
        • Business cards (for both organizations)

        An additional benefit of making such a checklist is seeing how many heavy things could be replaced with soft versions on a USB or external hard drive, or even better on the ‘ cloud’. For example, Dropbox can do away with the external hard drive (although you can’t use Dropbox on the flight). Also, I leave my heavy laptop at home and only take my iPad and wireless Mac keyboard when I know I will be in meetings all day and will only need email. The iPad is great for filing on flights and syncs all that work once connected to the internet again.

        With a new organization comes a new email account, folders, password etc. (I already had two-personal and company). Three separate gmail accounts is clunky to manage.  Not to mention the fact that people often use whatever email address pops up in their automatic address function, so the messages are often in the wrong accounts in terms of their folders. Add this to online/offline mobile working (planes, trains and automobiles) and you need a new email management system.

        So I migrated my email (which was previously kept in outlook on my hard disk) to imap where I can see all three accounts and their folders in one view, and they are kept on the cloud. (I say “I” migrated it, but it was actually tech support from software-writing husband downstairs in office cave.)

        For a mobile worker this system is good because your work, files, etc. need to both sync and be available from multiple machines: laptop, iPad, phone (if you remember it) and random dumb terminal.  You don’t want to have to do anything twice, and you want to be able to access all your aliases, being able to send from all accounts and use different electronic signatures.

        With this checklist I won’t forget my phone, and everything else I forget will have a place to go – on the checklist…it might take me a few iterations, but hopefully then will be foolproof.

        (This is my checklist, what’s on yours?)