Q: What if no one answers my question? 

You’re facilitating a group discussion, you throw out a zippy stimulating question and expectantly wait for an answer – but there’s no reply, nothing, only an awkward waning silence and no one making eye contact with you. One facilitator I heard recently who was confronted with this, paused and said, “I hear tumbleweed…”

What do you do?
a) Say, “OK, never mind” and go on:
b) Start to babble incessantly to fill the void:
c) Pick on people by name to answer;
d) Wait.

Well, of course, any of the above (except perhaps “b”) can be appropriate in some context. If it’s not the right time for a question and there’s no energy for it (like when you are 30 minutes late for lunch) then “a” works, and you can come back to your question after lunch. If you know the group and they are familiar with each other (whether they work together or have been together a few days) then answer “c” might work. In many situations answer “d” could work – a nice big pause and perhaps a rephrasing of your question.

But for new facilitators this on-the-spot decision making among these options can be terrifying.

I just had a young facilitator about to run a session earnestly ask me this question, and here was my advice (note that all of these things you can do in the design and preparation stage BEFORE you ask the question):

  1. Design away from it: Don’t ask that question for a plenary response in the first place. Instead ask the question and ask people to discuss it at their tables or in a pair/trio first and then ask the pairs or table for their answer. It is easier to answer on behalf of others – it takes the risk out of it. Also, with the buzz in the room first, people get used to their own voices in the room instead of yours and re-appropriate the workshop space for themselves.
  2. Build in a moment to think: Tell people in advance that you will give them a minute to think first, and then will ask for a few responses. This helps people who are thinkers or “processors” in the room to refine their ideas and not shoot from the hip (which they feel comfortable doing). It might also get you more thoughtful and better quality responses.
  3. Recruit allies: Tell a few people in advance about your question and ask them if they can answer if there is total silence in the room. Have them hold back for a moment to see if anyone answers and then give them a meaningful look if not.
  4. Write it down: Put the question up on the screen or flip chart – sometimes people don’t answer because they didn’t quite catch the question,  its too complex or long to remember, or they were sneezing (or heaven forbid checking their email) when you asked it. 
  5. Quality check it: Make sure it is a great question BEFORE you ask it. Test it with someone else – is it clear? Easy to answer? Appropriate? The right question at the right time? 
Also, the better your question is, the more useful it might be to use some of the above options, as big pauses particularly occur when your question is one of those great, positively disruptive questions that might challenge the group’s current paradigm and really provide food for thought. So be prepared  If you can do some of these things, you are much less likely to hear that tumbleweed after asking your question. 

If you’re like me, you have a drawer somewhere of gadgets that just didn’t quite make it into your daily routine. Or you have some apps on your iPhone that you tried but never got into the habit of using and now you are not exactly sure what to do with them.

I wrote a blog post a while ago about “Domesticating Your Facilitator” which used the theory of domestication (how innovations are tamed or appropriated by their users) to think about how to onboard a facilitator in an organisation which has not used one before. (I also had to laugh because in that blog I mentioned a  previous post I wrote in 2006 called “New Technology: It’s Not Just for Christmas” where I talk again about domesticating a new video ipod (sic) that I received for Christmas and unfortunately I am pretty sure that this toy has indeed ended up in that drawer.)

I am very curious about the process of appropriating new things, so that they become useful to us and not just paper weights or pretty icons or interesting titles on our e-bookshelves, and this includes new learning.

This is on my mind in particular this week because I’m in Bangkok running a Training-of-Trainers (ToT) workshop where a group of smart trainers from around the region are being introduced to a new set of training modules on ecosystems for business that includes hundreds of slides, dozens of pages of facilitation notes, and a new sequence of presentations and activities, quizzes, case studies, icebreakers, discussions, group work etc.

All in 3 days.

And the last day of this three is a demonstration of one module that they will run themselves with a new group of interested and eager learners from outside our ToT group. So my role is to set them up for success and to help them appropriate this information so that they can use it immediately on Friday, and especially thereafter.

For me that is a part of the domestication process. Like my video ipod, receiving it and letting it get dusty in my desk after an initial burst of enthusiasm makes it much harder to use. For trainers, participating in a ToT, where you hear and work through some of the material and then go home and put that enormous binder on a shelf in your office until weeks or months later when you deliver the training (the likelihood diminishing as each week passes) is akin to putting that gadget in a drawer for “future use”.

When you have an opportunity to deliver that material on your own, you will take it off the shelf, open it up and probably in the middle of the night the evening before your training (but let’s hope not) and at least on your own without the ToT trainers and your peers in the room, you will have to learn it all again by yourself. At that point, unsupported except by strong coffee and Google, you will try to domesticate the material out of sheer necessity.

So how can a ToT programme change that pattern and help trainers move that process up to during the ToT (and not afterwards)?  How can you precipitate that moment when someone moves beyond passively accepting the material to making it their own?  Turning it into a tool that actually works for them, and domesticates it so it is a part of their life.

Here are a couple of things that we have built into the design of our ToT to help do this:

1) Let people read the materials
This might sound glaringly obvious, but it’s not. We often try all kinds of things to get our learners into that big manual. We send it electronically in advance, or portions of it. We hand it out in hard copy the night before and ask people to leaf through it (after the opening dinner and reception and on top of their jet lag). We page through the manual with them in plenary and tell them what’s in it. We do an exercise from it on page 13 etc. All these things are good of course, but it is actually amazing what happens when you block out a half hour or an hour in the ToT agenda early on (like the first morning after introductions and context setting inputs) and just give people time in the workshop room to read through the materials- to see how they are organised, the logic of presentation, and the content itself.

2) Have learners identify for themselves areas where they want more inputs
I combine this reading exercise with a job aid (a worksheet) that asks the trainers to note down the topics on which they feel they would need more support and information, and where they have specific questions (e.g. Day 1, Session 3 of the training, I have question X.) Their questions are organised on my worksheet into content questions and process questions so they think about the materials from both of these points of view.

This action gets them even closer to the materials because it asks them to imagine using it and identifying aspects where they have a level of comfort already and where they don’t at the moment. Thus narrowing down where they want more (as opposed to me deciding this for them and probably getting it totally wrong). Testing the content against their existing competencies shows them that actually they know some of this already, and that there are spots where they could usefully learn more in order to use it effectively.

3) Have learners share their “learning edges” with peers
Once people have identified the areas where they want to learn more, their “learning edges” (because not everyone wants to admit where they don’t know something), I send them on a “Pairs Walk”outside the room. On this walk, they use their worksheet and materials to share the questions they have with one other person in the safe environment of a comfy chair in another part of the venue or outside in the grass. It is often at this point that your partner can answer some of your questions – point to a place in the manual with the answer, or share an experience they have had that speaks to your question. This peer learning exercise has many merits in addition to getting some answers to your questions; it demonstrates the value of the peer network for support (so even months down the road, you might shoot an email to one of the other trainers to answer your questions), it shows you even more about what resources are in the material, and gives you and your peer the opportunity to “display ownership and competence of the materials” (which is a part of the “conversion” stage of domestication.)

4) Aggregate the remaining questions and answer them together in Open Space
Now that some of the questions are answered, what remains are the trickier or less obvious ones. Now back in our ToT room, I collect the remaining questions from the Pairs on cards and we cluster them to see what categories of questions trainers have left. The categories that emerge lend themselves beautifully to Open Space Technology (OST) sessions which can now be scheduled and run to discuss and answer these questions. (I have written a lot on this blog about applications of OST: Opening Space for Conversation (and Eating Croissants), and Training Camp: An Un-ToT Design as it remains for me an incredibly useful framework for learner-centred workshops.)

Anyone can host one of the OST discussion sessions. It can be one of the ToT “master” trainers, or can be one of the participants if they feel comfortable to do that. Running three or so in parallel means that the learners can choose which to attend and customise their learning to exactly what they need. They can stay with one group or move around, giving them complete control over how to use their learning time.

5) Follow up with group and individual learning capture
For each of the Open Space conversations I create an RLO (reusable learning objects) template – which is flipchart template that invites the group or conversation host to record resusable learning. This is not a running record of the discussion, the aims is to pull out things for people to remember and (as in the name) reuse. It also means that people who were not in the discussion, because there are several in parallel, can benefit from the useful nuggets that come out of the discussion. You can post these templates for a Gallery Walk which can be done in pairs again, or use them for a very brief highlights report back the next morning.

I usually run the above sequence, or something similar, about three times in a ToT, because as one question is answered others crop up, as people really dig deeply into the materials. And of course as the demonstration course with the outside participants starts to loom on the horizon (offering another important “conversion” opportunity to participants.)

Participants at our ToT yesterday were delighted with this sequence. It feels different. It feels like they are coming to the materials, rather than the materials coming to them when they get to decide what they want to learn rather than a ToT trainer deciding what people should learn. Even if the two match up pretty well, the level of engagement and active appropriation of the materials is completely different. Participants are given, and take, responsibility for their learning in this kind of process. 

We still have 2 days to go on our ToT, and will have another two OST sessions today. By Friday when our 25 new external participants walk into the room and the trainers deliver Module 1 of our series to them, we should have made good progress in helping the trainers domesticate this new material for themselves – making it more familiar, more useful and personal, so that it doesn’t get stuck in that drawer (like that ipod) forever.

It’s 05:30 in the morning and a loud “bing!” wakes you. It’s a text message from your colleague. She has come down with the flu and has been up with it all night. And there is simply no way, in 2 and a half hours she is going to be able to stand up in front of 20 people who have flown in from all over the world, for the second day of their strategic planning workshop. Can you please take over?

What do you do?

Well, if humanly possible, you say “Yes!”.

Many facilitators and trainers work independently or in very small groups. As such we are all a little vulnerable at this time of the year (and in general I would say, see my blog post on “Facilitators: To Your Health!“)

So what can you do to help make sure that this emergency hand over goes as smoothly as possible? Here are a few things you can do both in advance to prepare for this possibility and on the day itself:

1) Prepare a Facilitation Agenda, Always

I think this is just good practice, but in situations like these it’s a life saver. We always prepare two versions of the same agenda for any event – a Facilitation Agenda and a Participant Agenda. The participant version has the information that is most important for their participation – the start time, location, break times, session titles, and some details on what will be the focus and task of each session. That is to give confidence that their time will be well spent, the issues covered are the right ones and that if they need to take a call etc, they know when it is safe to do so. It turns out to be one or two pages and easy to read at a glance.

A Facilitation Agenda however will be 3-5 times longer depending on the complexity of your process. It has all that the participant agenda has and much more detail on the dynamic and process of each activity. It includes part of the script or key words you will say to transition from one exercise to another, the materials you will need and what you will do with them for the activities, and all the timings (how long does that speaker have, how long is that group work, etc.) It provides complete process picture and all the decisions made by the facilitator of how that workshop will run.

With that in place, handing it over to another facilitator is much much easier. They might still tweak the agenda to their own style, but at least you can hand over a water tight design for them to follow (not to mention the important fact that the client had a role in developing it, so it matches their expectations and needs already).

2) Cultivate Some Colleagues 

Do you have a few facilitators who know what you do and how you do it (and vice versa)? We all have our favourite techniques and methods. Can you take the opportunity in network meetings to share these so that other facilitators are familiar with them too? Or can you write a blog post describing these in detail so that you can refer to that on your hand over?

There might be other facilitators with whom you co-facilitate from time to time, or you have seen them in action and they have seen you. Have a discussion at some point when you are both healthy and see if you want to agree in principle that in case one or the other falls ill or is incapacitated for whatever reason there is willingness to act as stand in if possible.

So those two things are things you can do in advance to help make any last minute handover go more smoothly. Having someone who understands your style, combined with a good facilitation agenda, some forwarded critical correspondence and a short chat from your sick bed, can go a long way to ensuring that your stand in can do a great job. Then what might you do, as either the sick facilitator, or the stand in, on the day itself?

3. Help Prepare Materials for Your Stand In (or Do It Yourself if That’s You)

This might sound odd, but we did this recently and it really worked. Part of the very time consuming set up each morning for a very interactive workshop is preparing all the job aids, flipchart templates, etc. However, for a stand-in facilitator, that precious pre-workshop hour when you should be flying around the workshop room making and putting up those groupwork templates, will probably be spent trying to calm down a nervous workshop host who just went from the comfort of a known quantity to a new facilitator mid-process. So anything that can be done to help get the materials prep time reduced is extremely helpful.

Instead of writing directly on flipcharts which you have to do in situ, smaller cards can be prepared in advance that can be stuck on blank flipcharts with the instructions. Those coloured facilitation cards in different shapes work well, and if you have a self-stick pack then they can just be whacked up on a blank flipchart and help guide the group’s work. If the ill facilitator can manage it and get them dropped off (or picked up) that is great (that’s what we did recently.) If the ill facilitator can’t do this, then you can do this at home, so that when you are at the venue you can have more time to work with the organizer. Do this at least for the first session or two.

Also on materials, if you are the stand-in facilitator, look at the agenda and plan in when you will make the remaining materials. Write into your Facilitation Agenda in the breaks or during quiet times when the group is working on something else, exactly what you will be doing to prepare for the sessions that will follow (e.g. make flipcharts for Session 4, count out cards, cut sticky dots for prioritisation, etc). That way you don’t have to do every thing in advance (because you still have to take a shower, dress properly, eat breakfast and get there in one piece, all looking very calm and in control, in a very short period of time. ) This takes me to the next point…

4) Take Your Own Food

This is important because you will never, ever be able to make the coffee break or lunch. You will be using this time to prepare materials or talk to the organizer, who will no doubt decide that the next session needs to be slightly different (even though perhaps there was a 2 hour conversation with the other facilitator about that session already.) So you need to pack a healthy lunch, some snacks, and a thermos of tea if you can do it.

Along these lines, I also take my own materials, even if I have been told that everything is there. You just never know, a conscientious custodian could have cleared that messy materials table, or a participant took home something to work on over night and then forgot to bring it back. You don’t want to have to spend precious time running around the venue looking for a pair of scissors.

This is indeed flu season; it hit us hard in Europe this year reaching epidemic proportions in Switzerland, and apparently it’s not over yet. And there is no reason why, if it can hit our workshop participants, it can’t also hit us. Think in advance about what might make it easier for someone to replace you, and if there is any possible way, say “yes” to that sick colleague, even at 05:30 in a morning when you were dreaming about finally catching up on your billing and administration that day.

We all know that what goes around comes around – that works for both good deeds, and the flu!

I was delighted to be invited by MAFN – the Mid-Atlantic Facilitators Network tonight to present a webinar on facilitating large groups which is one of my favorite facilitation topics. (and yes, it can be done, if you were asking!)

It has been one of my missions over the years to bring more facilitation and interactivity into large conference and workshop settings, whether there are hundreds of participants or thousands. And to challenge traditional conference design assumptions about long panels and short Q&As (where only a few people get to talk, if any). All with the goal of avoiding this…

It was a wonderful group of facilitators who joined the webinar conversation tonight and added to and elaborated further, from their own experience, the tips and tricks for working with very large groups that I presented. I promised to pull together and link a few favourite blog posts that I’ve written over the years, many of which I used as the basis for my presentation.

I organised my talk into four areas:

1. Design Opportunities

2. Preparing Yourself (including your Facilitators Toolkit)

3. Leading Facilitation Teams

4. Once on Stage 

I was happy to present my own learning and definitely took away a lot of great new ideas from the webinar! If you’d like to watch the webinar recording, MAFN has kindly provided the Adobe Connect link:

MAFN Webinar When Numbers Soar: Facilitating Large Groups

Thanks so much to my fellow Facilitators Michael Randel, to Dana Roberts and Fran Lowe for their help and great hosting!  And a little blurb for MAFN – anyone can join the Mid-Atlantic Facilitator’s Network, even if you are far from them geographically. They offer very interesting virtual learning opportunities through their webinar series, as well as a vibrant community of facilitators all happy to share their experiences!

I was working with an intact team (e.g. working in the same office space) recently on a retreat, the third that I had run with them over the years. Now, working with the same group on a long term basis is wonderful for a facilitator as it absolutely demands creativity and innovation; you cannot fall back on your favourite workshop activities over and over again (like you may be tempted to do when you work with new groups each time).

For this retreat, as for many, further strengthening relationships among team members was one of the soft outcomes desired – getting to know one another better, helping people look behind the office every day and delve a little deeper into what makes people tick.

One of the opening activities for any workshop is some kind of introductions at the onset of the day. Now with an intact team, this might be more of a “check-in” as everyone knows each others name, position in the organisation, etc. For this particular team, which in some cases knew each other from years of co-work, I decided to go a little deeper than usual and still keep it relatively light in the dynamic.

I am a fan of Vanity Fair magazine and one feature of the magazine is an interview, called the Proust Questionnaire (after the French novelist, critic and thinker Marcel Proust) on the last page that has a set of intriguing questions – things like:

  • What is your idea of perfect happiness? 
  • Who are your heroes in real life? 
  • What is your motto?
  • Which historical figure do you most identify with?
  • What is your favourite journey?
  • Which talent would you most like to have?
  • What is your most treasured possession?
…and so on. I took out some of the strongest ones, like “What would you regard as the lowest depth of misery?” and “How would you like to die” etc. because that was not the feeling that I was going for at 09:00 in the morning. You can see some samples of the Proust Questionnaire on the Vanity Fair website.
In the end I had a good number of questions that I liked, but in total that was less than the number of people, so I used the questions twice.
Preparation: 
  1. First I numbered the questions 1-14 (that is how many questions from the Proust Questionnaire that I ended up using), I liked the progression in the Vanity Fair interviews, so I used that order more or less.
  2. Typed them into a matrix that fit on an A4 sheet and printed it out.
  3. Copied it twice on coloured paper – yellow- I did this as it is just a little more visually interesting than the white paper that is laying all over workshop tables.
  4. I cut up the matrix, both sheets, so that I had 28 little squares, numbered, each with one of the Proust Questionnaire questions on it. 
  5. I put all the little squares of paper in an envelope.
Running the activity: 
  1. After I briefed the activity, I asked everyone to pick a square of paper from the envelope, while I walked around with the envelope.
  2. I told them that some questions would be doubled up.
  3. I gave people 2-3 minutes to think about their answers. As they picked slips and read the questions I heard some nervous laughter. ( I let someone who wanted to change their question, although the second one was not much “easier” than the first)
  4. Then I called the numbers one at a time and asked people to stand, read their question and share their response. 
  5. We did this until all were read out and everyone had answered.
What worked

The random nature of the question selection (picking from an envelope), the diversity of questions (they were all different except for the few pairs- I read out the questions that were not selected, as even in themselves they are thought-provoking questions), and the unknown ordering (not knowing who would be next) all added some surprise and a little drama to the exercise. And the provocative nature of the Proust Questionnaire questions really made people think. It was still challenge by choice – people could change their question if they wanted, but there really are no easy questions, and they could choose how they wanted to answer it. 
As the facilitator I could also choose the easier or the more provocative questions from the Proust Questionnaire depending on what I knew about the group and their interest in pushing the envelope together. As I mentioned, this was a group of people who know each other pretty well, but in most cases, these kinds of topics had not come up in their every day work discussions, so people listened and were deeply curious about their colleagues’ responses.
Outcomes?
The answers were conversation starters all of them, they added something different to what colleagues already knew about their fellow team members, and it was a fun way to start the day. And in this case, the game was NEW (they were the first group to ever play that particular “game”). 
You might need a new activity or game from time to time when you work with groups frequently. Look around you – you can find game and activity elements everywhere, even inspired by Proust or your favorite magazine! 

What makes some people look down a steep and slippery mountain and say to themselves, “Weee heee, I can get down this slope REALLY FAST!” and yet fill other people with absolute terror?

What makes some people approach a public speaking event, standing on a stage in front of 900 people, with excitement and anticipation, and give other people the cold sweats several months in advance of the event?

Part could be fear of the unknown (although for my son, he approaches every ski-able mountain with the same glee, whether he has been down it already or not). Certainly some certainty about what is around the corner, or down the hill, or some familiarity with my audience, is helpful. You can check out the plan, get some local knowledge (who’s been down that hill or worked with that group before?), do what you need to to inform yourself about what is coming.

Part could be confidence in your ability to handle new and unexpected things. This could come from a great deal of practice, so taking hours of lessons, clocking hours of snow time, and getting back up over and over again can help (if you don’t hit a tree and break your arm one of those times, which can set you back both physically and mentally, let me assure you).

This also works with public speaking and facilitation – after I have done a run of workshops, I feel like I start from a position of confidence in front of a group. And even after a dud workshop session or presentation for whatever reason (and we have all had them -my first Toastmasters Table topic was a real blooper), you need to reflect on that and try to remember more of what you learned next time (lean forward, dig in those edges, prepare yourself, keep cool). Learning from more experienced speakers and facilitators (as well as skiers) is a great way to learn – be it in lessons or from mentoring/shadowing/keen observation.

Part could be sheer bravado, but I am not sure how I can map that over to public speaking or facilitation – except that if you believe it enough there might be some self-fulfilling prophecy there. This might relate to just that instinctive feeling that you can do something; that you have the right tools and equipment and muscles, and master them, you have good general awareness, and feel that normally when you try something and give it your best, it works out. (This could be a pre-tree collision feeling, but can come back with some additional effort and if you don’t give up, I am assured.)

All I can say at this point, is that I look at an audience at a workshop, or in an auditorium with much less trepidation than I do that mountain slope and I’m doing my best to apply my learning from one to the other!

Last week I had the great pleasure to play a trial of the new Green & Great Game with Piotr Magnuszewski.

(In case you want to know more about the kind of interesting people who develop useful learning games like this – based on computer models –  you can look up Piotr who is a faculty member of the Centre for Systems Solutions,  a Senior Associate of the AtKisson Group (as I am), and a Balaton Group Member  – a network of systems dynamicists and modellers, systems thinkers and sustainability advocates. )

Green & Great is a new simulation game that helps players explore the “business transition to sustainability“. The game can played online or preferably in a room with multiple teams, face-to-face, with computer assistance. Up to 6 teams, with 1-5 members each, can play simultaneously and the game takes around 2 hours to play the five 1-year cycles of company strategy and decision-making.

In the simulation, the teams run consulting companies that are advising businesses working in the energy and finance sector (currently, more sectors are being added). The teams go through the decision making cycle of bidding on projects, hiring people with specific competencies, developing internal projects and making staff assignments (and other HR decisions such as training).

The results of these decisions are reported using the Compass (N=Nature, E=Economy, S= Society, and W=Wellbeing) which gives you progress indicators for your company as well as information on your competitors. Teams also get market information annually, about how the sectors are changing, upcoming legislation, what is being expected by consumers regarding environmental reporting, etc.

Teams run their companies for 5 years, and all the usual things happen: people may quit (but of course you can do something about job satisfaction – training or green benefits anyone?), reputation is important (and again the choices on external and internal projects can affect that – what about that CSR reporting project?), sectors change as certain consumer and government demands around transparency change), companies make money (or don’t) based on the decisions they make and the impacts of their projects on those compass points (some projects may not be available to you, as in the real world, if your reputation in that area is below a certain accepted level). There’s a lot to manage and monitor, but then that is the nature of successful businesses and including those moving in and around the sustainable development space.

My two hours with the game flew by and I really enjoyed playing Green & Great. I found the game very thought-provoking, complex but not overwhelming, and fun! (Which is one of my top criteria for games!)

I played my company team on my own, which is always going to be easier, as I only had myself to convince for decision-making. Because we were trialing it, we talked quite a lot with Piotr and among the competing teams, which might be less in a real game. I can imagine however playing it with a team and the rich conversations which would surround our choices about what kind of projects to take, how to build up a committed workforce, to take our sustainability values seriously and still make a good income. I was delighted that I ended up with high scores around Nature, Society and Wellbeing and towards the top for Economy (not the highest, but a satisfying result – we didn’t go broke keeping our other three compass indicators high – not even close!)

The game is great for consulting company teams, or for businesses who are working towards and trading in the sustainable development field. It is also an excellent way for people in the NGO or public sector to learn more about their private sector partners and the environment in which they are working. The game gives good opportunities for insight into how business is transforming and can help enrich the dialogue with business that you find in public-private partnerships.

It’s available now to play, and you can either play it with your own teams internally, with mixed sector teams if you have a joint project, or if you are a game administrator/facilitator/trainer you can play the game with your clients. They are continuing to enhance Green&Great and are happy to have feedback (which I was also happy to give – it is nice when a game is constantly evolving.)

Curious? If you want to try it out for yourself you can sign up for a demo and free trial on the website: Green & Great

Last week I had the great honour to join Women’s Forum for the Economy and Society as a main stage facilitator and moderator. My session, one of the opening plenaries, was set as a brainstorming session with 600+ participants on Women’s Visions for 360 degree Growth. My role was to moderate and facilitate meaningful interactivity with the participants, and to moderate a panel of interesting women leaders working in this field. 

This blog post is not so much about the content of the session, which was fascinating (challenging GDP as the growth indicator, especially when growth is being more expansively defined in terms of well-being,  equity and more; looking at the opportunities (and challenges) to international cooperation towards developing a new paradigm for growth, and the role of social media like Facebook in new forms of governance and democracy – fascinating stuff!) If you have the patience to watch a 90 minute video, or part of it, you can watch the session and the panelists here: Video of 360 Degree Growth Session

What I wanted to write about here was a list of the best tips I received from a number of great speaking coaches while I was writing and preparing for this session. As I am devoted to reusable learning,  I wanted to document them so that I don’t forget them, can use them next time, and who knows, they might be useful t others too! I have broken these tips down into three areas:

Tips for TV Interviews, Public Speaking and Panel Moderating

Giving Great TV Interviews

  • Don’t take an impromptu interview – never! Ask for the question(s) or topic, and re-schedule even if it is only 15 or 30 minutes later. Then prepare your answers. According to a French coach, interviews are like a “seduction”, they want you so they will wait.
  • Give short answers. The interviewer wants to ask you questions and move the conversation along in some direction. TV interviews are not speeches, they are a back and forth with the interviewer. This is also much more dynamic for the viewers.
  • Be concrete. Say something concrete in every answer ( include data, a number, a short case example.)
  • Be prepared to give an example for everything. A favourite question for interviewers is, “can you give an example of that?” This always makes the story more interesting and concrete.
  • Pause. For thinking and/or effect – silence is your friend.
  • Smile! It makes you appear more comfortable and connects with the interviewer and audience more easily.


Speaking in Public – Part I: Preparation
  • Practice for HOURS not minutes
  • Memorize your overall sequence, or arc of the session – where is it going, and what are the main parts. If you can, repeat this to the audience before you start.  
  • Prepare your notes in three parts (this is my own advice): 1) Create a detailed agenda (I have a template for this, which includes timing, transitions, and all the information on how to run interactive components);  2) Based on this write our a verbatim script; 3) Then write memory prompts on cards. For the cards I cut small rectangles out of black paper and write on them with a white pen. The cards need to be the right size to hold in palm of your hand. Number them, because at some point you will be shuffling them and will lose your place if you don’t do that! In the end you might not use them, but you will have them just in case.
Speaking in Public – Part II: Delivery
  • Use short sentences at beginning. This makes it easier to remember those opening lines and helps to manage nerves and breathing.
  • Emphasize one word in every sentence. This may sound strange but try it (don’t overdo this though). It can be any word. This helps to vary the cadence. You can also experiment with having sentences end high or low (as in pitch – I am probably butchering the musical references here, but I know what I mean!)
  • Speak more slowly than you think is normal. Pause in between sentences so people can follow. This is especially important with an international audience. People need to get used to your accent. As someone from the Midwest of US, I always think that I don’t have an accent, but I am assured that this is not true!
  • Use the physical space on stage. Walk up down, side to side, back and front – I even walked up and down the steps into the audience several times. (But don’t PACE obviously.)
  • Use your hands, use your face, use everything. This will be much more interesting. Of course, use them for emphasis so it is not weirdly distracting.
  • Don’t wear anything too busy by your face (e.g .necklace or scarf) if there is simultaneous video (e.g. if there is a big screen behind you, and for web streaming) it looks overwhelming.
  • Boost your confidence. Get your hair styled and make up done professionally, wear something that makes you feel fabulous, talk to a good friend right before, or any other thing you can think of!

Moderating a Panel Discussion on Stage

Note: For moderation, the difference between good and bad is mostly about preparation – I had so many audience members note that most moderators did not seem to know their speakers, so could not really draw out the most relevant facts for the audience.
  • Make a notebook with a divider for each of the panelists. In each section, create a collection of their CV and narrative bio, a photo, their writing, articles on the web when they have been interviewed. Notice what they have been asked and how they answered. Ask them what they recommend you read that is iconic of their work. Read all of these inputs across the different speakers to spot patterns that can provide you with some red threads that can help knit together their inputs into a coherent discussion.
  • Google the speakers. See if they are on Twitter, watch their videos on YouTube, read their comments on other people’s work.  Make notes of most interesting parts and some interesting facts or  good quotes you might want to use.
  • Memorise their names, titles, places of work so you can say them without hesitation (or notes )
  • Draft and memorise a leading question for each of them that reminds the audience who they are = even if they were introduced before (e.g. Marilyn, you are a Professor of Economics and…)
My session at the Women’s Forum combined quite a few of these different methodologies as it was interactive and had several distinct parts that I needed to weave together into a coherent whole for the audience that gave them an interesting, interactive and meaningful experience. I tried to take my own advice! If you have the patience to watch a 90 minute video, or part of it, you can watch the session ( Video of 360 Degree Growth Session ) and judge for yourself – you might have some other great tips that I can add to the list. 

I use Evernote (“Remember Everything”) for many things from tracking my kids’ football schedules to contacts for my favorite conference centres, but the most useful things for my learning and facilitation work include:

1. Keeping track of photos that I take at my workshops, including all the flipchart templates, job aids, handouts, game descriptions. I use these both for reporting purposes, but also so these materials become reusable (thus I don’t have to think again about how to frame this or that activity, or can write over a formatted job aid etc.)

I also have a great set of individual visual facilitation icons in there that I created for myself during a training course I took. Now I can scan that archive to remind myself how to draw those little star people holding trophies. The great thing about Evernote is that you can search text in photos, so I can find things easily again (even more so if I write the client’s name or session key word on the flipchart itself before I photo it).

2. Keeping track of articles that are useful to my work. I had an enormous stack of printed articles that I could not part with sitting on the floor of my office for years. One Saturday I went through them all and either found them on the internet and copied them into Evernote, or took a photo of them (you can also scan them) and put them there.   I recycled my paper stack (which I could not search) and now have both a clean office floor and a great archive of articles (which I can search). Some were from as far back as 1984! Almost everything is on the internet these days – even 2002 editions of Water Resources Impact Newsletter which featured a special issue way back then on Distance Learning and E-Learning in Water Resources Education, interesting from a historical perspective on this fast moving field.

I wrote about this process in a post called What to Do With a Stack of Reading? Create a Personal Knowledge Management System. I could always google, but with my personal archive, I can be sure that every one of the 269 article there is relevant for something I am doing.

On the articles, just a tip, after the first push to input existing hard copy, now it is easier –  I have installed a button on my browser which will let me instantly clip an article and automatically put it into Evernote. Because I can have certain notebooks synced so that I can access them offline, I can do my research on the plane if needed.

So enough about me, I wanted to write this post to point to a set of daily tips that are being written on using Evernote. The first two are linked below, and you can follow the others on Damian’s Blog: .net from Geneva, Switzerland:

Evernote Tip 1 is: You say: “I like Evernote, but I’m not sure I’m using it correctly” – I say “don’t worry, there is no one ‘right way’ “

Evernote Tip 2 is: What is an Evernote Notebook? So what if I have 80 notebooks?

Apparently there will be 31 of these being written daily this month (but timeless). By the way Evernote is free, and for inspiration you can check out the Evernote Trunk for cool examples of how people are using it, like with IdeaPaint which you can use on your wall to turn it into a giant whiteboard, then take photos of your drawings and ideas with your phone and store them in Evernote, which you can then search.

I’m currently working with a team on a number of 2-hour workshops that will be held at an upcoming international conservation congress in September. For one of the workshops we will feature 6 speakers sharing different approaches to working with their supply chains.

We will be using the Ignite format for their presentations and every presenter I have spoken with so far has been keen to try this, although they realise that the format is a little more challenging for them than the traditional PPT slide set that you control yourself.

I was asked by one presenter to share why we thought this format was a good choice, so I wrote up the following short description and rationale for why Ignites are great for conference presentations:

Ignites started in 2006 in Seattle, Washington, supported by O’Reilly media, and focused in those early days on helping the technology industry speakers “ignite” their audiences with new ideas, but in 5 minutes bursts. With the slogan “enlighten me, but make it quick” it rapidly caught the imagination of other conference and event organizers (both within the tech industry and beyond) as a way to feature many people, and thus many ideas, in a reliably short period of time.

The format of an Ignite is 20 slides auto-timed at 15 seconds each, which is similar to the Pecha Kucha format (which is 20 slides auto-timed at 20 seconds each). Pecha Kucha’s also came out of industry, launched as it was by presenters from the design industry in Japan, earlier in 2003.

These are powerful formats for conference settings as:

  1. They focus the speakers on a strong narrative line and key messages (avoiding going off message and in different directions during their talk);
  2. The format keeps the speaker to time, as the slides are auto-timed in advance meaning they change automatically during the presentation. This also means that all speakers have the same time allocation, and the last speaker doesn’t get squeezed by the time transgressions of the first speakers (we’ve all seen it happen).
  3. It means you can have, with confidence, more speakers and ideas, which allows for greater information exchange, as the talks are guaranteed to be short (after the last slide shows the screen goes black and its obviously over);
  4. It sets up a reliable pace for the audience, so they can relax into the 5-minute segments (even with many speakers) knowing that the presenter will stick to time and the essential points. They also know that if one presentation is bad, then it is only bad for 5 minutes and not for an ideterminable time period. This goes a long way in conferences to enhance audience enjoyment and engagement.

These are just some of the reasons we will be using Ignites in our conference sessions, and why this format is a strong choice for this!

I have written some other blog posts on using both Pecha Kuchas and Ignites, and what makes them good. If you’re interested:

I recently facilitated a workshop where 18 country teams participated and needed to present their progress and work for the year. They felt they needed to do this to foster peer learning among the countries and to gain an overview of what was happening globally. However, it is hard to imagine any one person listening actively to that many presentations in a row, although for pattern spotting, for good practice ideas and to see who are your resources in the group, it would behoove every one to listen without falling asleep.

So here is what we did…

Preparation:

  1. Expectation Management: We gave each country 7 minutes for their presentation, we told them we would time them; 
  2. Making Inputs Parallel and Comparable: We gave everyone a PPT template of the key questions to fill in which was made up of 6 slides with headings (Frankly I think 4 would have been easier for them to stay in time);
  3. Split Them Up:  I created four sessions over 2 days to spread them out, continuity was created using other tracking and memory tools (below).

Delivery:

  1. Time Keeping: I timed each presentation with my Iphone using the Doorbell sound to signal time up. I also gave 2 minute warnings with two fingers and walked around the room until I could catch the speaker’s eye (if they were strategically avoiding me). Everyone but one speaker stopped within 30 seconds of hearing that doorbell ring twice into my hand held microphone (note that if you have interpreters, then don’t put the phone right up to the microphone, it apparently drives them crazy, which I can well understand);
  2. Keep it Equal: Why the Iphone is great is that no one imagines that you are judging the time yourself subjectively, the time is up when the timer goes off. This was accepted by the speakers, only one person challenged me, but then I let her watch my phone for the following speaker and that was that.

Listeners as Learners:

  1. Helping Learners Stay Concentrated: Find as many ways as possible to help the people listening to stay engaged: I did three things:
  2. Use the Bell to Set Pace: Once the crisp pace is set, then people can endure presentations that might not be as strong as others, because they know it is for exactly 7 minutes.
  3. Count Down Visually: I created a flipchart checklist (above) at the front of the room of the 18 country presentations in alphabetical order and made a big flourish when checking them off as a presentation was completed. This helped people keep track of who was on and who was next, but also how many presentations there were to go:
  4. Make a Job Aid: As we didn’t have time to have a discussion or even take questions between the 18 presentations,  I created a Job Aid (handout) that asked the listener a couple of questions about each presentation – first to reflect on the presentation and identify, “What ideas did I appreciate most from the presentation?” – that was a appreciative frame that assumes that you will get ideas and appreciate them! At least it gets people listening to them to see if they can identify this. The second question asked for “Ideas to follow up on with the team members” – e.g. further questions. By capturing these in real time, they could go find the speaker in the coffee break and follow up on their questions (or ask them in plenary if time). This Job Aid had the benefit of tracking progress too for the individual, and letting them customise their follow up one-on-one with the presenters during coffee/lunch/evenings, rather than having one or two people hijack the plenary after each.

After the Presentations:

  1. Pattern Spotting: Rather than rushing on into the next thing, we built in a good amount of time to discuss the meta-level findings from all the presentations once they were completed – what similarities did participants hear and what diversity? Were there any messages or learning points coming through loud and clear in many of them?  As people used the Job Aid to capture their thoughts and organize them, when it came to the pattern spotting, it was easier for people to thoughtfully contribute.

In the end, we did it – people made it through all of them – both presenters and listeners, and identified some fascinating interconnections and good practice. And although it seemed easy, it took quite a bit of work to design it so that, in spite of 18 presentations, people can stay engaged and learning throughout the whole event.

What facilitation and learning tips do you have when dealing with a slew of presentations?

Last week we were facilitating at a major environmental conference in France with 16,000 people. We had been working with the Secretariat Team for 2 years throughout the preparatory process to help shape the agenda, work with the governance team, contribute ideas to the design and help facilitate stakeholder input to the overall process. All of these preparatory events had from 40 to 400 people, frequently all in the room at the same time.

And it all culminated last week in the final week-long conference which featured hundreds of events, many in parallel (often 30 at a time), and an offer to the different organizations hosting conference sessions for facilitation support.

Our Facilitation Team of 6 Facilitators was international (with multiple language skills) and during the week we facilitated, or supported as facilitators, 63 sessions ranging from 5 people to 2000.

In between these events – which made up over 141 person hours of facilitation – we were everywhere in the venue doing everything else – we met our session leads and their teams, held multiple preparatory meetings, briefed panelists and speakers, made flipcharts and group work templates, found materials hidden in boxes under tables, checked rooms, sweet-talked “volunteers” and technical staff, tested microphones, and more…

This is the second mega-conference (not counting all the ones from 200-500 people) where I have had a Coordinator role for a Facilitation Team. It is interesting to think about what makes these kinds of Facilitation Teams work best, as there are lots of unknowns, the environment is constantly shifting and changing, and often the Facilitation team – which is usually a distributed team with regional and language diversity in our cases- has not previously worked together. Here are some things that seemed to help us have a positive experience and impact last week:

1) Share Schedule Overview

Everyone had a completely different schedule, and although for some sessions we paired up, the pairs were almost always different. So having one shared schedule that showed everyone’s activities helped us understand each other’s commitments each day (each hour even) and get a sense of where the Facilitators were and who could help out or pinch hit if need be. This schedule took the form of a matrix with all of our names in rows, and the days of the events in columns. Each person also had their systems too, but that was what we shared.

2) Communication – Set-Up and Tools

On our first day (even before in my case) we took everyone’s cell phone number and put it in our smart phones (everyone had one). As we were almost always in wifi zones (although there were different passwords in different parts of the conference venue which was annoying), we signed up for WhatsApp and used that for free, or SMS when that was not possible. That was the main way we kept in touch throughout the week. We only rarely phoned as we were so frequently in meetings, sessions etc. Our smart phones helped us get last minute emails from our session leads (clients), as there were many last minute changes, and also helped us forward documents to the central printing facility.

3) Pick a Homebase

We needed to have a homebase for the team in the Conference venue where we spent our whole day (it wasn’t easy to get in and out of security quickly – you could get stuck for 45 minutes in line at the metal detectors), so we used a central space inside called The Agora – a large tent with a cafe, bistro tables and chairs, and lots of flipcharts – which is where we had a number of our sessions. There was a backroom there where the conference technical team let us store our bags securely and where they had drinks and snacks for staff, as well as the supplies. When we were done with our different events during the day, we would meet back there quite naturally and sit down at one of the bistro tables (often with one of our team facilitating a session on the stage beside), have a coffee and talk through what happened. By the end of the day the coffee would turn to a glass of wine and a review of that day and the next. It was so important to have that central place to meet and also to relax and regroup after high pressure and often very politically sensitive sessions.

4) Hold Breakfast Meetings

Every morning we met at 07:30 together for a meeting to discuss our schedule, any changes, any help we needed, and most importantly any relevant information we were getting. In these huge events, information comes in from all sides, through the organizers, through email, through our session partners, so this meeting was a way to get everyone there to share what was going on that was relevant to people like us who needed to move quickly and nimbly through the jungle of events, delegations, and the extended organizing team. Sometimes this was fun information – like the time of the Mexican evening reception in the Exhibition space – sometimes this was about one of the security gates being closed or needing a second, special electronic badge to get into the opening session because Heads of State were attending. (We also tended to eat dinner together each night if possible, but those weren’t “meetings”, more like wonderful getting-to-know-you opportunities.)

Finally, and most importantly…

5) Find Great Facilitators

This is probably the most important ingredient in running a Facilitation Team at a mega-Conference. You need Facilitators who both master and can use their facilitation tools flexibly. Because weird things happen at mega-conferences:

  • You don’t know the group size in advance, even in a room of 400 people, you might get 50 or standing room only. So you need to be able to scale up or down your design on the spot;


  • You might not know who is actually “in charge” of your session. Because many of the sessions are co-hosted, you might be dealing in the design phase with a young staff member from one organization, and then onsite, senior managers come in with their advice and desires, so you need to be ready to change, or hold your ground, in the hours (or even minutes) before your event starts;


  • You can’t see the space in advance. At least before you get there, and once you are there you can look, but at that point the design can be rather fixed. We received information about the seat set up, and whether we could put things like flipcharts on the walls in advance, which was helpful, and we had to trust that this would be the case.


  • You can’t depend on having set up time before your session. Each event had ostensibly 30 minutes between scheduled sessions. However, most sessions ran over (not ours of course!) which meant that we might only have 10 or 15 minutes to set up the room – and this could include cleaning up after the previous group, and rewriting the nameplates because so many speakers changed at the last minute. So we had to have everything made, sorted, and folded in advance and ready to pop up on the walls, or put on the tables, or hand out.


  • You have to be able to deal with high emotions. In a conference of 16,000 and so many events, both your session organizers and your participants have been on the go non-stop from morning to night. They are tired, they might feel exposed, they might be outside their comfort zone (we saw some of that as most people were technical people who all of a sudden are on stage in front of hundreds of people talking about their work). So there is quite a lot of bedside manner needed in events like these, and sometimes it is just a matter of gently adopting a take-charge attitude and getting things done for your session host teams who are effectively working together for the first time, and doing something (organizing a conference session) which they only do once every three years. Not to mention the fact that you (the Facilitator) are asking many of them to steer away from their safe, comfortable, default format of Panel of 13 speakers followed by 10 minutes of Q&A with an audience of 200 people.

All in all, our feedback from our session hosts was really excellent, and it is still coming in. We worked well together, we laughed alot, things within our control went more or less smoothly, and our session host teams were satisfied. And we learned a great deal about how to support and make more interactive these mega-conferences.

It is hard and can be exhausting, but the engagement you can foster from facilitating large groups to more granular outcomes can be both surprising and pleasing for participants, who report that they get even more from facilitated sessions – more engagement, more networking, and more learning (and even some ideas on facilitation that they can take home and use themselves) – spreading facilitation far beyond the walls of that enormous conference centre after the mega-event.


I moderated a panel at a large conference over the weekend, a conference at which I was also facilitating. I am not always so keen on doing this – not because I can’t moderate, but because I find it tricky to moderate AND facilitate at the same time.

Good panel moderators need to listen deeply. They need to pay very close attention to what their panelists are saying, to their arguments and questions, and the interesting possible inconsistencies amongst them. Moderators must poke a little, explore, try to move the panelists ever so gently out away from their traditional messages and in doing so potentially out of their comfort zones. Good moderators can generally anticipate the audience’s area of interest and questions in order to generate a vibrant debate and discussion.

But when you’re facilitating, you can’t always listen.

I moderated/facilitated my panel from the floor, that is, I was standing in the audience while the panelists were speaking, far away from the podium with all its formality. I stood and walked through the participants with my wireless microphone on all the time so I could jump in without missing a beat. And without the awkward fumble of turning the mute on and off. In doing so I could keep a more interesting conversational rhythm to the panel discussion.

But I couldn’t too probe much, and I couldn’t always keep track of the narrative of my panelists – at least not at a very nuanced level – why? What else was happening at the same time that I should have been listening to my panel speakers?

  • I was setting my iphone stopwatch to the 5 minute intervention cutoff after the speakers (because I had been warned by the organizers that they would go wildly overtime in their enthusiasm, effectively cutting off any discussion.)
  • I was checking my timer to see how close I was to the end, because I amplified the alarm for all to hear (with my lapel microphone).
  • The giant black crickets that I had seen crawling into the room in the morning (this was Nairobi) started to make loud insect phone calls to each other.
  • One of the organizers came up to tell me that the closing speaker had changed.
  • Another organizer came up to inform me how to pronounce the last name of the new closing speaker, which was Czech and not altogether obvious.
  • I was trying to remember the exact title of the next panelist, because the cover ppt slide had not been replaced by the tech team after the previous speaker.
  • The man in the blue shirt in the front row was frowning at me (or was it at someone else?)
  • I discovered that there was one spot where I would get chilling police whistle-like feedback in my microphone so had to go stand somewhere else.
  • The first organizer came up to tell me that the initial closing speaker was available again, so I didn’t have to remember the Czech name pronunciation.
  • They started to drill for something akin to oil outside so I had to go and shut the door.
  • I had to dodge a participant who came up from behind me to tell me kindly that I was doing a good job, but wanted to whisper it to me just where my lapel mike was attached.

All this in the 5 minute intervention that my first speaker made (or at least it seemed like it).

Moderators sit at the head table, listen intently to the speakers and have a great conversation. Facilitators are highly sensitive to all the information coming in from their environment – more than the one voice after another on the panel. They are managing the space, they are managing the time, they are managing the organizers and they are managing the hopes and expectations of the 140 people in the room. As a result, ask me to moderate OR facilitate, both of which I will be happy to do, because facilitators can’t (always) listen.

I prepared a 54-page Facilitator’s Guide for the workshop this week, a master list of materials, a session-by-session description of what job aids to make in advance of the event, and a mock-up of every flipchart we would have to draw on site. We had a detailed facilitation agenda, and a script ready for each session that would be lead, we even had a minute-by-minute design for our pre-event facilitation briefing.

However, in the instructions I created to help prepare our 8-person facilitation team, one piece of guidance was clearly missing – take care of your health.

I didn’t say, make sure to get good sleep in the week before you come, take your vitamins, drink plenty of water, and don’t stay out too late. I didn’t say, don’t try to get absolutely everything out of the way in the nights before you take that transcontinental overnight flight, and don’t cut it too close on arrival so you can rest before we start our very full programme of activities.

Maybe Facilitators think they are a bit super human, dealing with the emotions of large crowds, handling stressful environments, holding the hopes and dreams and fears of a group of passionate people, getting up early and staying up late setting up the room and moving dozens of chairs, or running miles to find hotel staff and trying for the 100th time to get them to turn off the aircon in the room.

But on our preparation list in the future must absolutely be the husbanding of our own resources in the days before a big event, and during it. Otherwise, we risk being taken out by an opportunistic bug, wicked jet lag exacerbated by sleep deprivation, or worse. And while it is no fun for us, it is also no fun for our team members and our partners.

It hit home again today, I am not sick myself, but as the leader of the facilitation team and seeing it around me, I am sorry that I didn’t write that note. And at the same time wonder, even if I did, if the Facilitation Team members would have done something different in preparing themselves for this event? I know this community. I write this at nearly midnight in Bangkok after a long long day, and after promising myself an early night.

Once I push “Publish” I’m off to bed, I promise myself, to take my own good advice…

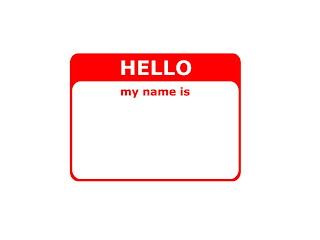
For years, name tags looked something like this (above): Name, title and organization. Small, business card size and with a pin on the back that always meant that no matter how many times you adjusted it, it listed slightly to starboard. The printing was also pretty small, making people with personal space issues perpetually nervous.  Name tags are changing, here are two I received more recently that start to work for you on a lot of levels.

This GTD Summit name tag is twice as big as the first, measuring 9cm x 11cm and popped into a sleeve hung on a sturdy cord. The first name is pulled up by many font sizes, and your identity within the community gathering is added to the information given. For an international group, skipping the official title and adding your country helps give more backstory for discussion.

This name tag, used by TED Global this year (as last year), is even bigger. Measuring in at 12cm x 19cm, it is laminated into a block hung by a cord connected by clips on both sides – this you can see from a distance which helps at crowded receptions and also presumably to monitor entry to the venue and satellite events held all over the city. On the name tag the first name again stands out, encouraging people to be on an informal,  first name basis. The photo is an interesting addition (mine is pretty standard, but many people had unusual studio photos that gave away some secrets of their passions). Below the title, organization and place of origin (also helpful for languages), comes a section called “Talk To Me About:” followed by three key words. We were asked to pick these to add to both our online profiles as well as our badges, to give anyone approaching a substantive starting point for a discussion. Again, lots of creativity can go into these three words.

Another cool feature of this  name tag was that on the back you had the programme for the week, colour coded day by day, with the session titles, speakers names and timing. Social events and venues were also added. So when you are sitting in a big conference hall waiting for a speaker, or at coffee wondering if you wanted to go back to the big room or sit in the simulcast lounge, this information was at your fingertips to update you on what’s happening and for quick decision-making about where you should be at any moment.

In the end, a name tag is both for the person wearing it as well as everyone else attending the event, it provides provenance, establishes identity in the group, and also, if it is designed to do so, can help encourage engagement that starts further down along the usual small talk trail of questioning.

The next time you make one, think about how the name tag can be an intervention in itself? Think about how many different items of information are useful to include – and what you want the impact to be. Can it help people be on time, help people find their own language groups,  identify similarities and diversities for you so that you can get right into the most interesting conversation, encourage informality by picking out the first name, give you the sense of being one of the in-crowd by wearing a huge identifier?

Now, that’s what’s in a name (tag)! Any other innovations to this workshop staple to add?

We’ve written a number of posts about both facilitation and the use of online tools for virtual and face to face events. See, for example:

“The Connected Facilitator: What’s in the Online Toolbox?”,
“Look Behind You! The Webinar Facilitator’s Non-Technical Checklist”,
The Two-Day Total Twitter Immersion: Using Twitter for Social Learning“,
“Knowledge at a Distance: Skype Video – It Works!“; and
“Create a Facilitator Role for Your Conference Calls and Webinars

In this two-part blog post, we are sharing (in part 1) some examples of tools that are either free or have a “freemium” model (you pay for increased functionality) and which we think can be usefully used in online facilitation; and (in part 2) some ideas about how you might adapt facilitation methodologies to an online environment using these tools (plus IRISnotes – as we haven’t yet discovered a lower-cost option…). We hope you find it useful, and that you’ll share your ideas and experiences too!

Twitter.com
● Contribute to / follow conversations in real time with short bursts of info: max 140 characters
● Hashtags aggregate related content
● Content can be ‘retweeted’
● “Follow” option
● Tweetdeck

Backnoise.com / Yammer.com
● Similar to twitter
● Private option

Skype.com
● Conference call diverse group sizes
● Option to add video (max 10)
● Screen-sharing
● Instant-messaging with chronological display
● Send files

Screenr.com
● Create screen-casts, recording screen and voice to share online

Slideshare.net
● Share presentations, documents and professional videos publicly or privately
● Create slidecasts (slideshow + MP3 audio synced)
● Create channels & favourites

YouTube.com
● Upload video content
● View video content online
● Create channels & favourites

Wikispaces.com
● Co-create documents collaboratively
● Track changes / contributions
● Password protection option

Docs.google.com
● Co-create documents collaboratively
● Similar editing to word / excel (and can export in these formats)
● Design surveys (google forms)
● Auto-generate survey reports with graphics

SurveyMonkey.com
● Design and manage online surveys
● Auto-generate survey reports with graphics

PollEverywhere.com
● Create multiple choice or free-text polls
● Collecting info in real time via text message, web, twitter, and smartphone responses which can be instantly combined
● Charts update instantly as people respond (online or embedded in ppt)

Doodle.com / MeetingWizard.com / TimeAndDate.com
● Propose dates / times and gather responses online to quickly and easily determine preferred options

MindMeister.com
● Co-create Mindmaps online in real time
● Working simultaneously and see changes as they happen

Wordle.net
● Generate “word clouds” from text with greater prominence given to words that appear more frequently

Smart Phone / computer video cameras
● Create short videos for sharing (by email if video-bites)

Smart Phone / computer audio / voice recorders
● Create audio files for sharing

DimDim.com
● Slideshow, chat function, audio for presenters, recording, private chat, whiteboard, video link for the facilitator, and more.

Online-stopwatch.com
● Keep time online, counting up or down
● Customize the visual (stop-watch, clock, egg timer, etc.) and sound (bell, alarm, laughing, beeping, etc.)
● Once customized, download the link to your timer. (Personally, I like the egg timer with applause as here: http://www.online-stopwatch.com/eggtimer-countdown/full-screen/?ns=../../s/3.mp3)

And here’s another one we love but that’s not free (you’ll need to make a small purchase):

IRISnotes
● A pen and mobile note taker
● Capture handwritten notes and drawings
● Edit, save and export them
● Convert handwritten notes into editable text

Following part one of this blog post (which shares some examples of tools that are either free or have a “freemium” model and which we think can be usefully used in online facilitation), this part two shares some ideas about how you might adapt facilitation methodologies to an online environment using tools that are either free or have a “freemium” model (plus IRISnotes – as we haven’t yet discovered a lower-cost option…).

1. Scheduling future events
• Use Doodle.com / MeetingWizard.com / TimeAndDate.com to quickly and easily determine favourable dates and times for future events (e.g. future conference calls). Not only can this be done to schedule your online event – you can effectively use it during the online event to efficiently schedule your next in real time!

2. Presentation
• Use Ignites (igniteshow.com) / Pecha Kucha (http://www.pecha-kucha.org/) (timed presentations) to keep to timing in online events and make sure presentations are well prepared and maintain a good pace.
• Use Prezis (Prezi.com) for variety in presentations (a change from powerpoint), creating visual interest.
• Use short videos and/or screen casts via YouTube.com / Screenr.com or Slideshare.net

3. Work in small groups with online “job aids
• Provide a participants list to everyone in advance, including names and Skype.com IDs (or equivalent). Divide the group up into small groups, designating a host.
• Pre-create job aids using Wikispaces / Google Docs / Mindmeister etc. These will most often be templates, to which you can provide links.
• Direct people to your ‘job aids’ with links (plus log-in and password).
• Provide an online timer to keep time and remind people to promptly rejoin the whole group at the specified time.

4. Report back (after small group work)
• Use Screenr.com to create screen-casts for report back
• Create video or audio recordings – using computer and smart phone programmes / applications to pre-record report-back and share using YouTube.com or Slideshare.net – helping to avoid lengthy monologues and add diversity to the event
• Use an online timer (such as online-stopwatch.com) to help with time-keeping and speaker management

5. Prioritizing questions (e.g. for a Q&A with a speaker)
• Use Twitter.com / Yammer.com / Backnoise.com. Determine a hash-tag in advance and provide this to participants.
• Give participants a few minutes to submit questions. To prioritize these for the speaker (so they respond where participants are most interested in learning more in a limited time), then ask participants to ‘retweet’ the questions others have posted that they are most interested in hearing the responses to. The questions most ‘retweeted’ are then prioritized and the speaker addresses the questions according to this prioritization.

6. Clustering questions / ideas
• Use a mind-mapping online tool such as Mindmeister.com (or do a hand-drawn version using IRISnotes). Set up the mind-map in advance and provide all participants with the link / access (to edit or view) or, just use Skype.com screen share (or equivalent) to share the map and designate one editor.
• Ask all participants to think of a question / idea and then cluster these as follows: Ask any person to start, sharing their idea using instant messaging (this is important to keep it concise and to the point) – as well as reading it aloud (but not expanding on what is written unless someone asks for clarification!).
• The mind-mapper copies and pastes the idea from the instant message into the mind-map. With this done, ask for someone with a like / similar idea to share it (again, instant messaging it and reading aloud), which is then copied and pasted into the mind-map / or summarized by hand if using IrisNotes. Do this until there are no more like / similar questions or ideas. Then start with a different ‘branch’ of questions / ideas on the mindmap. Repeat until all questions or ideas are represented.
• The mindmap will clearly show where there is greatest interest, most clarification needed, most energy and/or ideas and conversation in plenary afterwards can start from here.

7. Voting
• Use an online tool such as PollEverywhere.com to do real-time voting (with an anonymous option). Prepare the questions / options in advance, or generate them online and set the poll up in the course of the online event. Either-way, if you think you might vote on something, get familiar with polleverywhere and its parameters (e.g. more than 30 people and you may need to pay a subscription fee) ahead of time.
• One advantage of poll-everywhere over google docs and survey monkey (see below) is that rather than having to download the results as a pdf, you can actually see results live – as they change second by second, creating more excitement and anticipation.
• Google docs (‘forms’: docs.google.com) and SurveyMonkey.com could also be used for voting prior to or during an event. Both enable results-exporting as visuals (pie charts / bar graphs) in pdf.
• All give you the option to track – or not – who responds and how, so you have the option of anonymity or respondent profiling and analysis. (e.g. how do responses vary by sector / region…)

8. Carousel
• Use Skype.com video conference calls (or equivalent) for small group discussion (Note: make sure all participants are in one another’s contact list in advance and provide a participant list with names and skype IDs, as well as who is in which group for the carousel so that the host / facilitator of each station discussion knows who they need to include in the conference call)
• Use wikispaces.com / google docs (docs.google.com) / Mindmeister.com mindmaps in place of flipchart stations
• And/or use IRISnotes for visual / hand written work in combination with Skype.com screen share (can save and share doc with next group for further editing, or have same station ‘facilitator’ throughout)

9. Open Space Technology
(visit openspaceworld.org for the ‘how to’ steps in a face-to-face environment)
• Use instant messaging (e.g. Skype.com chat) for people to submit topics / questions to schedule
• Prepare a blank timetable (in word / google docs / wikispaces.com) and copy and paste across questions and topics as they are submitted
• Provide each topic ‘host’ a few minutes to decide where they would like to capture the key points of the discussion as it progresses (e.g. wikispaces.com / google docs / Mindmeister.com / irisnotes), to set up the appropriate ‘page’ and send you the link plus log-in / password if necessary. Note: If you prefer, you could just pre-determine that everyone will use (for example) a wiki and provide the topic hosts with links to appropriate wiki pages – labeled topic x through to topic y.
• In the same doc as the timetable, include the following info:
(a) Who is hosting the conversation (plus their Skype ID)
(b) Links to the page(s) where the conversation will be captured, plus log-in / password if necessary.
• Use a screen share tool (e.g. Skype screen share) to share the timetable with everyone as it is developed
• Ask participants to instant message the topic host when they wish to join a conversation
• As the facilitator, keep time and use instant messaging to inform groups when they have 10 mins / 5 mins / 0 mins until the end of their session (OR use an online timer such as online-stopwatch.com) and then invite everyone to revisit the timetable for information on where to go for their next conversation.
• Use Skype conference calls (or equivalent) for small group discussion, in combination with Skype screen share as necessary.

10. World Café
(visit theworldcafé.com for the ‘how to’ steps in a face-to-face environment)
• Provide a participants list to everyone in advance, including names and Skype IDs (or equivalent). Include also in this list some coding (in a table) to facilitate organizing three different groupings of 4 participants for each round of the World Café, and nominating a host.
For example, for the first round of the World Café / first grouping of 4, you might group people by simply going through the participant list organized alphabetically by surname, and counting people into groups of four – giving each person a letter next to their name – e.g. the first four participants would be coded ‘Group A’, the second four ‘Group B’ etc. For the second grouping of four participants, go back through the list and this time number them from 1 through to the total number of participants / 4 (e.g. if you had 40 participants you would number them 1-10 four times. For the second round of the World Café, all the 1’s will chat together, all the 2’s together, etc. Then for the third round, you might assign different symbols or colours. You choose – the important thing is to determine in advance how you will group everyone, and include this ‘coding’ in the participants list so it is clear and easy to create the groupings.
Additionally it is important that, for each round of the World Café, you designate clearly in the participant list who is responsible for hosting the conversation (i.e. hosting the Skype call, keeping time and making sure everyone contributes!)
• Once everyone is clear about with whom they will chat in the first round and who is hosting the call (plus their Skype ID), you can launch round one. But first – set an online timer (such as online-stopwatch.com) that everyone can see and which will ring to call everyone back into plenary.
• Back in plenary, take some highlights ‘popcorn’ style from each group (call on the hosts of each group of four) and capture these in wikispaces.com / google doc / Mindmeister.com / irisnotes using screen share at the same time.
• Repeat.

11. Point and counterpoint (read the description of this methodology for the ‘how to’ steps in a face-to-face environment in the book: Thaigi’s 100 Favourite Games)
• Provide a participants list to everyone in advance, including names and Skype IDs (or equivalent).
• With everyone on the conference call, use Polleverywhere.com (or google forms / or SurveyMonkey.com) to gauge participant’s positions regarding a controversial statement. Set the poll/survey question up in advance, putting opposing controversial statements at either end of a scale of 1-10, with 10 fields in between into which they must enter their first name. (You need the names later!) Give participants only 30 seconds to decide where they are on the scale.
• As soon as you have all the results, generate the report (export the results) and share this with participants using Skype screenshare (or equivalent). You should be able to see the names of all participants on the scale from one to ten. At this stage, make a comment on the distribution. Then ‘count off’ participants, starting at the person nearest 0, putting them alternately in team 1, team 2, team 1, etc. Note: Designate one (or two) participant(s) – you want to ensure there is an equal number of participants in each team) who fall in the middle of the distribution as ‘judges’ who won’t participate in the work of team 1 and 2. Then designate the person nearest 0 as the “captain” for team 1 and the person nearest 10 as the captain for team 2. They are then responsible for hosting two team calls (using the list of participants shared prior to the meeting).
• Use a tool such as wikispaces.com / google docs / Mindmeister.com as a work space for each of the groups (having set up a space for each team in advance). Provide them with the link and (if necessary) login/ password and set them to work brainstorming all the arguments in favour of ‘their’ controversial statement – capturing all contributions on the tool provided. (This capture is essential for later.) Use an online timer (online-stopwatch.com) to keep time and remind them to return to a full group call.
• Meanwhile, set up 2 quick slideshows. Make sure you can play both on loop. In the first, go through the results from the poll, entering one name per slide into the slideshow starting with the name closest to 0 (and remembering to remove the judge(s)). With all the names in place, make the slides with the names of all participants from team 1 one colour, and all the names from team 2 in another colour. When you play the slideshow, as it goes through the names, the slides should alternative team/colour one and team/colour two. You will use these to call on the members of the teams to share their arguments, as well as helping everyone keep in mind who is talking and on behalf of which team / position. A second slide set is just two slides with just the two team colours (no names).
• Back in full group, launch the ‘debate’, determining who speaks when using your slide set, until all the arguments captured are exhausted. The switch to your second slide set and invite people to ‘change teams’ and spontaneously argue from the other team. You will not have names, so just switch from colour one to colour two. Participants can only share if they are adding a new argument from the other team to the one in which they participated.
• Once all arguments are exhausted. Invite the judge(s) who have listened to the debate to give their ‘verdict’ with a brief synthesis of which arguments they found most compelling.
• Finally re-do the poll that you started with. Generate the report and compare the results! Have people shifted in their thinking?

Please let us now how you get on and what you think!

We are currently running a Facilitation learning programme with a large organization here in Geneva that is focused not so much on tools and techniques, but more on the design of facilitated learning processes, and what it means to be the person leading them. Overall we are working to help people use facilitation in a very nuanced, thoughtful way rather than as a blunt instrument.

We have a session that is focused on ourselves as facilitators and for that we use any and all information that people have generated over the years (their choice) using diagnostic tools such as MBTI, Strengthsfinder, FIRO-B, etc. They can also talk to friends and family to get some inputs. The objective is to reflect on how our behavioural preferences might manifest themselves in our facilitation and group process leadership work.

It has been a very interesting thought exercise to try to identify times when our individual behavioural preferences might really help our processes, or might get in the way. Just asking the question – How might my behavioural preferences manifest themselves in my facilitation work – is an intervention in itself as it is something most of us don’t consider or consider very often.

We both give examples of where we see our own preferences at work, and take the exercise one step further to talk about how, once we are aware of them, we manage these. We are both very different facilitators, Lizzie and I, and it is interesting to see what we both actively do to make sure that the best outcome is achieved.

I grappled with one of my behavioural preferences recently during a large group facilitation exercise in Mali. My FIRO-B results in inclusion are rather high (expressed and wanted). This is a good thing, of course, when it comes to working successfully with groups, and at the same time it gives me a challenge when ownership by the group is one of the soft outcomes desired of a facilitated process. This might be the case for a network building meeting, one generating an action plan or campaign, or a Youth Call to Action – as was the case in the Mali event.

For any facilitator high in inclusion, turning over the process, standing back and letting the group take over takes deliberate thought and action and can really work against that behavioural preference to be in the middle of everything until the very end. But that ownership outcome demands it. In Mali, at the end of our process, that hand over needed to occur and did occur, but it was a little messy and felt for some as though the process was listing to starboard. As easy as it would have been for me to step in (my inclusion was ready to jump), I didn’t. I was present, I helped from the floor, I gave advice when needed, but the group representatives and the process we had set up took over, and they finished the work, and could revel in their success in doing it themselves.

That was hard for me personally, but very good for the process.  Lots of additional relationship building, deeper perspective sharing, and considered decision-making might have been lost if I had run that process myself right to the very end. And these outcomes can be used as social capital when this group meets again.

We use other examples of how our behaviour preferences map over to our facilitation work, and we talk about what we do to manage these, whether it is to design in specific things (like a handover point), to working with a co-facilitator that balances them out, to contracting differently with the group. We all have preferences that both make us good at being facilitators and that also might get in the way. Being mindful of these, and frequently asking the question – How might my behavioural preferences be showing up in my facilitation work? – is a good way to constantly be learning when I’m the Facilitator.

Related blog posts:
What Did You Say? Building a group’s capacity to deal with its own issues
A sampling of good intervention statements to use when you are trying to help a group work through its issues, take control of the process and lead its own development.

You Have the Right to Remain Silent
Reflections on dealing with a group that has different inclusion needs – just because someone is not talking doesn’t necessarily mean that he/she is not engaged. Watch jumping up that Ladder of Inference!

Understanding What We are Bringing to the Party: Group Process Consultation Resources
A list of tools and resources that facilitators and Group Process Consultation practitioners can use to explore their own impacts on a group.

In the stages of facilitation, one of the key preparation stages is “Education”. In this stage the facilitator gets to field questions, give background information, descriptions, share anecdotes and generally help the partner with their learning about any aspect of the facilitated event or environment.

Sometimes partners precipitate the Education stage conversations – because perhaps you are suggesting some activity or format with which they are not familiar. Or you might have to launch into this stage yourself because you perceive in the consultations that there is some misunderstanding or apprehension about your designs or tools based on lack of experience with them.

This happened to me recently. I went to Belgium last week to work with a team for one day on the design of an upcoming European-wide event. We could have possibly had the design discussion on skype or the telephone, but the need for longer discussions exploring the pros and cons of different methodologies meant, for that team, that it was more the Education piece that they wanted to explore. Therefore a face-to-face discussion with the facilitator – about how it would all work, what different techniques could produce, and how to frame new methods for a more traditional group – was going to be much more effective than a shorter, virtual interaction.

In fact, I find that for most groups the newer the methodology, technique or overall format is to a group, the more the Education piece becomes critically important to successful design (that is, a design that makes it through the gauntlet of consultations before you can deliver it). Definitely using a format without the partner being in full understanding of what is being proposed can be a risk for a group that has not yet adopted more interactive discussion techniques overall in their meetings.

Working in the sustainability field, we often have the pleasure to work with smaller associations for whom framing discussions and dialogue events in more than the most familiar board table discussion or conference style presentation and Q&A is unusual. Even for many larger organizations, convening meetings or dialogues differently to reach their goals is taking a risk at some level. However, what intrigues them most about more interactive methodologies, is the promise of optimizing time, achieving fuller and more developed outputs and above all ensuring some of the softer outcomes – like engagement, buy-in, enthusiasm for follow-up, etc.

My lesson here was not to try to push conference and skype calls all the time; these communication tools can be extremely productive. But in the Education stage, especially, it might be more important to be there, live and in person, and to create an environment where the partner can ask all their possible questions about your subject and process – even, if need be, over and over again.

In doing the research for a participants’ guide for the Facilitation learning programme we’re launching with a partner next week, I found a nice “greatest hits” collection that we made of some of our blogging reflections on the topic of making the most of internal meetings.  These posts were written from inside a large organization’s learning department and give some insight into the internal dialogues, learning and engagement processes (all kinds of meetings and gatherings) that institutions convene to help work through issues and generally get things done.

I am delighted now that we captured our learning at the time in this format – a blog- and wrote it with the spirit of creating “reusable learning objects” (I was always banging on about RLOs in the organization, now that I am actually reusing them I am delighted!)

This collection of 18 posts is organized below (with summaries and links) into the following categories that explore aspects of how to Make Meetings Meaningful:

  1. Purpose
  2. Positioning, and
  3. Process (e.g. design, implementation, reflection) 
  

1) What’s the Purpose?

Are we having conversations that matter?
How are the conversations our organization is having changing the nature of relationships and the way people, groups and societies around the world are thinking and behaving? In other words, to what extent are our conversations bringing about the change we seek and helping achieve our objectives? And how can we continue to improve the quality of our conversations to better ensure that they matter?


What Is the Purpose of ‘Free Coffee Mornings’?
What value do weekly free coffee mornings have in fostering staff networking and informal learning in our organization? We decided to explore the opinions of others in our organization on this topic, through a short questionnaire. Many staff commented on the exercise itself, pointing out learning about how to make the most of free coffee mornings in the future to engage with staff, about how enthusiastic staff are to express their opinions, and the importance of ‘social spaces’ and time for team-building and collaboration across ‘silos’.

You’ve Just Been to a Great Staff Meeting – What Happened?
What are some of the different purposes of a Staff Meeting?

-To update and inform staff members of activities in the institution
-To profile people who have done good work and let them share their reflections
-To maintain transparency and an open environment for sharing
-To bring staff together for a shared experience once and a while
Have you ever been to a great staff meeting? What was it about the meeting that made it useful, interesting, and made you excited to go to the next staff meeting?

Post: You’ve Just Been to a Great Staff Meeting – What Happened?

Networking – In or Out of Your Comfort Zone?
Monday afternoon, a two hour session was held titled, ‘Learn Something New: People and Networking’. The objective was to not to provide a taught course on Networking, but do create an environment where people can share and exchange about networking, and do it at the same time. … Some suggestions were offered about how we can do more networking, and how we can help create work environments where networking and interaction is one of the key objectives. Longer coffee/lunch breaks? Open spaces in the agenda for interaction? Introductory sessions which serve to connect people and help them build relationships?

2. Can Meetings be Used for Positioning?

In our day to day conversations, how do we “talk the walk”?
We’ve all heard of “walking the talk” – but what of “talking the walk”? In our day to day conversations, how do we “talk the walk” and reflect the core values employed in our work?… Our conversations can serve to enforce or discredit our messages and ourselves in powerful and lasting ways. Walking the talk is imperative. Talking the walk is so important too. People notice.

No Such Thing as a Pointless Question: The Impact of Simply Asking
The act of asking questions of an organization or group influences the group in some way. With our questions we get people to focus on something – what is that thing? What is our purpose of the question we are asking and what impact will it have on the way that person and the room think and feel? If people go in the direction you question them, where do you want them to go?

Me and My Multiple Intelligences. We and Ours.
In our organizations, what are we doing to make sure we interact in ways that address diversity of intelligences and learning styles? And how can we engage the multiple intelligences of our colleagues to best answer this question?

3) How Effective is our Meeting Process?

a) Design and preparation

How Old is Your Knowledge?
Workplace learning is 20% formal and 80% informal. Informal learning is an interesting combination of reading, internet surfing and search, audio-visual inputs, speeches and presentations, meetings, and conversations in the cafeteria, corridors, and on the bus. For the most part in these activities learning is quite accidental and not a deliberate objective. There are learning opportunities around every corner. What are you doing to structure your informal learning?

What Kind of a Discussion do You Want?
It is thought-provoking to hear people come away from discussions that they have lead and say, “Why do you think people reacted that way to my ideas?” Another question they could ask might be, “What could I have done differently to develop a generative discussion rather than a debate?” … If one sets up an academic situation, then people will be happy to react as though they are in one! Rarely do people throw a professor or a keynote speaker for that matter a soft ball…

A Courtroom or a Concert?
If I was going to run an important meeting, which environment would I want to create? How would I want my participants and speakers to feel when they left the room? What would I want people to get out of it? Would it be a zero sum gain, or would it be a step of a creative, hopeful process? When I sent out my next invitation for the group to meet again, what would be people’s reactions? Would they be excited that their favorite group was holding a concert again? Or would they dread the eyes of the jury?

Bottoms on Seats – How Do You Make That Memorable?
People travel to the venue, they walk into a bustling and colourful conference venue (exhibitions, restaurants, meeting spaces, and all), then they walk into their first of many small workshop rooms and basically sit there (different small rooms of course) for 75% of the conference… We spend a lot of energy thinking about communication to conference participants and the media around the event to make it colourful, interesting and engaging; how can we make sure that this does not stop at the workshop door?

Leveraging the Wisdom of Crowds in our Organization
Next week, our organization is hosting a week of meetings, bringing together in headquarters senior staff from our offices around the world. During these meetings, how smart will our crowd(s) be? How smart could it/they be? As session organizers, what can we do to make our crowds as smart as possible – better at solving problems, fostering innovation, coming to wise decisions, even predicting the future?

Lights, Camera, Action: Working with Star Speakers
Here is a lesson that I absolutely need to learn as a workshop facilitator: No matter how well you brief a plenary speaker who is a subject matter expert, they will go over the time. … Plan for it in as many ways as possible, especially by allocating substantial discussion times (even after they get cut down) so that this critical part of the learning process is always there to help people follow your star.


b) Implementation

Using Storytelling to Generate Ideas: We Just Went to a Great Staff Meeting – What

Happened? (Reprise)

We decided to use our own communications unit meeting to generate additional creative ideas, and then to share them with the team who is responsible for our staff meetings… Here was our question: You just went to a great staff meeting – you left excited, energised and hopeful. Tell us – what happened? We first worked in pairs to create our stories, then shared them with each other. Here are some of the ideas that emerged.

Ballroom Learning and Large Groups: Using Socratic Questioning
I am sitting in a hotel ballroom with 140 people at a conference titled, “Capacity Development Strategies: Let the evidence speak” and the level of some of the participants has dictated a certain room layout and format – we have a head table with four speakers and 140+ people sitting shoulder to shoulder behind tables in the room… If learning is the goal, and this formal room layout is a given, how might we best work with this format for optimal exchange?

What Exactly Are You Facilitating?
I have had a few people ask me about the value of facilitating other people’s workshops. What does that contribute to the grand scheme of things? The overall goal is not to just to move people around a room for a day. A good Facilitator is a process person with their eye on outcomes and learning – there is reason for every interaction, what is it and how can a process be designed that makes those conversations easier, smoother, and more productive? After all, facilitation comes from the Latin word “facil” which means to make something easy. Good facilitation means making group dialogue, decision-making, information sharing, and learning processes easier and more effective for everyone: your workshop hosts, your participants, and yourself.

c) Reflection and follow-up

Helping Other People Do Great Work
How transferable was my experience last week and what can it prompt me to learn about how to help our guest speakers do great work for us at the upcoming workshop? What more could I do in the next few days that could make all the difference for a first-timer, to create an environment where people are proud of their contributions, others appreciate it, and generally helps everyone do great work?

Dialoguing about dialogue
“Listen to one another with your full attention. Think about what is said, how it is said and the intent behind this. How does it make you feel – physically, intellectually and emotionally – as a participant in this dialogue process? How does it make others feel?” There is still much to explore and emerge about the role of dialogue in change processes. Along the way, how can we replicate such experiential approaches in our own institutions for collective learning about the important role of dialogue in change?

I found it interesting to look back, now that I am working from the outside and don’t always have seamless, day-to-day contact with such micro-learning processes, to remember how valuable it was to capture this nuanced process learning through a blog. Even after some time I find the learning very clearly reusable.  

I wrote this text (below) in the context of a Strategic Review I conducted for the Training Department of a big international development NGO. They wanted to explore ways to transform their existing training practice into a more contemporary “learning” model.

I pulled this text out again today because I am writing a manual for a facilitation learning programme that we are developing for a partner right now. I wanted to remind myself of this and thought I would share it.

*****************

A Learning Programme calendar, course description, or even agenda, is an intervention opportunity not to be missed. In a world of choice, it is a perfect way to communicate and feature your learning product(s) to potential learners, whether in-house or external.

Imagine that your learning programme was an excellent quality restaurant and the learners were valued diners. What is on the menu for your selective learning customers? Does it look good? Does it sound like something that the diner would enjoy? Would it satisfy her? Will the final product deliver what it promises on the menu?

How can learning providers (or facilitators) write their programme calendars, descriptions and agendas like a menu at a great restaurant and mean it? People need to read the course description and say, I want to take that course!

Consider testing course titles and descriptions on colleagues and potential learners first. Bear in mind, these tantalizing descriptions must also be true, nothing is worse than ordering a delicious sounding dish and having it turn out to not be as good as it looks on the menu!

I was just asked by a partner to send through some questions on which we could base a first workshop design discussion. I looked back at my learning design blog post Good Learning Design Discussions: Where to Start? (which incidentally and surprisingly just moved into the top 3 most read posts on this blog) and I think the questions there are very good for capacity development design discussions.

For a network workshop design discussion, I wanted slightly different questions, so I sent these instead:

1) What outcomes do you seek? What do you want to be different after the workshop ends?
These can be hard outcomes (such as a programme development process put into place, or to have a more consensus around prioritised items for a research agenda) and “soft” outcomes (such as more commitment, more enthusiasm, more engagement, better relationships among participants.)

2) What physical products do you wish to have as a result of this workshop?
Do you need a set of comments and inputs on a document, a strategic plan, a set of targets and possible solutions?

3) Who will be attending?
What are the numbers and kinds of participants who will be invited to attend? What are their motivations for attending?

4) Where will the workshop be held?
What kind of physical space are we working with for the event?

5) Where does this workshop sit within larger processes?
 To which larger processes would it contribute or be informed by?

These first five questions would get us started; check these first ones off and we can continue from there.

It is often difficult to find table signs that stand up so that you can see them from a distance (we had 88 people and 11 tables at our Climate Change Adaptation Learning workshop on Friday in Windhoek). I was impressed by the cleverness and the budget-friendliness of the solution above that the team here came up with.  We quickly changed from numbers to letters at the coffee break – both of which had been written on the back of the name badges before the workshop to help mix people up for seating during the day.Worked beautifully!

Every single page of the first pad of flipchart paper had been written on, with marker was so dark that it was clearly legible on both sides. The second pad, with no cardboard backing, was shiny and slick and had been rolled and then stepped on, lining it with deep wavy creases. Another was on a roll and had the consistency and colour of toilet paper on a old French train. Three clean sheets of paper could be found left over – but the Facilitator needed six. Finding no scissors in the materials box, she drew a wavy line down the middle of each sheet so that the tear marks would not need to be so even.

It had been 5 minutes before the event was due to start when she finally found the venue, a highrise building which had its main conference room on the ground floor and the registration set up on the top. She took the lift up to help register people, all of whom were already there, and then zoomed back down the steps to prepare the room. By the time she started room prep, the event should have started too.

After half an hour of moving chairs out of the classroom set up, drawing up the flipchart sheets, and worrying about what the participants were doing up there (no coffee had yet been delivered), the opening sequence was ready. She went up sheepishly to collect people, through an exhibition that was noisily being set up outside the room for the event which followed. She would finish the preparation for the next part at coffee break (if coffee had shown up by then.)

Thankfully at this point I woke up, so completely surprised that my subconscious had thrown up such a detailed set of facilitation challenges in my sleep. If you can really learn something in any context, then the big message here for me must certainly be PREPARATION.  I cannot always anticipate/do anything about everything as the facilitator (although the buck often stops with me), but finding a venue so I can be there early, getting the sheets done in advance, going thoroughly through the materials and equipment list with the partner, or having an “icebreaker” in my pocket in case of a delay are some that I can. With some of these out of the way, all the other random things that life (or your dreams) can throw up can get your full attention.

Gee whiz, OK, I’m awake now…

I have three workshops/conferences in just over a week, let me go back to my prep now (and daydream about that vacation on the horizon)…

I recently facilitated an enormously complex 2-day event, with over 100 people (numbers shifted hourly), multiple process owners, and a continuously evolving agenda. The more exciting things got, the more interventions were sought (e.g. seat on a panel, announcement, chair role, changing speakers, changing titles, etc.) The nature of the event meant that each request needed to be accommodated if possible without jeopardizing the overall coherence.

AND this was an incredibly important international environmental governance event, and I needed to be able to turn down the volume on the pulsating process enough so that I could listen, and be most effective in helping guide the discussions.

I knew it would be like this, this was a preparatory event for a much larger week-long political conference (600+ participants), with high stakes and even more moving parts. So in going into this exhilarating environment as the main process holder, I needed to make sure that I had a hand on everything possible and could find it quickly. Being awake, well rested, and centred in my appreciative frame, was necessary but not sufficient. I had a stack of paper, emails, and last minutes instructions and changes that made up the body of input materials.

What I am about to write might seem totally basic, and still I wanted to record this, as often I go into events with my pink labelled GTD manila folder with papers loose inside. Once at the event, I just use my Facilitator’s Agenda and my loose process notes, prepared session-by-session. I write them on a rectangular coloured Facilitation card, one per session. I use it to prepare notes for three fields: Preparation, Materials, and Script.

This time there was just too much stuff and it was still coming in fast and furious. It took me about 3 hours – I put together a Facilitator’s Notebook for myself to help me avoid shuffling through papers or worse, forgetting something critical while standing in front of a hundred people.

Facilitator’s Notebook

Hardware:
Two ring notebook
12 Dividers

Additional Materials: 
Hole punch (which I took with me so I could add things on the spot)
Label machine (mine is a Brother P-touch 65)
Day-glow post-its
Facilitators rectangular cards (different colours)

Steps:
1. I labelled the folder and then all the tabs, so they would be easy to read and look good to me and others (thanks to David Allen for my addiction to labelling things);
2. For tabs I used the following fields:

  • Agenda: This was first as it was my main guide. This included my Facilitation agenda, and also the Participants agenda so I could see how things were framed for participants (and how much info they had on each session) I also made for myself a one page snapshot agenda – which was essentially a matrix overview of the 2 days with the timing, and session titles, so I could see the overall logic and flow and communicate that to participants (hard to do from a 13-page Facilitators Agenda). I also included it in a blank page for notes, to include any last minute changes to the agenda.
  • Session-by-Session tabs: I had one called “Open”, then Sessions 1-5, then “Close”. Behind each of these I extracted that appropriate section of the Facilitators Agenda and reprinted it, so I could see the coherence of that particular session to introduce it. After that I had the bios of the speakers (if there were any, and there almost always were from 1 to 7!) After that I included the background papers that were being used and referred to in that session. I printed them 2 pages per sheet recto-verso so they wouldn’t take up so much space. I used this on the plane to prepare myself, so the papers were marked up with my own notes and highlighted with essential points pulled out again for briefing purposes. I also included copies of any templates or job aids that we would be using in that session.
  • Participants: Here I had the composition of the participants groups in numbers, as well as the Participants List.
  • Notes: Under this section I had 5 pages of blank lined paper and I used it to take process notes under headings like: “For next time” and “overall”, as I needed to write a short report afterwards with suggestions on what worked and what could be different. I didn’t want to have to sift through everything to find those, and there were plenty of free moments during the event when I could jot down ideas here.
  • Logistics: This section had filed all the logistics information I had been given, everything from my own flight and hotel details, participants logistics information note, to the layout of the room. Again more was added to this section once I arrived.
  • TOR: In this section I included my own TOR and a copy of the contract, for reference.

3. On site, I used the rectangular Facilitators cards to write my script for each session. I actually used different colours for each session so I could grab them and not mix them up as there were so many of them. I also had a blank one of that colour to keep in my hand to write notes, such as the speakers list and announcements etc. I used the hole punch to put them in the right section before using them, and then put them back in the book when I was done so they were not flying around in my bag.

Finally, the post-it notes came in handy for last minute notes and reminders, which I could stick anywhere and make sure they stuck out of the edges of the book so I could find them again quickly.

The whole idea was to minimise the “noise” of extraneous paper, notes etc. by organizing it in a logical way so that I can listen and help the group most effectively. It also helps me to have a system that can grow organically (thus the hole punch in my bag),  and helps me not lose important information and changes (e.g. writing them on a slip of paper and forgetting it in my pocket). I simply had the book open on my designated desk and could walk back and get anything I needed or add things as they came up.

So simple, and perhaps you do something this already and have some learning to share? I have been making these Facilitator’s Notebooks too for some time, I dissect them (sorry, perhaps pushing this metaphor a bit too far there) after the event which is what I was doing just now, when I thought I would pause and look again at the anatomy of my notebook…

Synchronicity. That is the best word I can come up with to describe my first introductions to ‘Business Model Generation: A Handbook for Visionairies, Game Changers, and Challengers’ – simultaneously via my neighbours the Ortelli’s who know lead author Alexander Osterwalder and rightly thought it was a book I would love, and via my Hub Geneva collaborations with Patrick Keenan of The Movement who’s partner Alan Smith led the handbook’s design. Thank you all!

It aims to help people understand and methodically address the challenge of business model innovation. It addresses the questions:
How can we systematically invent, design and implement powerful new business models?
– How can we question, challenge and transform old, outmoded ones?
– How can we turn visionary ideas into game-changing business models that challenge the establishment – or rejuvenate it if we ourselves are the incumbents?

Not the typical strategy or management book, it is designed to convey the essentials of what you need to know to work with business models quickly, simply and in a visual format. Examples are presented pictorially and the content is complemented with tools, exercises and workshop scenarios you can use immediately.

Having incorporated the core tool – the Business Model Canvas – in a couple of workshops, there is plenty of learning to share. So here I write up some of my own process notes to help anyone else interested in using the Canvas in a workshop setting when time is limited. It is a very participatory, learner-centred, peer-learning approach.

Using the Business Model Canvas in Workshops

1) Set Up: Mount a very large Business Model Canvas (approx. 6 flipchart sheets) on a wall. Mark on this the block names: Customer Segments; Value Propositions; Channels; Customer Relationships; Revenue Streams; Key Resources; Key Activities; Key Partnerships; and Cost Structure. (See sample in photo above.)

(If you are dealing with ‘Beyond Profit’ business models, you may like to add also Social and Environmental Costs; and Social and Environmental Benefits as described on pp265.)

2) Understanding the Canvas Blocks: Having prepared ahead of time an A4 sheet for each block – on which is written one question that best guides people in determining what content goes in each of the canvas blocks – ask participants to randomly pick a sheet (e.g. place them face down and ask them to select.) Depending on group size people may get more than one or may share one between a few people. Ask the group to read silently the questions on their sheets and consider which block the question relates to. Once they have a good idea, ask them one at a time to read out their question and suggest where it belongs. The rest of the group then says whether they agree or think it belongs somewhere else, and – once there is consensus – stick it on the wall-mounted canvas.

For example, for the block ‘Customer Segments’ the question on the corresponding A4 sheet may be along the lines of: “To whom do we offer products and services in response to their problems / needs?” Continue until the group is satisfied that all the questions are in the right blocks.

Already the group is actively engaged in establishing understanding of the different Business Model Canvas blocks, and participants are helping one another learn about it along the way – rather than listening to an ‘expert’ present it to them.

3) Detailing the Features for Each Block: The next steps also require some advance preparation. This time it is post-it notes (or ‘stickies’); lots of them! For each block, write up a handful of examples or prompts, drawing from the material in the handbook if desired. For example, if we take Customer Segments again, we know from the previous step that we are looking for clients to whom we are offering products and services in response to their problems / needs. In this step, the post-it notes might include: mass, niche, segmented, diversified, multi-sided, and so forth – with a brief explanation of each. Take the group of related post-it notes, and stick them to an A4 sheet labelled with the block title. So for each block on the Business Model Canvas you an a sheet of prompts.

Repeat the process for step 2, asking people to choose a sheet and then determine – as a group – where the post-it notes belong. Note that these prompts are not necessarily the answer to the question “To whom are we offering products and services..?”. Rather they just provide a means to better describe the business model, so we can say, for example – “we offer our services to X, a niche market…”

4) Designing Your Business Model: Once the the group has constructed this canvas, complete with questions and prompts, it’s time to dive into working through an example. I like to divide the group into small teams and have all these teams work on describing a “business” that is known to everyone – such as their own! Then when they present back, consider where there is agreement and where some divergence is present. A great launch pad for the next step – considering what the business model could be!

I hope this helpful. Perhaps one last thing – the ISBN: 978-2-8399-0580-0. Happy Modeling!


As learning practitioners, we are always looking for new ways of engaging people and helping people learn. When it comes to helping people learn about what we do, we have a handful of cards up our sleeve. Moo cards. We love them – and we think that you will too.

Moo cards = business cards with a difference. Ours are mini; only half the width of a normal card. We have 50 different designs in full colour on both sides. We created them ourselves on the Moo site. And they are printed on paper that is sustainably sourced, as well as acid and lignin free.

Each of the 50 designs features one of our photos. Each highlights a diverse aspect of our work – so if someone is beckoned by our blog they can have a business card with our blog on it; if they are seeking systems thinking and crazy about causal loop diagrams – hey presto, a card to match; or maybe they want to get their fingers on some of our favourite books… a card featuring our bookshelf!

Of course, we also enjoy saying “here, take a look and take your pick”. They get a photographic tour of what we are all about. We see some great conversations sparked and engage in great two-way learning. And of course, they get a great card they chose (and chatted about) which means they are much more likely to remember us and keep in touch.

Go a step further and we can design our business cards into our learning and facilitation processes. For example, if we want to divide a group into teams for group work, we could hand out a selection of our business cards (ensuring that there is the appropriate number of duplicated or themed cards) and use them as the means by which the group organizes itself into teams. They pay attention to our card – which has a valid purpose in the process – and they get to keep it afterwards, which means less work networking after!

These are just some reasons why we love our Moo cards. Visit the Moo site and subscribe to their creative newsletter for stacks of ideas helping you to help others learn about you.

Full disclosure: I ran a workshop at the  International Association of Facilitators Europe Conference a little while ago on Facilitation and Web-based Tools. It went well, and the participating facilitators were enthusiastic users and happy to share. We did a quick mass collection of what and how people were using different tools – I diligently took down the flipcharts and promised to send out the results.

Well, in an office clean today I found those flipcharts, buried in a stack of papers. Hmmm, to keep my promise, I thought I would share the results. If any of you who attended read this post – I will apologize profusely and sincerely hope that “Better Late Than Never” is actually true. A sheep seemed to be the best picture I could use for this blog post.

So here they are, a list of tools that this group of facilitators reported using (I have checked, added some notes, and updated them where necessary). Some of these are obvious and some a little less so, in any case it is an interesting snapshot of what web-based tools are in a facilitator’s online toolkit:

YouTube

  • Creating and posting video clips to be played in face-to-face events or a WebEx event when participants/speakers cannot attend live, or to save costs or carbon, or just for additional time-restricted content (e.g. you need an on target 5 min clip and not a speaker who will go over by 10 min);
  • Using video clips as an information and learning source for facilitation (“Facilitation” has 2,970 YouTube video clips available today);
  • Uploading videos of you in action for promotion of your facilitation work (and to answer the “What is Faciliation?” question as you would answer it);
  • Uploading videos of your work for funders as a part of evaluation or reporting process;
  • Uploading video for participants of projects and events in addition to or replacement of a written document (as in a final “video report”).

Blogs (e.g. WordPress or Blogger)

  • Sharing written blog updates relating to facilitation work and linking them to your company or institutional website as information about your work;
  • Blogging for knowledge sharing on facilitation;
  • Setting up a new blog to support a particular training or facilitated event (I also like http://www.posterous.com/ for this, as it is very easy to use it in sessions to share group work and keep real time track of products created, mainly because posting is done by email);
  • Creating an internal blog for a group of facilitators- for in-team learning, requests for help and challenging management decisions (sic);
  • As a place to connect to and share web-based facilitation resources (e.g. you could set up a blog to aggregate other blogs and online resources on facilitation, or you could simply connect up to relevant blogs through a dashboard, a reader, or using something like Delicious (one of a number of social bookmarking sites – Note: Delicious is owned by Yahoo and might be closing, so do some research if you want a good social bookmarking site – I personally just switched my Delicious links to Evernote). 

Ning

  • Setting up one to support specific training or facilitated events, for posting updates for a distributed community during an event, and community development more generally before and after a facilitated event;
  • A place to facilitate or join topical discussions related to any theme (there are 65 nings that are tagged with Facilitation);
  • As a support platform for building new organizations or networks (Note: This used to be free, and is now a pay platform).

Wikis

  • Creating an internal wiki in an organization to collect and record learning (such as pbworks);
  • Using other wikis as an information source and for sharing on things like games – such as the gaming wiki  WoWWiki to understand everything from “chat” to “bloodcurse” about how the game works (you might wonder about using World of Warcraft for learning – try a 30-day trial and see what you think – I enjoyed exploring it for examples of negotiation, teamwork, collaboration etc.) (Anyways, another facilitator put this down as being useful for him, so you don’t have to take my word for it 🙂

LinkedIn

  • Useful for promotion and business for facilitators (I have now had a number of requests come through LinkedIn and not email initially);
  • Helping to manage professional links – especially people who work with many different teams and organizations;
  • There are many functions for networking (e.g. slideshare, events, etc.);
  • As a place to tap into ongoing discussions through LinkedIn Groups – today in the Groups Directory there are 219 Groups that deal somehow with Facilitation and 8,280 with Learning. 

Twitter and Twitter-like tools

  • Can be used to generate energy around a project (keep people posted, update on activities, achievements, learning etc.);
  • A place to talk facilitation business with other facilitators (“Follow” other Facilitators – and see who they are following to find others);
  • To identify communities through hashtags (such as #Facilitation, #AppreciativeInquiry and #Learning and anything else you care to find);
  • Useful as a way to gather customer appreciation (what are people tweeting about your facilitation work?)
  • Using Yammer  (a private Twitter-like tool) internally in an organization to keep track of people and their work, ideas, etc.;
  • Using Backnoise in events for more audience participation.

Facebook

  • Maintaining “social” work contacts;
  • Using the Events (+CreateAnEvent) function for announcements and promotion of your facilitation work;
  • Starting a business page for your facilitation work (to inter alia “Invite your friends”, “Tell your fans”, “Post status updates” etc.)

Second Life (This dates us a little)

  • Useful for dialogue and storytelling practice;
  • Keeping in touch with the virtual world technologies;
  • Useful as an alternative to conference calls, to make them more interactive.

Others

  • http://www.doodle.com/ for meeting time planning and invitations (MeetingWizard is another);
  • Basecamp for project management and as a collaborative tool for teams of facilitators or facilitators and their partners;
  • Personal Brain (http://www.thebrain.com/) – Useful to develop self-managed learning applications or even as support for group mind mapping, brainstorming, and more;
  • WebEx and DimDim– video conferencing for facilitation and training;
  • Campaign monitor – for email marketing campaigns;
  • Zoomerang and Surveymonkey – free places to create and run surveys and questionnaires – useful for both demand articulation/needs assessment as well as post-workshop evaluation/feedback.
  • To this list I would add Evernote to keep track of the photos of flipcharts that I take, and I attach any other job aids I produce, I also have an image of all the visual facilitation icones that are standards that I might want to include on a flipchart, this is in addition to all my online links which have become a valuable on-demand resource for me (as mentioned above)

I think this list is interesting as a snapshot of what and how Facilitators are using web-based tools in their facilitation work, as well as a way to acknowledge that we all are using new media today in so many different ways. (Please feel free to add to the above!) I’ll bet you are using something in each category above – before you read through this list did you realise how many online instruments were on your facilitator’s dashboard?

Oh, and next time I hold a workshop at an IAF conference, I won’t wait so long to report back (she said sheepishly).

Sometimes as a learning practitioner you are working with a third party process holder, and not (at least not in the most initial stages) with the learners themselves.

For example, you might be designing a lessons learned workshop to collect experience that informs planning for a large conference, you might be designing a capacity development programme for farmers around rainwater harvesting, you might be helping high-level decision-makers develop better policy frameworks for climate change adaptation, you might be helping a whole staff strengthen their facilitation skills, etc.

How do you structure a discussion that gets you the design of a learning programme, process or event? Where do you start?

Of course, there are plenty of ways to go about this. Here are a set of questions that I often use to inform an initial design that I might offer, providing the basis on which the design conversation continues:

Question: What change do you want to see after your programme/process/event?

This is a great question as it gets to the purpose of the event, it helps the process holder be clear about the outcome they want, and lets you, the designer, gently probe some of their assumptions about what and how things change in their context. It also signals that learning, in this case, is not an end in itself. A next question might be:

Question: Who needs to make these changes so that the practice or context changes in the desired direction?

This question explores the learner group – to see if it includes all the people that are needed to make the change.  It might also open up some discussion of segmentation, perhaps the programme needs to have different components for different groups – for practice, policy, support etc. If you want to probe the audience question a little further in terms of readiness, and to get some good material for the rationale for the learning initiative, you could ask:

Question: If I would ask some members of this group if they needed or wanted to make this change, what would they say? (and why?)

Further questioning might give you some information on what this group needs to learn, according to the process holder (this can be tested through some useful demand articulation with the learner group later – but not too late!) The following question also expands the notion that learning is just about information (knowledge acquisition), towards the behaviour change aspect (e.g. practicing using knowledge and know-how):

Question: What kind of information, tools, practice does this group need in order to make this change?

You could explore learning preferences and good practice further by asking for some stories of successful past behaviour change and learning:

Question: When this group has changed its behaviour in the past and learned something new, how did that work? What conditions were present?  How long did it take? What helped make it stick?

You could find out what kind of methodologies for learning are preferred- no doubt they will be mixed and individualised – but there might be some interesting patterns in the answer to this question:

Question: How do group members like to learn, and in what format do they like to engage in learning?

Through the above question you can explore how the group might react to innovation or new methodologies and techniques. This might also give you some idea about how “safe” the environment is for learning.

These are just a few starters of the many questions that can help guide an initial learning design discussion – what other questions might you add? Where would you start?

As Facilitators and Trainers working with new groups and organizations, we occasionally get strong reactions to descriptors like “interactive”, “games-based”, “experiential” when explaining our work. When you dig a bit deeper into those responses, you hear stories of team-building sessions gone awry, icebreakers that were too “silly”, or activity choices that were “pointless”, in someone’s estimation.

The gap in meaning, I might guess, is due to the absence of metaphor.

Metaphor is the concept of understanding one thing in terms of another – or constructing an analogy between two things, ideas or actions.

Picking the right team building game for example, is not just a question of what the facilitator likes or feels competent delivering; it is selecting a game that provides a platform to explore some of the key issues that the team has, and creating a metaphor in a game that lets team members identify them, work through them, test options, discuss them based on the behaviour in the game, and then draw lessons or ideas that can be useful in their daily work. 

Even a quick activity, like an icebreaker or introductions, can be linked to a useful metaphor too. For example, I recently used Thiagi’s Hello game to both have people collect information about their experience, expectations, etc., which was good insight in itself, and then in the debriefing asked the group to think about how the exercise might be a metaphor for their work. This game features a number of small groups concurrently collecting information from the whole group in very short segments for planning, collecting, analysing, and reporting of around 3 minutes each! This particular group had some issues that team members wanted to explore about dealing with time pressure, with cooperation and information sharing, and this game was perfect for both introductions and to begin to lightly focus and reflect on these things, even in the first 15 minutes of the day.

Think about where you can find or create metaphor in  facilitation and training work. Any extra design element, no matter how small, that makes the link between the activity or game and the work that people are doing (or hoping to do better) can deepen the connection and the learning. And of course, it is important to bring attention to the metaphor, through debriefing, questioning, noticing. Your role as a facilitator is to help people see and make those connections. When done with skill, this helps makes both the meaning of the activity as well as your choice in introducing it much more obvious to participants. Finally, it optimises the time and refreshingly gives people permission to play again (“serious play” of course).

Some groups might need some extra work to help regain credibility for experiential learning. By strengthening the metaphor and meaning of games and activities, you are both investing in a group’s future success learning together through interactive techniques, and also hopefully softening resistance, making your life easier on the day and afterwards.


Next week, I’m coordinating a Facilitation team working at a 2-day conference of some 400 people. We are 5 Facilitators working for the event, sometimes together in a large plenary hall, and at times in parallel in breakout rooms spread over the vast conference venue.

The organizers will provide all the materials we need for the conference work planned, and in my experience there are still some things that you want to have for yourself, in your back pocket, just in case…

This is the message I sent out today to the team, coming in from Switzerland, the UK and the USA, about this:

Dear all,

I’m packing for the Conference today and am bringing the following for myself (the organizers will be providing overall conference materials for participants), you might want also to consider this:

  • Markers (small set for myself in different colours – that work – including extra thick for making templates);Pack of office materials: scissors, tape, white out (for covering up mistakes on charts), stapler, paper clips (for loose things people give you – when you need them, you really need them);
  • Pack of facilitation materials: ball, deck of cards, bell, set of sticky dots – you probably have favorite materials you might draw on in case of a last minute/impromptu exercises, prioritisation, group dividing, calling time etc. and to liven things up/personalize activities to your style;
  • Water bottle (in case we work through breaks);
  • Business cards (who knows?)
  • (Also don’t forget your chargers – phone etc, and converters for UK/USA/Swiss gadgets. I am bringing my IPAD and Iphone – we will share numbers/skype contacts in another message for those who have phones that will work there (e.g. for texting or skype chat).

You of course are welcome to borrow any of my materials (if you can find me!) This is a big venue and we will be working individually for some sessions. I have asked the organizers already if we have wifi in the venue and will let you know. If you can think of anything else to add to this list, please share it with the rest of us!

I am sure there will be a big box of materials waiting for us when we arrive. And it is still comforting to know that the basics will be in your own bag in case you need them (or need to share them), or if a few of you need to work in parallel with the one pair of scissors in the box provided. Plus, you never know until you get there what will actually be in that box that the organizers are providing…

When I am preparing a workshop, in the day(s) before, I go carefully through the Facilitator’s Agenda (which has more process detail than the Participant’s Agenda) and make detailed notes for myself. For each numbered session (without session numbers the workshop blocks are impossible to keep track of), I write down: 1) what needs to be done for preparation; 2) what materials I need, and 3)  an outline of my “script” – what I am saying to the participants to brief, run and debrief each session.

(A “session” for me, is a thematic block, normally an hour or two in length – the time it takes to introduce something, work through it, and come up with an intended output.)

I normally go one step further with this session preparation, and prepare any Job Aids, handouts, or design the flipcharts that I need to make on site to use in each session (for briefing, debriefing, a group work template, whatever.)

I do this because I need to have thought through as much as possible BEFORE I get into the workshop room, because once I am there anything can happen.

When I’m preparing my flipcharts or whatever needs to be done on the spot in the precious moments just prior to the workshop’s start each day, I really cannot be thinking deeply about what I am doing (as strange as that sounds). I can’t be designing things, wordsmithing, or wondering about the best way to phrase a group work question, as I can be interrupted at any moment, repeatedly, by practically anyone for practically anything – calls for directions to the venue, catering staff with questions, lost luggage, changing name tags, taking feedback, new ideas and opinions, greetings and more greetings – and you want to be available for all of these very important pre-meeting tasks.

Of course, I could write up my flipcharts in my home office before I go, I do have my own dangerous flipchart (see: Reframing Falling Flipcharts – hmm, there seems to be a recurring theme here.) But then you might have a last minute change, they might get mangled, you might forget them at home or on the bus. So I usually write up the flipcharts as a draft on cards and then recreate them on site using those as a guide.

This is all well and good, but what happens to those cards? If I keep them, they sit in my files, they get misplaced or out of sequence; rarely do I go digging into my files to find and reuse them. What if I could draw each flipchart model once quickly by hand, use it as a model to prepare the real thing in the room, and at the same time keep it electronically? Wouldn’t that save me time and from recreating the wheel?

I do now take photos with my iPhone of all my “best” or most useful flipcharts after the workshop and save them in Evernote where I can search for and find them again. I have been doing this for about a year now, and have some 500+ notes which are entirely workshop templates, flipcharts, activities, game descriptions, systems diagrams, good results of group work etc. Why I like Evernote is that its text recognition feature lets me go into my Evernote database and search for a word that is embedded in an image (rather than for a tag or a title). I take so many photos after a workshop that I don’t always have time to tag them, and the tags are rather generic anyways, so I can simply search for a word written in the photo of the flipchart and find the image.

I am interested in the possibility now, with my new Irisnotes (a digital pen) (thanks to my friend Lorenzo for this Christmas gift and tutorial!), to actually write up my flipchart “draft” in advance and keep it electronically for use again. I drew the above image with my Irisnotes pen on an A4 paper in 1 minute and when I connected to my PC simply saved it as a jpeg and then uploaded it to this blog, and also saved it on my PC.

This can also be helpful for collaboration. With Irisnotes I can also send the flipchart picture I have just hand drawn as an email. For example, if I was working with Lizzie as my co-facilitator, I could send her all the flipchart drafts in advance for her comments before we get to our venue,without having to type them all up and nicely format them (not one of my strengths).  We could even co-develop them in real time through a process that I used today for another discussion.

This was for a client telephone call focused on agenda development for an upcoming facilitated event. For this call I used Irisnotes while connected to my PC (by a small USB cable), which meant I could see my writing on the screen as I wrote my notes. As I was on a Skype call, I shared my screen  (cool new Skype feature), as we discussed a draft agenda and a set of group exercises (make sure you don’t have other files open or Hello Kitty “wallpaper” that you don’t want shared as well).

While we were talking, I drew examples of the group work matrices that I was proposing for the meeting in real time. I also captured the steps that we would take as we worked through the flipchart template I was proposing. Because he could see me drawing as I spoke, he could easily follow the logic, question it, help me improve it so the final drawing was more or less agreed. At the end of the conversation I immediately emailed him the file. And with Irisnotes, I could either send the file in my handwriting or convert it to text (accurate, if you write in straight lines, but still expect some minutes of work tidying things up. Lined paper to start with would help this.) Because I was drawing matrices I just sent him the file in handwriting as an aide memoire of our discussion, which I then typed up into a more formal proposal later.

Stick all that into Evernote, so I could find the above notes by searching for “Introductions” or “Group work templates” for example, and the next time I wanted an example or exercise for a workshop, I could find my flipcharts already “made”. With the help of some handy technology, I can make my preparation time more efficient, and be prepared for even more of anything.

I think all of us would instinctively answer this question with a “Yes”, but how often do we actually take steps to create an interesting visual “learnscape” around us, particularly in our temporary learning venues.

At least 99% of the time, the spaces that we use for our workshops, whether for strategic planning, team development, training or other, are square rooms with white or beige walls. All the chairs are the same. The tables might be rectangular, square or round, and probably all the same. The windows are uniform, the walls are blank. The latter is often a good thing, particularly if you want to hang up flipcharts and the products of your work. At the end of the workshop the walls may be covered and the “journey” of the workshop evident for all to see.

But what about the first morning, when people first walk in? What do they see and how does it set them up for the exciting, creative and productive experience that you will help them co-create with your terrific interactive agenda and fast paced repartee?

It is interesting to notice when workshop or conference organizers do take the external environment and the challenge to create visual interest into consideration. I think that conference organizers perhaps try a little harder as they assume that the participant experience is more passive, so they add a plant or a sofa. Actually, TED Conferences are really brilliant at this, the stages that you see in the videos, or as a participant from the floor are intricate, rich and interesting.  Watch a minute of this Tim Jackson TED video for an example of the eclectic mix of background articles they use. Or take a look at the photo I took of a panel discussion at the TEDGlobal Conference I attended last summer. The TEDXChange Geneva event that Lizzie organized also featured a whole task list on procuring props for the stage, shipped in from Zurich, to make the background for the speakers and the conversations look interesting, including a vintage coke machine, a wagon wheel and more (see photo here), which all tied in some way with the talks being given.

When you can’t truck in props, you can still create visual interest in other ways. The recent Membership Meeting of a standard setting textile product group that I facilitated featured a sample from their first harvest on each table – there to admire, feel and connect people with their process. In the room as people entered were also maps of their strategic regions, with photos of the value chain stakeholders, and posters created to show the value chain. We used these for one of the first exercises, and put them up before we started for the visuals and to get people in the theme of the meeting from the onset.

It you want to leave the walls free, what about the ceiling? I was mesmerised by the big room at the Hub in Brussels, where we had a recent LEAD Europe (Leadership for Environment and Development) training course gathering, where a local artist had hung a cardboard sculpture. How visually stimulating it would be to have a workshop in that space! I remember during past IUCN Commission on Education and Communication workshops, there would be bouquets of fresh flowers, and bowl of bright fruit and chocolate on all the tables. I remember a facilitator from Disney telling me that at some of their planning workshops, each participant would have their own placemat and setting with drawing paper, coloured markers, playdough, lego or other small items to “play with” while the meeting was going on. What can you bring in that will be different and interesting to look at/interact with during your learning exercise?

Creating stimulating visual environments for learning, even in our temporary workshops spaces, can enhance creativity and spark ideas and engagement. It can signal that something different is coming, something that will connect people will both their left and right brains. You can do this by moving people around, by using different rooms, by going inside and outside, and also by looking differently at your main workshop room and setting and thinking more about how you can make it visually stimulating. Even you are a canvas – people will look at you, the facilitator, trainer or organizer for HOURS, what colours are you wearing???

Last week in an insanely busy airport of holiday travellers, an extremely tight connection found me jumping up and down, wildly waving at the large window beside the closed gate trying to get the pilots’ attention – I could see them in the cockpit fiddling with their papers, the plane on the tarmac, the gate still connected, so I thought no hurt in trying.

I was getting nowhere when a passing security guard with some holiday spirit took pity on me and called down; they miraculously opened the door and I flew down that ramp – focused on that little open plane door at the bottom, the two anxious flight attendants holding it open, and not the big seam in the ramp floor in front of me.  My magnificent trip over that seam produced a lateral movement that only ninjas and some desert snakes can make safely, not being either of those I managed to tear the anterior cruciate ligament in my right knee.

Now in a leg cast for 6 weeks, I can walk but that snake and most people would leave me in the dust. And I am thinking about what I need to do to modify my facilitation work to take into consideration the fact that I am incredibly slow and only partially able. I cannot run up and down steps, or from room to room, in 2-minute intervals.   And I cannot be carrying around 50 kilos of workshop materials, can’t bring that extra flip chart, or move the tables and chairs in the rooms from a U-shape to cabaret style in the 30 minutes before we start (because we asked but for some reason the venue didn’t do it). Even getting back and forth to events must obligatorily be done on public transport or with the private chauffeur, also known as a full-time working husband.

My first event in the New Year is mid-January and we are working on the interactivity and activity design now. We will have around 400 people in Paris at a planning event for an international water forum happening next year. What do I need to do differently now, so that when I get there, cast and all, I will still be able to do a great job? This is a good thought experiment in its own right – this might be a temporary condition for me (hopefully!) but for others it might be status quo, both for facilitators and potentially for some of the participants.

Here is a list of what I think I need to know and do to facilitate with my leg in a cast (and probably should know anyways!):

Transport: Slow and Virtually Hands Free

  • Can I get there by public transport? How long will that take? What changes do I need to make (train to tram to bus)? Where are there steps or lifts or long walks? I am usually in the venue at least 60-90 minutes in advance for set up, can I get there in time? Can the day start a little later, and go later – what is the flexibility with the start and stop time if needed?
  • If I need to be driven, can we park close enough so that I can carry the materials to the venue? Can I offer someone else from the team a lift to help carry?

Venue: Steps and Who Can Help

  • Occasionally I look at the floor plan for the venue if it is large (and available) but normally I don’t. Now I would like to know – how far is the room from the entrance, how far apart are the breakout rooms, how far is coffee and lunch from the workspace?
  • If I am working in a plenary auditorium space, is there a stage area with steps? Can I either start and stop up there, or can I do all the talking from the floor (better)? Is there a wireless mike I can use?
  • I won’t be able to fix or move things myself, or run for more this or that. Who is in charge in the partner organization just in case, do I have her/his mobile phone number? Who is in charge for the venue, do I have that contact information? 

Agenda: A Little More Leisurely Than Usual

  • Is the agenda perhaps a little too tight, are breaks and transitions short? Can the pacing in the design be a little slower and less choppy in terms of rooms changes – more gastropod and less hummingbird? (This reminded me of one of my own blog posts recently about not overdoing interaction: Too Much of a Good Thing.)
  • Where do I need to be when? Can I minimize my own running around by putting other people in charge of certain rooms and spaces? (For the mid-January event, I will be working with 4 other Facilitators, can I assign them the furthest rooms? Are they happy with these extra “fitness” benefits?) 

Workshop Rooms: Where Can I Sit? 

  • How is the room set up? Do I need to reserve a seat in the auditorium for myself at the front by the microphone so I don’t have to walk up and down the steps to speak?
  • In the workshop rooms, can single chairs be put here and there to sit on while I am not facilitating? This is a funny one, I noticed at a recent workshop there were exactly enough chairs for the participants and not one extra, so I spent the whole day standing (until the participants were standing -then I was sitting in their seats!) Make sure to have more than one extra chair around the walls, as late comers (both at the start, but also after each break and lunch) will always take the single chairs in the back/side rather than moving people to sit in the middle.  

Communicate: Tell People

  • I need to tell people, especially the other facilitators asap about the fact that I will be wandering around, slowly, in a full leg cast. They will have good ideas how to be as efficient as possible with a partially able team member.
  • Communicating about how it is going during the event will also help people understand why I might opt out of the group dinner, dragging a leg and cast up and down the steps all day will probably be incredibly tiring.
  •  At the same time I need to be as self-sufficient as possible, believe me I will be wearing something with as many pockets as possible, stuffed with pens, markers, etc. things I normally have to continually walk around to find when I need them!

I’m sure in the end it will be fine. And this situation will give me the opportunity to think even more creatively about many aspects of my event. It will get me to put in the advance preparation time that is needed, the thinking through of choreography, materials, and movement, now even more crucial than ever. And it will certainly give “team” an additional dimension.  It is good to be mindful of these things anyways, and will be a good real life reminder of what it’s like to work with and pay attention to mobility and other very human conditions in a workshop setting.

I ran a workshop yesterday – an interactive membership learning exercise for a group of 40 international network members – which gave me a moment to reflect on dynamics and the value of diversity of, well, practically everything.

In my workshops I like to keep things moving, to get people out of their seats to work, use different parts of the room, etc. and when one participant asked me if, for the next exercise, we were going to “stand up again”, it made me smile – had I over done it on the moving around?

Generally, due to an Appreciative Inquiry approach I tend not to look at what not to do, and at the same time this little list seemed useful (and could easily be turned around to a “what to do” list):

  • Don’t sit down too much;
  • Don’t stand up too much;
  • Don’t have too many interactive activities (people like to sit and reflect on their own too, or listen to a presentation from time to time);
  • Don’t write on flipchart templates too much (vary with cards, post-its, handouts, electronic templates);
  • Don’t stay in the same room too long, even if it is an excellent one (use a breakout room, the lobby, or send people outside for a walk);
  • Don’t have people sit in the same seat all day (or look at the same part of the wall) even if it means you might need to rethink about people’s names;
  • Don’t always ring a bell to signal the end of something (change with voice, clap, or other);
  • Don’t use the same colours or always draw very straight lines on your visuals (can you use circles or wavy lines too?);

I could go on – what else would you add when you want to remind yourself to vary things, even when what you are doing seems like a “good thing”?

I am currently working with a team focusing on biodiversity conservation and assessment to “makeover” an existing training curriculum into one even more interactive and learner-focused. As a part of this process I offered to put together a selected list of resources, from the raft of those available, that are particularly useful to me in this kind of work.

As trainers, capacity developers, learning practitioners, and facilitators we have before us a veritable sea of interesting tools, techniques, and even toys that have been developed to help make our events successful and enjoyable (yes, we have discovered a learning space where we can have fun and learn at the same time!)

Because this sea is vast, we each have our own parts that we prefer. And our selection of what we bring with us may be different every time – we might dip in and out, or we might dive deep into one area or another. It’s always varied, to keep both us and our co-learners fully immersed and engaged. What follows are some of the places I go to find inspiration (many I have written about on this blog and in these cases I will link up the posts or the tag).

Of course I always approach an event from the point of view of its learning objectives. Once those are clear, how you achieve these is an exercise in building an agenda or process that will, as much as possible, bring people out of their everyday discussions into a vibrant learning zone. Try…

Games
I use “games” frequently in my learning work, whether they are quizzes (see: Want to Learn More: Take this Quiz), experiential learning processes (see: An Appetite for Experiential Learning), or introduction games (see: An Amazing Group of People), or others. I find they help tap into the natural curiosity of learners and participants. I have written quite a bit about using games (see the tag: Games), and I frequently use the Thiagi Gamesite for ideas and for ready to use games, as well as Thiagi’s books, such as this one on interactive lectures, for when you can’t avoid a presentation. I adapt games, create new ones (see: Make a Game Out of Any Workshop Topic: The dryer the better), and get ideas from other trainer’s games. Brian Remer and The Firefly Group have a nice website and Games newsletter called the Firefly News Flash, for example. I also use the games of Dennis Meadows, such as Fishbanks and Strategem in my work, as well as the Systems Thinking Playbook (NB: We are writing a new Systems Thinking Playbook on Climate Change right now that should be published by GTZ in the next months.)

Discussion and Co-creation Techniques
There are so many wonderful tried and tested techniques and processes available now with which people are getting more and more comfortable (facilitators and participants). I’ll list a few of these here along with some of the blog posts we’ve written about our learning using them. What is also intriguing, once you get really familiar with them, is to mash them up! This helps them be even more suited to the particular needs and interests of your group. Among these is Open Space Technology, developed by Harrison Owen which has a whole community (OpenSpaceWorld) of connected users (see: Opening Space for Conversation (and Eating Croissants)). We have enjoyed learning about and using World Cafes (see: Our World Cafe: Kitchen Table Conversations for Change), and this methodology has also gone global with a useful website (TheWorldCafe) full of its own tips and resources. We have built numerous Conversation Cafes – into our sessions (instead of holding them in cafes). These are slightly different than World Cafes – they are hosted and build conversations without people moving tables.

Specialisations to Add
Storytelling
To a good interactive learning base, you can add some special features to your event (warning: with too many it starts to become full sensory overload). The selection also depends of course on your goals and objectives. What about Storytelling (see: My Point? To Be a “Story” there Must be a Point)- story circles, featuring cases as stories, etc. Anecdote from Australia has a wonderful website showing how you can “put stories to work” and a good newsletter by the same name. Check out their learning White Papers for interesting applications and how to’s. We also have a tag on Storytelling on this blog.

Improv Comedy and Theatre
I love the idea of adding Improv comedy or Theatre activities, especially if you are working in leadership, presentation, conflict resolution, teambuilding or just to spice things up and get the group thinking more creatively. I have been to a couple of Improv Theatre application workshops and have experimented with adding this to events (try to go further than role play.) (see: People Buy Adjectives). John Cremer gave an excellent workshop at last year’s European IAF Conference on using Improv and his website gives more ideas about how to use it for creative thinking and presentation skills learning. If participants need to give presentations as a part of their learning event, why not start with a little interesting improv training on this?

Visual Facilitation
There is a great deal of nuance here around graphic facilitation, visualisation, graphic recording etc. which I lump together as “visual facilitation”. The bottom line is that real-time visuals are created to capture the discussion and activity threads of your event. (see: Making Memories: Improving Your Impact Through Visualisation, Slam Poetry and More). We have worked with a Danish-based group called Bigger Picture, who are members of a larger, global Visual Thinking community called VizThink. We have contributed to visual murals at Society for Organizational Learning Conferences, worked with cartoonists at several IUCN events, all with great results, tapping into visual learners, and giving an extra dimension to our work. Visual facilitation works best when time is given in the session to have participants co-creating, developing personalised icons and talking through what is being visualised.

Systems Thinking
This is one of my personal passions – using systems thinking tools for learning. We have experimented a great deal in applying an approach that might initially appear to be too complicated to introduce in a short workshop. It does have a specialised vocabulary, a number of graphic tools and a set of conventions. We have a tag on this blog devoted to using systems thinking (see: Systems Thinking) which features posts on using it for strategic planning (see: Building Capacity in Systems Thinking: Want More Amplification? Don’t Call it Training), and exploring ways to help learners pick it up and use it in experiential ways (see: Working With Systems Archetypes in Learning Contexts). Systems thinker Linda Booth Sweeney has an interesting site devoted to systems thinking learning and storytelling, and has developed a useful systems thinking resources room.

And So Much More
You can actually find inspiration all around you for making your learning events more meaningful, more engaging, more powerful. Look everywhere (see: When I Was a Game.) Why not do your reporting back after group work borrowing from the current trend in micro-lit? (see: Micro-Lit: Too Wordy, Try it Again or the longer Trendspotting: Micro-Lit and Other Applications) or have all your presentations time in at 6 minutes and 40 seconds because they are given as Pecha Kuchas (see: Taking the Long Elevator – 13 Tips for Great Pecha Kuchas). This great technique helps speakers get to the point by putting all of their inputs into 20 slides, auto-timed at 20 seconds each. Presentations in general can have a myriad of formats – even PPT can be replaced by Prezi (see: Preparing a Presentation? Read this Praise for Prezi) or any other number of innovations (see: The End of Boring: Borrowing, Adapting and Mashing for Facilitators).

Send your working groups on a walk, use the cafeteria or hallway for a session, make cool job aids (get inspired for your handouts by David Seah’s Printable CEO series.) Pull one of your main presentations up into a webinar (see: Look Behind You! The Webinar Facilitator’s Non-technical Checklist), or instead of a live speaker, find an excellent TED Talk video which presents the content in an engaging 15 minutes (see: On My Way to TEDGlobal).

Through this process you will “Learn how to speak agenda” and will be able to both design for interest and impact, and also to write up your agenda like it was a menu at a restaurant. Think of yourself as a diner, if you got this menu (agenda), would you want to eat at this restaurant (or attend this workshop?)

And Finally (although I think this beach is endless)…
A recent book by the World Bank called The Black Box of Governmental Learning, which I am reading right now (download it for free from their website), starts with an interesting history citing the progression of learning in this domain  -governmental- although I find it widely applicable from my experience. It talks about the change from expert-driven learning which is lecture-based with limited interactivity, to the newly evolving paradigm of learning with each other. The tools and techniques that I list above can help makeover a learning event from a one-way teaching model, to one where everyone jumps into the topic together.

Such a long list might seem indeed for a trainer or facilitator like jumping in at the deep end yourself, and yet you can wade slowly into this sea of interesting learning tools and techniques, until you find your own favorite place(s). Good luck! Fellow trainers and facilitators, please add your favorites in the Comments section below!

There are so many kinds of workshops/meetings/events, with as many different kinds of objectives and outcomes desired. Each needs a specific structure and build to get successfully from start to finish. For veteran facilitators this might be a statement of the blindingly obvious. However, we do have our favorite sequences. We have tried and tested frames for group work, our signature activities and games, our question stems that we draw on and adapt to many different contexts. We might also do more of one kind of workshop than others – more retreats, or relationship building, or strategic planning, or stakeholder dialogues. These big categories indeed might have archetypal sequences that we can use as building blocks and rely on for winning results.

When the Stakes Are Even Higher

When we get into a new category of work, that is a great opportunity to think again about our favorite workshop outlines. For example, how different might an agenda look if you are consensually negotiating a text that will be binding on those in the room (and many others who may not be)? This is an interesting context as stakes will no doubt be much higher. In this context, participants may be formally representing constituencies (where their re-election depends on successfully serving their interests), others may be spokespeople for higher-level absentee decision makers (who may sign their paychecks). There might also be observers, funders, hosts, and other non-voting participants, who might still have significant impact on the final decision.  There may also be significant power asymmetries, along with the familiar cultural and sectoral diversity and personalities that we see in all of our workshops. Ultimately jobs and much more may be at stake. All together this might make agreeing on a black and white text in a defined period of time an exciting couple of days for a facilitator.

Some of the differences between such an agenda and one devoted to, for instance, strategic planning by project teams, might be how and when you work with the product (text) itself. Some of the things I have noticed revolve around timing and placement of the decision moments in the overall workshop agenda. These might sound simple, and can make a difference for a successful outcome:

  • Watch attendance and travel: If this is a high stakes decision-making meeting encourage people to be there for the duration of the meeting, and if necessary make an agreement that if people choose not to stay it indicates their agreement of the final decisions of the group.
  • Have clarity on decision moments: Make certain participants are clear WHEN the readings will be and decisions taken, so that they can arrange phone checks or access to other decision-makers at critical times. It helps them avoid scheduling other work or calls at those times and also helps them arrange their schedules to be present (mentally and physically) when they need to be.
  • Keep extreme realism in timing: Because timing will be important throughout the event, keeping to time is even more important – make sure this particular agenda is super realistic (as opposed to optimistic), and build in some extra discussion time where possible (can a less important agenda item for the group be pushed into their next meeting?)
  • Make it visual: When it comes to the text itself, make sure that the text is put up on PPT point or visually in the room and not just read out loud to the group. The meaning is much clearer and easier to discuss as a group when people are able to read and mull it over together.  
  • Externalise the decision: Making it visual (rather than oral – as in reading) also externalises the words (e.g. de-personalises the text) so that the group can own it and it is not affiliated with any particular position or the opinion of the reader(s). 
  • Provide something to take away: Have a print out of the final text too, that people can use to check with counterparts who are not present, or can use to read later on their own or in caucuses. Don’t make people write it down for themselves.
  • Build in check-in time: Give people time after the first reading to check with their constituencies if necessary or with their bosses.
  • Sleep on it: Try to get the text work done before the last day, so that people can sleep on it and discuss it informally.
  • Take a second look: Have a second reading of the decision taken on the final day. Make sure this is not in the last few hours of the workshop in case there are still open issues which can be dealt with in time.
  • Don’t push it: Introduce no new issues on the last day of the work together.

There are many other familiar activities that can and will feature along the course of the negotiation. There will be the relationship building, the mapping of opinion, the exchange of perspectives and reality checks. With this kind of high stake workshop, the steps of the negotiation and decision-making process need to be perfectly placed so that this central aspect of the group’s effort doesn’t create a hurdle but a gateway to … (ok, giving up on the horse-racing metaphor here, it’s sounding more like the stable floor than the track – you know what I mean!!) 

I arrived at the Chicago workshop about 5 minutes late and was horrified to see all the participants in their seats looking at the trainer/facilitator who was in mid-sentence describing the objectives of the day. He didn’t even pause as he said “gruetzi” to me (“hello” in Swiss German), to which I quickly replied “bonjour” (I don’t speak Swiss German), and tried to quietly sneak to the only remaining seat in the room, which of course was at the first table. I grimaced as I walked in front of him to take that seat. He never broke his opening patter, but for that first word of welcome, and didn’t address me directly again as he informed the participants that I didn’t know that I was the first game for the day.

Take out a piece of paper, he said, and write down three things you know about this Mystery Person (the group had already met for several days previously, and I was only joining on the fourth day). Including, he added, how you pronounce her name (I had just written it on a sticky name tag) with a hard “G” or a soft “G”. The winner, he announced, wins a BMW.

People took out paper, and peered quizzically at me. After literally 30 seconds of reflection he asked for everyone to share one of their guesses. I was to answer yes or no as they postulated about me based on the little bit of data that they had collected in that 2 minutes since I walked through the door. What do we know about our Mystery Guest, he asked, and people started…  I disliked being late. I wasn’t good with directions. I spoke another language. I had a job where I worked in front of people. I had travelled by plane to get there. And on and on. It was simply amazing how many things people could discern or infer from so little input in such a short amount of time.

At the end, he asked me to say a few words about myself. At that point, my introduction to the group was alarmingly short as I built on the many uncanny, correct guesses of my fellow participants. At the end, he asked people to  count up their “points” at which moment there was a flurry of quick questions. He said “congratulations!”, without being too concerned about who actually had the most points, and welcomed me as a newcomer into the Thiagi Interactive Techniques Certification Workshop.

* * *

What a wonderful way to be warmly integrated into a formed and familiar group, what an interesting way to involve everyone in this introduction process. What an excellent way to reinforce the fact that your participants know much more than you probably give them credit for (or can figure out for themselves), and that you can cover a lot of ground, hitting multiple objectives (introduce a new person, integrate him/her, play a game with some learning points like these, get people’s attention and wake them up at 08:00 on a Thursday) in only 5 well-used minutes.

This is the work of Thiagi (Sivasailam Thiagarajan), who holds the title of Resident Mad Scientist at the Thiagi Group. With its Indiana USA origins (starting “in a basement” some 30 years ago), this group is building an increasingly global network of games enthusiasts and Thiagi Certified Facilitators (like me!) who use these kinds of interactive techniques as a basis for engaging people in our facilitation and training work. And in that short introduction to our Certification day, Thiagi helped us see that not only are we people who design and run games for learning, we can be games too. There are no boundaries! How different might daily life be, how much more might we notice or learn, how much more fun might we have, if we knew that we could make a game of literally anything?

We just completed a very interesting workshop where 110 stakeholders were involved in giving feedback to 15 speakers (project proponents and authors of 11 Chapters of an ambitious global Reporting project) in 1.5 days. How we did that is a completely different blog post! (We did use Pecha Kuchas to give the Chapter overviews, which overall worked well – participants appreciated them very much for their economy of words and time, and some speakers were rather challenged to get all their information, diagrams and graphs into the 20 slide x 20 second format.)

Our very large participant group was made up of experts, advocates, authors, and partners, all with a valuable perspective to share, both on the process and the content areas addressed in the Report. With so many speakers and items on the agenda we needed to design in as many opportunities to hear from the participants as possible, as getting their feedback on the Report was one of the main goals of the workshop.

With so many amazing people, we needed to optimise their inputs and flatten out any potential power hierarchies that might be inadvertently created by a speaker/participant, teacher/learner lecture format (e.g. someone speaking and many people listening and then asking questions). We used many different ways of capturing inputs and ideas from people after our Pecha Kuchas, many starting with table-level work so that many people could speak simultaneously.

But back to the very beginning… After our workshop opening on Day 1, we took the first 10 minutes at the tables for people seated together to introduce themselves. They shared their names, organizations and insight on their involvement in the Reporting process so far. That provided a good sense of the resources available in close proximity.

Then we used a group mapping technique that would help demonstrate and visualise, for all of us, the collective knowledge and expertise in the room. First we asked people to stand up when I called their sector – I asked people working for government to stand up, for those from NGOs, business, the UN, etc. to stand – this gave us the sector balance in the room. Then I asked for people to stand who had already worked on the Report as an author or writer – that gave us the people who have been most intimately involved – our process experts. I asked who had read one or more Chapters – that gave us the people who had been involved in any kind of review (formal or informal). We noticed that for each of those categories called, the experts were in fact seated at all the different tables in the room – no longer were all the “experts” at the front of the room.

Finally, we asked for people at their tables to add up quickly all the months that individuals had been involved in the Report process, and all the years of content expertise they had. They wrote this up on a prepared flip chart near their tables, and then we had them quickly report their numbers table-by-table in plenary.

When we added this up we had 625 months (or 52 years) of process involvement in working on this Report (which had officially started in 2008), and 811 years of content expertise! With all this experience in the room, we were ready to go!

Something I am noticing about groups that I work with frequently over time is their growing ability to read through the agenda versions I give them and imagine what will happen, anticipate the kind of questions or challenges the participants might have with the task or group work, or wonder if the time allocation is enough for the number of speakers – just like I would.

Being able to speak and read “Agenda, is a great language to have both as a Facilitator/Trainer as well as someone engaging one. When both these parties speak it, it helps to develop a shared sense of the event or workshop before it happens so that you can build in any contingencies (e.g. extra time at breaks that can be used for overrun, a session that is optional, etc.) Especially if you are working with a new group, it might be hard as a newcomer to their community to anticipate where things might possibly go off track, you won’t necessarily know the personalities you are working with, the past history, the patterns, the hot buttons, etc. So having a counterpart in the organization engaging you that speaks “Agenda” is incredibly useful.

How do you know if someone does (and it could be any member of the organizing team)? They will be the people who ask you the kind of questions you would ask: What will we get out of that session? How do people move from one room to another for this exercise? Where will the screen need to be for that activity? What happens if someone asks X? These are very useful questions that, when answered, make for a smoother, better choreographed, more productive workshop. You will be asking these kinds of questions yourself as you do the agenda design work for the event, and at the same time, with the knowledge your partner has about his/her own participant group, their sharp eyes on your agenda will be incredibly helpful.

How can you train people to speak “Agenda”? Well, you can start by writing it and speaking it back to them. When I write up my agendas, I always prepare first a detailed facilitation process agenda. This includes essential items such as:

  • Time on the agenda day (matching the hours of the workshop);
  • Session number and title (these milestones makes it easier to talk about parts of the agenda);
  • Session content: sequencing, speakers names, presentation titles, activity names, group work questions, and timing of all these individual items in minutes
  • Facilitator name (who’s in charge of that session)

Once I have thought through the agenda to this level of detail, I send out version 1 to my counterpart in the host organization and I talk them through it also at this level of detail. That is when I need to find that person who speaks “Agenda”. The next conversations are incredibly important for road testing the ideas, the sequencing, the activities proposed. Especially when I am introducing a new kind of activity (like a Pecha Kucha, or a systems game) it is incredibly useful to have someone who can understand the dynamic and ask me informed questions about it. 

I can see over time how my regular contracting partners get better and better at speaking this language of group dynamics and of process flow, and it becomes a real exchange on what the workshop will look like and achieve. I believe it makes the final agenda more robust and realistic. When I am not getting back these kinds of questions (if my agenda only gets to version 2 or 3, because I am tweaking it myself or finding typos), then I know I need to sit down again and go through it myself very carefully to check my timings, transitions,etc. This is also when I need to be asking more questions to get information about the group and its personality and preferences when convened.

When I sit down with one of my partners who speaks this language, however, I might get to version 4 to 6 (or more), and in working through all the elements with someone who understands, I feel even more confident about the flow and content. An added bonus in finding someone who speaks “Agenda” is that, in session, I have someone who is watching the dynamic like I am, who has the vocabulary and can understand what is happening and why, and with whom at the breaks I can check in, with a little chat in Agenda, my own language, to see how things are going from a Participant’s point of view.