Released in early July, Pokemon Go – the new location-based, augmented reality game – has been the perfect summer-time companion. It gets people outdoors and moving around day or night. But is it just a walk-around-and-catch-monsters-in-your-backyard game? Maybe I am just rationalizing the hours of playing (that’s me above, Level 20!), but I see some interesting insights for adult learning practitioners.

With Pokemon Go, I observe in myself an interesting blend of intrinsic and extrinsic motivation to learn and play, by design.

Intrinsic motivation -participating because you find it fun or personally rewarding- comes in part because you get outside, often with de-stressing effects – see this interesting article This is Your Brain On Nature. Parks and green spaces in cities have a high concentration “Pokestops”, where you can collect Pokeballs which you need to capture the monsters, and Gyms, where you fight and train.

You can also start a collection that doesn’t have any physical components or manifestation (no stuff or additional storage space needs – again brain calming – Marie Kondo would approve). And these little monsters, graphically interesting and beautifully rendered in the game, are virtually free except for your electricity bill as you need to charge your phone several times a day (and of course data, but it doesn’t take very much to play the game).

Extrinsic motivation (participating for an actual reward or prize) comes in part with the game’s leveling up system – this gives you something to work toward, both for the satisfaction of “progress” (intrinsic motivation), as well as for the label or badge, and also what comes as the reward (a great ball, hyper potion, etc. all useful in the game):

There are some other features too that tap into these things, are just fun or provide useful tools to continue progress in the game, or “bragging rights”, the latter of which cannot be underestimated (I am enjoying playing the game with my sons and seeing who can get the most unusual Pokemon, or level up first). There is definitely a social aspect to the game, believe it or not. I went into a “secret garden” behind the Parliament building in Copehagen at night on a recent work visit and witnessed legions of Pokemon Go players of all ages sitting around in the dark chatting and walking around that ethereal place, known locally to be a perfect hunting ground for rare Pokemon.

It’s not that big a stretch to ask yourself if there are lessons or tips that we learning designers can take from a game that gets learners to take their progress into their own hands and master something for themselves. Building in the motivational aspects, the visual interest, the social learning and the fun – these are not always traditional starting points for learning designers, but perhaps they should be! I think I’ll stop here…

(Note: It has taken me a little while to post this blog post, partially because I have been travelling with work non-stop for weeks, catching Pokemon from Hanoi to Seattle, and also because I was a little embarassed about how much I have been enjoying playing this simple game. For my efforts, I am now at Level 24!)

Christian Kranicke, Founder and CEO, Leading Edge Advisors

There are markets and countries where people have very limited access to basic financial services. With the technology available today this is simply inadmissible. I work to change this situation and empower individuals by building Digital Finance Solution (DFS) businesses in frontier economies and emerging markets. By that I mean developing businesses in sectors like branchless banking, mobile money and alternative payment systems.

When you look at the value chain in the delivery of mobile banking services, there are many diverse entities and interests. Being able to collaborate with all the players in service delivery is absolutely essential. Finding common ground and creating realistic value propositions are essential if you wish to build viable businesses.

The Academy provides effective tools to help address complex challenges. The courses have helped to sharpen some of the hard analytics needed for my job but have also had a positive impact on the qualitative side. I really appreciate digging deeper into the subject of systems thinking and exploring methods to examine the components and interaction of all elements in a defined environment. I also appreciate developing tools to improve my interrogative skills. Often the information we need from people is readily available if we just know how to formulate our questions correctly.

How do you keep a workshop of 30 people focussed and engaged when exploring a complex issue such as climate change or explaining dry internal procedures an organisation must adopt? What are some effective ways to highlight collaboration or performance issues and opportunities in a team’s work together?

We as facilitators regularly face these types of challenges and have a range of tools at our disposal to address them. But one that is perhaps underexplored is the rich world of games that can help people learn experientially and enliven the driest of topics. Simple participation games, demonstration games, simulations, quiz-based activities, role play and problem-solving exercises are just some examples of the many games that can be used for diverse purposes in equally diverse settings.

Games can range from a simple one-minute, thought-provoking icebreaker (sometimes called a ‘jolt’) to a half-day simulation exercise to help go deeper and understand a complex issue. Lizzie and I use games extensively in workshops – for team building, conveying key messages or lessons learned, problem solving, breaking down barriers or simply invigorating a stagnating discussion.

Experiential games help a group ‘learn by doing’ rather than by more passive methods such as theoretical discussions. They can be powerful when conducted in ‘discovery mode’ – where people do not know exactly how to play or ‘win’ at the outset. A carefully designed quiz or treasure hunt can help a group learn about another organisation in a way that’s far more engaging than listening to a corporate presentation! One game we find really effective is Fishbanks, a computer-assisted board game which helps groups understand the complexity of resource management from multiple perspectives. Or there’s Green & Great that helps players explore the business transition to sustainability.

There are games to suit all group sizes: mass games that can be played in a conference of 2,000 people, demonstration games that a small group can play while others watch, or participation games suited to groups of up to 30 people. A great source of hundreds of free ‘serious games’ is the Thiagi Gameblog (‘improving performance playfully’) – we highly recommend it!

As with most other elements of facilitation, games must be tailored according to group dynamics and cultural differences. We rarely use ‘off-the-shelf’ games but rather adapt an existing one to a particular group or objective, or design our own. Some people may be put off when they see ‘games’ on the agenda, seeing them as silly or irrelevant. So it’s important that the value of the games is explained and a thorough debrief is factored into your session plan, and perhaps change the title to ‘management exercise’!

Read more…

Uta Jungermann Project Manager at the World Business Council for Sustainable DevelopmentProject Manager at the World Business Council for Sustainable Development

My day-to-day work requires a lot of moderation, facilitation and – at times – mediation. Meetings, workshops, webinars or just plain conference calls fill my day – sometimes more than desired, which can be challenging. There is simply not enough time to get the actual work done.

So making the most of all types of meetings and workshops is key to advancing our team’s overall work plan and achieving core objectives.

Through the Bright Green Learning Academy courses, I have learned how to design questions that help a group achieve the agreed outcomes. I also feel better able to articulate these outcomes, both hard and soft, while fostering the group’s ownership of them.

Collaboration is central to what I do and I enjoy it, yet it is not always easy to progress at the pace you would like and keep everyone equally engaged throughout the process. The Academy has equipped me with the tools and methodologies to think through each step – before, during, between and after meetings and workshops. It has helped me to implement actions that optimise participant engagement for more robust results.

And luckily I can say that the first stress tests on applying these new skills have been successful.

How many of you have been in meetings or workshops that veer off track and become ‘talk shops’ that have little chance of reaching the outcomes that were agreed at the start? Are you often left wondering how relevant a meeting’s topic is to your day-to-day work?

As process facilitators we are called on to help a group achieve an objective or output such as a strategic plan, a partnership agreement, multi-stakeholder engagement, or policy advice. It’s important for us to be clear from the first contact with clients about what outcomes they are seeking. Only with these outcomes clearly stated and prioritised can you design methods to achieve them and measure success.

But achieving these ‘hard’ outcomes (the plan, project document or agreement) often relies on a suite of more subtle ‘soft’ outcomes such as team buy-in, learning, trust and relationship building, understanding or enthusiasm. Striking a balance between what you need the group to achieve and how everyone feels about the process is a skill that requires deliberate and thoughtful preparation and planning, flexibility and an ability to read situations as they evolve. This means keeping one eye on group dynamics and the other on the clock!

Central to keeping a meeting on track is designing excellent questions that are pertinent to the group and its collective work. Workshops can involve dozens of questions – big and small. Every question you ask has an impact on the group and questions can serve multiple purposes. We often use Appreciative Inquiry to help us frame our questions – one of the assumptions is that the act of asking questions of an organisation or group influences the group in some way. Great questions can focus minds and can provide energy (not so great ones can draw people down a pathway that confuses or bores them, or takes the wind from their sails). Questions should be carefully crafted from the start of the process and their usefulness continually reviewed throughout.

Articulating intelligent outcomes, designing purposeful questions, and balancing task maintenance with group sensitivity are core skills that the Bright Green Learning Academy can help you to build. Find out more about our programme.

Read more…

It seems so simple. A deck of post-card sized cards, printed on both sides and connected with a ring.

One side or each card has a question:

The other side has the answer:

The whole exercise takes just 1-2 minutes – to read the question, think about it and have an answer in mind, and then turn the card over to see if you got it right by reading and considering the answer.

Twenty cards, twenty quiz questions and twenty answers, about 20-30 minutes of learning, chunked up in small bites. Learning Nuggets!

I would never recommend actually eating an elephant, but as the old saying goes – How do you eat an elephant? One bite at a time… But what does this have to do with learning?

I have worked on many fascinating projects, such as the one for which we produced these learning nuggets, that generate a mountain of learning (an elephant of learning). The learning can be very intentional and structured, using for example a set of KPIs or a donor’s reporting framework to guide it, or more organic, using the partners or project proponent’s learning questions that emerge during the process (or both.)

The learning can be generated through interviews, online reporting systems, annual reports, workshops and meetings (and more). And the outputs can take the form of stories, case studies, spreadsheets, good practice reports, how-to guides, videos, photos (and on and on).

The Micro-Learning Nuggets answered an expressed need – many of the project proponents did not want to read long documents, or wade through a vast jungle of information. So the Learning Nuggets exercise was a way to consolidate and distill out the most important learning and deliver it in an accessible way – a quiz-type exercise where people had to work (a little) for the learning through a few minutes of “effortful retrieval” through applying their own knowledge and experience to the task, and then getting validation or course correction, with some new information.

We have used these cards in workshop exercises in many ways as you can imagine with people learning about industrial development PPDPs; we have shared them with our partners as a way to transfer lessons learned through the project (and they can in turn share them in their institutions); we have also recently launched a Micro-Learning Nuggets Newsletter, which is a curated online format for the Nuggets. Here is a sample of the second Micro-Learning Nuggets Newsletter (Note: You can click on the images below to see them in more detail in a larger format):

Once a month, an Micro-Learning Nugget Newsletter goes out with a topic, and one related question that has a multiple-choice answer that the reader can consider and click the chosen answer and then submit their response. They then get a “Congratulations! D is the correct answer” with some additional information, or “Sorry, incorrect! D is the correct answer” with the right answer which shares the learning. Here is an example of the Learning Nugget as an online quiz question:

The Micro-Learning Nugget Newsletter then offers just a few additional links for learning more if you are “Still curious?” This is great because it let’s us link to selected resources all over the website, thus connecting the learner to existing documents (or specific parts thereof), knowledge products, videos, social media – all curated to the topic of the month’s newsletter, and timed out (very important!) from very short to a little longer.

What I think is most interesting about this method for packaging and sharing learning, is that it is very simple – just one quiz question – but each one is based on the large body of evidence collected through captured experience, interviews, annual learning workshops, reports, Chief Technical Officers and partners experiences, and more. But instead of a drop box full of documents that people rarely use, this transforms and brings back the knowledge in bite-size Micro-Learning Nuggets, be it on a card or in your in-box once a month.

We developed two animated videos that took a similar approach – to boil down parts of the vast learning base into 2-3 minute videos. I wrote a blog post about that process: Condensing Learning Into 4 Minutes or Less? Making a Simple Animated Video for a Complex Project. 

That last blog post tipped it over – 500 blog posts, written since 5 October 2006. With an average of 50 per year (nearly weekly) that’s not too bad. In this celebratory blog post – I reread our first ever blog post and, using our stats, link to our Top 10 of all times.

Here is our very first blog post – it was about blogging, I wonder if I heeded my own advice?

What Did I Notice Sailing Around the Blogosphere? Learning About Blogs (first published on 6 October 2006)

We have just started our blog about learning at our organization and in doing so, I did some learning myself about blogs (after being completely inspired by a presentation on the power of this medium by Alex Steffan from www.worldchanging.com). I spent around 3 hours looking at many blogs about learning and here is what I noticed:

1. The blog itself needs a distinguishable title and a good tag line that talks about what the theme is. Otherwise it is hard to find it;
2. Colour and font are important for readability;
3. Short is definitely good. But too short unless there is some pithy content is not good. www.Dormgrandpop.com site has good length – long enough to develop a thought, and not too long to get boring;
4. Links are valuable;
5. Postings have great title names – clever (think New Scientist);
6. No spelling errors. This reduces trust in content;
7. Write in full sentences and with proper punctuation and capitalisation – otherwise it is not easy to take seriously; and
8. Archives are hard to use if there is not a search function on the site. It is hard to look into the date archives if you are looking for something special. Thematic archives seem easier to use, except that not too many blogs have thematic archives (some do.)

We are just going to start our blog and get going. We will no doubt find our pace in a few days…

 **************************
Well, I think for the most part we stuck to those observations.  I still believe in using English my mother would approve of (wait, is that a stranded preposition??) We have our search feature and our posts are tagged by topic to make them easier to use. Perhaps the posts are a little longer than I recommended to me by my 10-year younger self. Maybe I am getting wordier as I get older?

And for our top 10 blog posts of all times – here’s what the wisdom of crowds thinks from 10th most popular to the 1st…..drum roll please!

10. Looking for a productivity gadget that’s low tech for a change? Try Nu Board
09.  Fast and easy workshop reports with Penultimate
08. Suggested Facilitation Strategies: As the Facilitator how do you work with personal desires for harmony or debate? 
07. The Connected Facilitator: What’s in the online toolbox?
06. Online Facilitation: Adapting to an online environment with free(mium) tools – Part II
05. Good Learning Design Discussions: Where to start?
04. Must See for Learning Practitioners and Educators: Remembering Rita Pierson
03. New Systems Thinking Game: The Flashmob Game
02. Learning with the Business Model Generation’s Canvas

and the most popular post of all time…
01. Make a Game Out of Any Workshop Topic (The drier the topic the better!) 

There seems to be a little technology bias in the crowds, and a soft spot for games. Learning is one of our leitmotivs, so that isn’t surprising, and facilitation is one of the most common tools we use to help groups and teams with their reflective practice and learning work.

Well, on to our next milestone, wonder what will be popular 10 years from now?

I had the great honour and pleasure to be the process steward for a multi-stakeholder consultation recently around a complex new idea (which is exactly when you want and need a multi-stakeholder consultation) in the sustainable development field. The issue was one that had significant potential environmental, social, economic and political implications that people and their organizations felt very strongly about. In the room were representatives from a number of sectors – multi-national corporations, government officials, NGO and civil society actors, etc.-, and the potential for a good deal of power asymmetry to be expressed.

Pre-work for the consultation had shown a diversity of opinion on our topic. This 2-day face-to-face meeting needed to surface all the reactions, opposition, ideas, and suggestions from this diverse group of experts in order to make the idea more robust, more applicable and have more chance of success. Among our desired outcomes, we wanted to be able to anticipate and address the wants and needs of the sectors and organizations that could be implementing it in the future. We were clearly discussing a good idea with a lot of potential, thus the good turnout to the invitation to join, and the high level of attention and engagement of the people in the room.

The consultation process was designed to maximise the contribution that every individual participant could make, their opportunities to provide comments to each aspect of the idea, and the time they would have to explain the rationale behind their input. The focus for the committee presenting the idea was to listen deeply, be curious and ask good probing questions to further their understanding. At the foundation of this consultation was the firm belief that any question, input, challenge from the group could only make the idea better, more appropriate and more applicable in its second iteration. So we needed maximum authenticity and a safe space to share what might be opposing views.

This post isn’t actually about the process that we used to do this – that’s another article that I will write at some point. This post focuses on an observation that provided some powerful learning for me about the assumptions we all hold and bring into our processes and work with other people.

The first day of our consultation went very smoothly. The group was high-level, well prepared and worked together diligently to provide comments, document them – discussing, analysing and developing some very useful key messages from their small group analysis. There was laughter periodically in the room in spite of the seriousness of the topic, great questions were asked, the wall templates were filling up with colourful nuggets of incredibly useful and thoughtful contributions. Everything looked rosy.

I was getting very nice feedback from people at the end of the day and during our group dinner. And then the question came.  A member of the idea committee asked earnestly, are people being too nice?

Where’s the clash? Where’s the conflict? Are people giving their real opinions? This took me a little aback. I would say in a very useful way. It gave me the opportunity to think about assumptions (which I always enjoy) – all the different assumptions that people hold that are creating the reality we are sharing. Including me.

I could see that the assumption on the part of the person earnestly questioning if we were getting what we needed, was that difference in opinion in their experience was signaled by overt public disagreement, which can lead to passionate speeches, high emotion and possibly visible conflict in a face-to-face meeting of minds. This was clearly absent in our process so it caused a question mark to pop up for this person and then a desire to go around and check with people to see how they felt about the environment we had created to provide inputs. Hmmm, interesting.  I felt my face – was I wearing rose-coloured glasses?

For me, as the process steward and facilitator, my assumption was that people were happy because they were able to provide their viewpoints in a structured and constructive way. So the absence of open conflict was a sign that the process was providing them this opportunity, and so they were satisfied and comfortable, able to both provide their views and get to know each other and laugh from time to time. I actually very rarely have any kind of open conflict in my workshops and processes because I try to use different methodologies that aim to capture all inputs (rather than those of the loudest or most persistent), provide anonymity when needed, value inputs through multiple levels of discussion and analysis that allows people to work with ideas rather than refute them. I use Appreciative Inquiry to inform my question articulation and keep the pace moving and visually stimulating, and mostly out of long, open, unstructured plenary sessions where speechifying and checking your email is tempting, and the feeling that you are not making progress is tiring.

So the question made me usefully pause and notice again my assumptions and gave me an opportunity to check in with the group. This was a good idea for all – it would help me understand if the process was providing space to capture opposition to our central ideas (rather than being designed  for harmony at the cost of good input), it would help the person who feared that the lack of open and vociferous dissent meant that people were being too nice (and that nice meant no opposition); it would reinforce our principle for participants that all views were appreciated – the good, the bad and the ugly. We wanted them all!

I decided not to just ask the BIG question to the group in plenary at the beginning of Day 1, as that would be a risky format to do it and in that situation people might not feel comfortable to single themselves out and speak up in the awkward silence after such a question so early in the morning. So instead for the next set of discussions around the inputs, which were a little higher level and bigger picture, we asked for the “elephant in the room” (things that have not been spoken but need to be spoken) as well as key messages from their analysis and small group discussion.

The addition of that little question worked very well. It was an unexpected visual, amusing and energising question at that moment in the consultation (we were talking about biodiversity and had already spoken about elephants once in a more realistic context). Groups could identify one big elephant or a herd of small elephants. It invited everyone to think about what might be some of the underlying and potentially unspoken or softly spoken issues, at any level, of our consultation.

It also gave another way to analyse the patterns of the contributions, and it allowed us to see if there was anything new that we had not heard rumbling up before, or if the elephants identified now were more thought-through conceptualisations of things that had been emerging but perhaps not yet fully formed in all the different discussion activities as we went along. We found more of the latter which was heartening and also found it to be a valuable way, towards the end of our consultation, to help summarise and crystalise collectively the most important action areas for the idea moving forward.

It’s not often that you get a stop-and-think-question like, “Is this going too well?” that helps you test your assumptions (and those of others) while you still have everyone in the room. In the end, the consultation went well, the energy in the room was high, and we got those comments, ideas, gaps and elephants, with and without my rose-coloured glasses.

You put out a call for proposals for your large meeting coming up and your enthusiastic community responds with many ideas – way too many in fact for the traditional parallel break-out session format that was envisioned. What can you do about this? This is a good question and an issue for many large-scale gatherings.
Actually, this is a good problem to have as interactivity and community relationship building and networking are often why people come to these large events, but more often than not they get panel discussions and lines of speakers (see Duncan Green’s rant on this in Conference Rage and Why We Need a War on Panels).  So you are starting well, with many people attending interested in contributing and sharing their ideas. 
The traditional break-out room format is not necessarily bad, but it can be without good guidance, or if you are trying to fold too many things together. If they are endless, very large, anonymous and all have the same large panel and Q&A format, then people can “get lost” or skip these more easily if they are tired or use the time to squeeze in that last meeting before they leave.

Consider mixing it up, you can actually schedule all of these types of sessions into your large meeting:


  1. Parallel Session Breakouts:  Have the parallel session breakouts on one day with the strongest proposals and the most interesting proposed formats. Consider providing a template before the call for submissions that has questions that guide people into considering how to make it interesting and interactive and give Panels as one of many formats to consider, with some guidance on how to do these in the most interesting way (e.g. 2 or 3 panelists with juxtaposing views, rather than 9 people who just want to say their 3 minutes regardless of the topic.) These can be good with more complex topics that need time to develop and can have interesting methodologies included within if there are competent facilitators working with the organizers – crowdsourcing, storytelling, carousel discussions, etc. 
  2. Hold an Open Space Technologysession for one of the 2 hour blocks –  after lunch is a good time as people will move around a little and small, self-selected discussions can be more refreshing. And it gives the hosts a little more time to prepare.  I often modify the traditional format slightly. This could be in the main plenary room and could feature 15-20 parallel conversations with two rounds of 45 min each (I’ve also tried this with 30 minutes and more rounds, but it tends to feel too rushed and short then). These parallel table discussions with hosts are scheduled in advance with numbered tables and a “key messages” template to record any ideas and outputs from the conversations. These are good for brainstorming and getting feedback on ideas. 
  3. Hold an Open Mike time, or a Pecha Kucha (or an Ignite), or TED-like talk stage where people get a limited, set amount of time and are video’ed professionally. Hold it in a “studio” type room so that people/audience attending is good and a bonus, but peripheral. Pick the submissions for this that are more ‘show and tell’. You can do the filming over lunch each day and invite people to come and watch but tell them (truthfully) that there is limited space (that often encourages people more!)  Some of these talks could be featured in the formal plenary programme here and there as appropriate as they are short targeted interventions. In addition, as TED does, you can feature them throughout the year in your newsletters with a little blurb and add in video links to other communications. It is always nice to promote the work of members, and this is in their own words. 
  4.  Digital Poster Exhibition: You could also run a digital poster contest. Invite people with appropriate submissions to design an e-poster. Then have a number of large screens in busy places (the coffee area, lunch room, etc.) where the e-posters are displayed for 3-5 min each and change all the time, like a billboard. You can also feature these e-posters on the conference website, and archive them. Each one could have the photo of the person presenting it and inviting people to approach them for more information (face-to-face or by email).  The e-posters could have a custom e-template that people fill in, which could be a website template potentially and provide people with fields to complete with a title, text (e.g. 500 words), upload photos, add links, contact information, web URL, etc. Award prizes for the top 5 posters and announce them in the plenary and show them there. Let the audience vote on it for the prizes, or have the organizing team do that. 

And there are other formats that can also work, this is just a selection and to demonstrate what can be combined to showcase the different kinds of proposals you might receive. This blended format can also allow you to say “yes” to all of those who submitted proposals to share. The advantage of adding in points 3 and 4 above, is that in addition to an on-site F2F experience, they also give you video and image content to use later in your communications and learning and training materials, as case studies of what members are doing, etc. This adds additional value to participants as you are helping them disseminate their messages beyond who’s in the room at your large meeting. 

For each of these, produce good guidelines and templates. This is not to put square pegs into round holes, but to help guide people in their thinking about what good practice is for each of these formats. This takes a little more concerted effort to produce at the onset, and any follow up coaching you could provide is a bonus, but this can be welcome capacity development contribution back to your participants – as with highly active community members, your large scale event probably won’t be the only one they attend this year! (Try to make it one of their favorites)

(Want to learn more about our work? Sign up for our Bright Green Learning Academy Newsletter Collaboration by Design here.)

Are you a big picture person or a stickler for detail? Do you prefer to work in a structured way or to let things evolve? Are you an introvert or extrovert? Do you like to be in control or prefer others to take the lead?

Whatever your personality traits or preferences, each has an influence on how you work and interact with others. And if your job involves bringing people together to meet a particular objective, convening workshops and meetings, then knowing yourself, and how others see you, is critical to creating a harmonious and productive environment.

Your worldview, your culture, your opinions, what you do, and even what you wear, can all have an influence on people and on group dynamics. How closely you want to work with others, how much you need to relate to a group, and how you prefer others to behave towards you, all have a bearing on your performance. Identifying these preferences is important to your self-awareness and your continual development as a facilitator of collaborative group processes.

Gillian Martin Mehers and Lizzie Crudgington of the Bright Green Learning Academy describe their respective preferences and how these influence their work, and the strategies they use to amplify or manage them.

Gillian

I’m an extrovert on the MBTI (Myers-Briggs Type Indicator) and a ‘learner’ (using the Strengthsfinder vocabulary) and enjoy leading discussions. As someone who likes to learn new things all the time, I can draw on many different facilitation tools and techniques that I have used over the years. However, this means that I need to be careful to check with those I’m working with to make sure they are comfortable trying something new. They might be at a different stage of the collaborative process, where even breaking into small groups, away from the security of a plenary discussion, might test the comfort levels, trust and confidence of participants. So I need to manage my enthusiasm and eagerness to always be pushing into new territory in terms of methodologies and approaches.

I am also strong on the ‘inclusion’ trait (according to the FIRO-B diagnostic tool), which means that I like to be included and have a formal role in a workshop or meeting. I have a genuine desire to work with people, to help them achieve their goals, but I need to be conscious of not taking on too much of a role that could reduce the group’s sense of ownership in their process and results. In designing a workshop, I always build in a gradual ‘handing over’ of leadership so that the energy and momentum for follow-up rests with the group, and not with me as an external facilitator. Thinking about how your behavioural preferences reveal themselves in your facilitation work takes effort and introspection, but this awareness can help make you a better host and (temporary) holder of the process!

Lizzie

Different to Gillian, I’m an introvert on the MBTI and prefer not to be the focus of attention, so at the start of a session, I’m keen to get participants interacting with each other as quickly as possible (and shift the focus from me). I don’t feel a particular need to be included, this shows up on my FIRO-B test, but this may make me seem disinterested! It’s important to realise how others perceive you and perhaps adjust your behaviour accordingly.

Overall, it’s important to play to your strengths for the good of the group. Although I enjoy interacting with people, as a facilitator, I don’t feel I’m there to be the constant centre of attention. I do what I need to do to achieve the session’s objectives from the sides of the discussion, more as an objective process designer, guide and observer. That way, I find it easier to manage conflict if it arises. Sometimes in a heated discussion a verbal punching bag is needed and I’m happy to act as one if that’s what it takes to move ahead!

I’m what is called a ‘maximiser’ in Strengthsfinder language which means that I want to make everything as good as it can possibly be. I like to put my energy into turning something good into something great. So I like to push a group to achieve more than they set out to. But that means constantly ‘checking in’ to make sure they are comfortable with going the extra mile as sometimes the ‘just enough’ point is still a little distance from where I might, as a maximiser, be happy to take them.

It is important to be aware and continually adjust to evolving situations and group dynamics. It’s a continuous and fascinating process of evolution!

Read more…

I’m the Facilitator – How might you be affecting your facilitation work?
Me, my behavioural preferences and my facilitation practice – What are some common ‘learning edges’ – skills to strengthen – for facilitators and conveners? 

Nora Cantini – learning and development professional

Coming from the learning and development profession, I felt I knew myself quite well. I am not a particularly structured person; ideas tend to come to me as I go along, and in facilitation roles, I thrive more on the people interactions and less on the agenda details. But thanks to the exercises we went through in the ‘self’ and other modules, I realised that being more systematic and specific about defining ‘hard’ and ‘soft’ learning objectives actually increases my chances for greater outcomes. It also helps me align better with the leaders, sponsors and co-facilitators of the events I’m designing.

I’ve worked in both private and non-profit sectors and the working culture varies greatly. In the private sector, it’s all about quick results and people are often very task focussed, regardless of feelings and opinions. This can mean staff agreeing to an action plan publicly, but privately, they are not on board, to the detriment of motivation, and paradoxically, productivity. What I’ve learned is how to facilitate sessions that achieve results whilst building teamwork and buy-in, without losing time.

I look back on some of the rigid, formulaic meetings I have attended and see how I would run them completely differently now. The Academy sessions have equipped me with the tools, methods and skills to make meetings more interactive, varied and productive while catering for the diversity of preferences and personalities in the room. The quiet ones often have the best ideas – let’s make way for the hidden diamonds!

I facilitated a big global workshop last week- some 190 people attended- where we used music in a number of different ways in the event. First, as it was a large group, we used it for crisp starts and stops to our sessions: the music stopping gave a subtle audio cue to people, signalling a transition from the informal networking time, to the formal start of our session (more elegant than me shouting in the microphone for everyone to sit down).  We used it just prior to the start of the after lunch sessions to give an energy boost after the hour spent enjoying the lunch buffet. And we used music at the end of the day to create the mood for reflection and to usher in a reception and other evening events. We also wanted local music to give people the feeling of being in the host country (because we spent a lot of our time indoors in a space that could have been located anywhere on the planet). It also filled the vast, high-ceiling-ed and rather anonymous ballroom with warmth making our conversations feel more intimate.

Music can be a wonderful and useful instrument (pun intended) for a process designer when planning the choreography of an event. But I find it is one seldom used. TED does a good job of selecting songs with messages in the lyrics to start coffee breaks, and then tends to end those breaks with short videos (that can again have the effect of forward attention getting and a crisp start.)  Other than that it seems that music is infrequently  considered in a deliberate fashion to help create the overall atmosphere for dialogue and learning.  

What it takes to put a workshop to music

There might be some reasons for this – adding music adds tasks to the long list of materials, equipment, roles and responsibilities for a workshop. You need audio equipment, speakers, a playlist, and someone paying close attention to cue and cut the music. More importantly, you need a special talent to create the playlist in the first place – someone with a good broad knowledge of music who can select just the right piece for the right mood and, if there are lyrics, appropriate ones. All this adds considerable time to what might already be a busy and finely tuned event.

Not as easy as it sounds

Recently at our Bright Green Learning Academy training (Module 8: Practicing Facilitation Approaches and Methodologies) one of our participants ran a brainstorming on this exact topic: which pieces of music fit where in a workshop design? Interestingly, although it seemed an easy task, we all found it incredibly difficult to do on the fly, and found that some of our individual great ideas were certainly a matter of taste. The big lesson: Creating the sonic fabric of the workshop takes encyclopedic musical knowledge, careful consideration and time, but it can have thrilling effects when done astutely.

It turned out that the person who ran the exercise in our Module is himself a music aficionado and he took the exercise a step further a couple of weeks ago. He took a set of criteria  given to him by the meeting facilitator and used his own vast musical knowledge to create a sound design for an evening workshop (a Toastmasters meeting).

Here is what he proposed, with at least two suggestions for each part of the meeting. The jazzy feel matched the demographic in attendance and the after-hours feel of the evening event. Read through his proposals below and see if you can feel the surge of the music as the event progresses and the deliberate sonic ebb and flow proposed. Notice his thinking behind the choices:

Entrance: Soft energy/welcoming
Entrance:   Stan Getz & the Oscar Peterson Trio  
Why? Easy and welcoming.
or 
Chet Baker 


Break:   Higher energy  
Break:    John Coltrane  – My Favourite Things  
Why? This piece is lively and gives a great jazz take on a known melody.  It’s also 13:30 minutes;  just right for the break period.

John Coltrane  – My Favourite Things
or
Stan Getz & Bill Evans  (sax & piano) 
or 
John Coltrane  – A Love Supreme   (a bit livelier)
Exit:   Positive vibe for teamwork and a good send-off: 
Exit:    Uptown funk (sax cover)  followed by Blue Train
Why? As the meeting ends, cue up this tune (Uptown Funk) and play it right after that final gavel hits the President’s desk.  There is a punctuated start to the piece which gives way to the funky sax solo.  It’s an attention grabber.  It’s says ‘Hey look here!’  and conveys a positive feeling for the exit. The piece however, is only 4 minutes long!   Bear this in mind because it is good enough as a punctuation mark to the evening but not long enough to keep things flowing for the 30-minute cleanup.Therefore, follow it up with Blue Train which will easily carry you through the length of the clean-up process. Just mind the time of the first track.  You’ll need to make a smooth transition after the first song ends without there being a gap of silence which lasts too long. This confuses the listeners and puts a glitch in the sonic fabric (and we don’t want that!) 

Uptown Funk:   Sax cover of Bruno Mars’ Uptown funk.   (Lively funky sax send-off)
or
Play that funky music:  Sax cover
followed by:  
John Coltrane  – Blue Train
Sounds technical…
The technology to add music to your meeting or workshop doesn’t have to be complicated,  For smaller meetings you can connect to the songs on YouTube from your telephone or iPad and broadcast them on a speaker via a Bluetooth connection.  For larger events like my conference, you need a sound system, but if you are showing any videos during the event you will probably have already amplifiers  hooked up and available
Bringing your workshops alive with the sound of music definitely takes some careful work, but using music strategically in your event can add real richness and energy to the learning landscape, connecting with people on a different level, and might help take your collaboration and results to new heights. 
(A big thanks to Christian Kranicke for his excellent soundscaping and for being willing to share it!)

I have recently been working with a team on training design for a rather technical three-day workshop to be piloted soon. Once the course has been tested and further refined, the next step is to develop a Training-of-Trainers programme to support the capacity development of a number of trainers who can disseminate this learning workshop globally. That sounds like a logical step and helps contribute to broadening the impact of the course and content by having a number of good trainers delivering it, in multiple locations and in numerous languages.

I have given many Training of Trainers (ToT) courses over the years and have been very happy with the design described in this blog post: Training Camp! An Un-ToT Design. This design provides for high customization by the trainers, as they tend to all have different levels of ability in both the technical aspects and training process. I find that this Un-ToT format works well to produce a group of trainers in the end with a handle on the materials they will need to  deliver the course independently in the future.

So, the course design is one thing, but how do you develop the materials for the trainers – the Trainer’s Manual – what does that look like?

Obviously the trainers get the Participant Materials, but what else do they need in addition to that by way of materials? I always produce a written Trainer’s Manual, that I provide in the ToT and use both to support the ToT process and that also provides trainers with an on-demand resource as they go forward and deliver the course themselves. I think it has higher utility to the trainers to produce this additional resource rather than provide only the Participant Materials and some supplementary handouts.

Here is a sample Table of Contents for a Trainer’s Manual:

Section #
Section Title
Contents
1
How to Use this Manual 
Explain how the manual will be used in the ToT and beyond in the course – this section can also be used to welcome facilitators and give them information on where to go for more information – dedicated website, contact information, etc.
2
Facilitation Agenda 
Include the annotated Facilitation Agenda that the trainers will use in delivery of the training. This includes timing, process information, activity descriptions, etc. – this needs to be in front of the Manual and easily accessible as people will refer to it frequently.
3
About the Host Organization 
Provide relevant background on the group designing the training so that trainers have the relevant information to share with participants, as they might not be staff of that organization but external trainers.
4
About this Training Workshop 
Describe the origins of the training, rationale and what it hopes to help participants achieve. Provide a description of participant profiles that can help the trainers and others identify the right participants to attend.
5
Master Materials and Equipment List 
This list helps with procurement of stationary and ordering equipment for the training room – flip charts, markers, LCD projector, post-it notes and so on.
6
Materials to Prepare in Advance 
Indicate what needs to be done prior to arrival onsite – this can be posters to print, handouts, job aids, etc. in aggregate.
7
Materials to Prepare Onsite 
This list includes items that can be prepared in the room before, such as flip charts, templates, etc.
8
Room and Table Set Up 
Provide a diagram of how the room should be set up, and where to position equipment like flip charts, screen etc. This can be shared with the venue staff in advance.
9
Day 1 
Each day has its own section.
10
Session by Session Description
(See below for detail)
11
Annexes
  1. Participants Training Manual (Separate – this is the manual that all participants will receive.)
  2. PPT Slide Set (If PPT will be used – separate on a USB key/ CD or URL/Dropbox for download. Include electronically the Trainer’s Manual with handouts etc. in Word, and the Participant’s Manual in case this needs to be reproduced locally.)

Within each of the Session descriptions (I always divide my days by Session, so I can keep them distinct and provide an easier way to refer to them to participants, trainers and speakers, etc.), I write up each of the Sessions in the Trainer’s Manual with the following information:

  • Session Number and Title
  • Materials (What’s needed for this specific session)
  • Preparation (What do trainers need to do to prepare – flip charts, room change, quiz, find a place for a game, number tables, etc.)
  • Timing (How long does this session last – 09:00 – 09:45)
  • Sequence (This is the sequence of events and the script AND it always includes possible answers to questions the trainer is asking participants, or answers to a quiz or learning activity. If participants don’t quite understand the question or ask for an example, this helps trainers provide one, and gives them a sense of the kind of responses to look and push for.)
  • Flip charts/Job Aids (What do these look like, what questions are asked, what format do they take?)
  • PPT slides (You can add in print outs of slides with notes in this section, or you can include this in an annex. NOTE: If you have a very long slide set or one with lots of images and graphics, this can make the Trainer’s Manual data file incredibly heavy. If this is the case, I sometimes refer simply to slide numbers in the Sequence part of the section (like “See slides 1-5”) and then provide a hard copy of the slides and notes in the Annex which can be printed separately to the Manual document.)

    All these sections should have an open and “airy” layout on the page that allows trainers to take notes in the margins or has a designated place to make notes. In order to deliver this training, they will have to make these words, concepts and activities their own, so providing a space to reflect and customise the materials as they go along will be an important part of the Training of Trainers session. 

    How to Put It All Together? (Literally)
    One last thought, I have experimented with different formats to provide the above materials. I think I like ring binders the best with a pocket in the inside front and back where you can put the USB key or CD. The rings help people take things in and out that they might need in the training delivery (notes, the Facilitation Agenda, the PPT slide printouts, handouts to copy, etc.) and then put them back in to keep them organized. It also means that anything new they develop they can pop in and not have to keep separate and potentially misplace. I would always print the title of the workshop on the spine so that it can be seen on the shelves with their many other Manuals.
    Trainers of Trainers, anything else to add that helps keep us on track in a ToT? 

    (I love the fact that I really do learn or re-learn something new every day…)

    You might be the Facilitator, in charge of weaving together threads of themes, helping people make sense of complexity, ensuring time for reflection and assimilation of concepts, framing and debriefing activities that will help participants share their thoughts or co-create radical new ideas. You might be on stage bringing energy to the group when they need it and watching participants to make on-the-spot modifications to match their needs and interests. 
    You might even be introducing the Minister, Ambassador, Permanent Secretary and CEO. Effectively you are there to make sure that the investment of tens of thousands or even hundreds of thousands of dollars in convening the right people for this workshop or conference is fiscally responsible and has the results that ensure a return on investment by the hosts. That’s your job as Facilitator.
    And you might also be doing the following:
    • Finding volunteers to translate job aids into different languages;
    • Printing and making photocopies of job aids in two languages (and finding paper for the copier and then taking it completely apart to clear the paper jams);
    • Putting the job aids on the 25 tables in the plenary;
    • Making the background PPT slide set that runs behind the programme (giving it to technicians and changing it as things change);
    • Clearing the tables of cups and other ephemera and replenishing materials needed on the tables;
    • Putting the chairs back around the tables and smoothing table cloths before the next plenary so that it looks tidy and inviting to participants;
    • Taking care of things people leave in the room (walking lost and found – phones, cables, USB keys…);
    • Making signs to indicate the breakout rooms locations;
    • Getting people into the rooms on time.
    • Standing in front of said signs to help people find their rooms;
    • Finding interpreters for parallel sessions;
    • Performing materials husbandry tasks – dividing up materials needed by parallel sessions and delivering them to the rooms at the right time, finding lost markers, saving enough materials for the last sessions;
    •  Finding the rapporteur to hand over the written results from the working groups.
    • Double check everything and field what quickly becomes Frequently Asked Questions.

    So you also might get to do these things at your large event. These details make a difference you know; they contribute to the visual aesthetic of the event; they signal care, respect and professionalism; they make the event feel smooth to participants and reduce any anxieties that can come between attendees and their learning and contribution to the event. 
    It’s definitely not a problem to do them and you are certainly willing to pitch in, and they need to be done. By you? These important roles could also be assigned in advance of the event to other team members who could do them sometimes even more quickly and easily than you – the operative word here, that might occur to you exactly in that moment you are taking apart the photocopier for the second time rather late at night, is definitely in advance
    To enable this better division of labour it is great to think systemically about the event in the weeks before and make a check list of all needed roles to assign before your big meeting and conference (as with a small one, these things don’t take so much time, but with 180 people then that is a lot of tables to straighten up after a plenary) and then ask who might like to take them on. There might be a short list of roles already that you can add to from what you know about what makes large events work.
    As the more time that is needed for these things, the less time you have to focus on, and prepare for, the participant-facing facilitation work you will do – not to mention grabbing a couple of minutes of your own to clear your mind, rest a little in the hubub of the conference, refocus your thoughts and look at the scenery that might just be outside your meeting room…
    Facilitating large groups? Here are 3 more related posts: (Module 10 in our Bright Green Learning Academy is also on this topic)
    1. When Numbers Soar: Working with Large Groups
    2. Going Large: Tips for Running Facilitation Teams at Big Conferences
    3. Building Peer Learning into Mega-Events and Conferences

    I didn’t wear a helmet, riding boots or a crop when I spent three hours last Sunday morning with Mr. Bean and Frederica- two former polo ponies living on a farm in Bavois, Switzerland. That’s because I didn’t ride them – I spent my time leading them around a chilly arena, slaloming cones and over low barriers (without a rope!), or at least trying to.
    This was during one of Sarah Krasker’s equine-assisted learning workshops where she provides individuals ( coming in teams or alone) an opportunity to explore their leadership abilities through experiential learning. You bring your non-verbal communication skills, energy and purpose to bear with giant animals who don’t get office politics or do something because it’s a nice thing to do. If the horse can’t understand your direction, is getting mixed signals, or doesn’t trust you it will simply abandon you for a good, hard, longing look at the rest of the herd in the field out the window.
    We were three people, two horses and trainer Sarah for the morning. All of us had picked different aspects of leadership to explore. In our three hours, we worked with the horses twice with reflection and debriefing after each session.
    Our goal in the barn arena was simply to get the horse to follow us on its own accord. This seemed unlikely (why should they?) but we were assured if we were giving off the right energy (Sarah called it an “energy bubble”) and signals and made it seem more interesting than anything else going on at the time for the horse it would happen. For that we needed to communicate direction, intention and passion for the task ( walking around the ring or weaving through the cones). Horses being herd animals, we were explained, like to follow a trusted leader. Mustering these forces within you would lead to a satisfying picture of a horse following you around. However, hesitation, a dip in conviction or attention or energy, alternatively means that the horse will just stop in its tracks and look at you patiently, stock still, 900 pounds of immobile weight, with those big beautiful brown eyes. No amount of pushing or cajoling at this stage would get it to move another step.
    It took me the first round to connect with the horse and understand more of how strong you have to be to get the horse to follow you. Not muscle strong though; it takes concentrated, ongoing focused energy and mental engagement to get the horse to start and keep moving. My first time I only got a few steps that initially heartened me but quickly showed that the window was more interesting than anything I was offering at the moment.
    But the second time, with resolve, a vision in mind about what task completion looked like, a firm but friendly voice and not taking no for an answer, I blocked my energy, gave instructions and turned my back and walked around the ring a couple of times with Frederica following along behind me. Granted, I did start with the rope for the first few steps, but then we unclipped the rope and (to my amazement, although I didn’t let on of course) she still followed me around the ring for a couple of tours. The second time I needed to quality control the slalom by slowing down a little and insisting a little more firmly that she go around all the cones, and she did! (I must confess, at first I thought these just might be very well-trained horses that know their trail and would do it by themselves, but on many occasions, even with the rope, if the leader hesitated or lost their conviction the horse would simply and quite abruptly stop in its tracks. Now that’s feedback!)
    It was a thought-provoking morning in the barn and it got me thinking about how I communicate vision, the responsibility for safety that leadership brings (task based as well as emotional), how to make sure that what you are asking, which is out of the ordinary – not business as usual,  is more interesting than the familiar other horses or the window. Leadership most often means taking people along to a new place, a new situation, or a new practice.

    Working with the horses and Sarah this way provides a great opportunity to get outside the four walls of the office and separate yourself from the day to day. This can give invaluable time for reflection that the barrage of emails and meetings doesn’t always provide for, and a useful experiential learning moment that can move your thinking ( be it at a trot, canter, or run) about your own leadership role while enjoying the warm hay breath of the horses.

    (Trainer Sarah Trasker with Mr. Bean)
    It has been great to work  with my co-authors Dennis Meadows and Linda Booth Sweeney on a book of  22 games that help people learn more about climate change. The three of us have been working in the sustainability field and on related issues for many decades. We’ve enjoyed building on some of the games from the Systems Thinking Playbook, relating them to climate change learning objectives, and also developing new games that can be applied in a number of different learning contexts (workshops, meetings, conferences, training courses, etc.)
     
    We’ve organized the 22 games into three types – mass games, that can be played with any size group, such as in a conference setting; demonstration games that a small group can play while a larger group observes; and finally participation games, that groups from 5-25 people can comfortably play.  
     
    The three authors have played these games for many years with many different types of learners, from students to senior policy officials, and have built into the game descriptions our own learning about how to frame them, brief and debrief them most effectively. Some are simple and take 2-3 minutes to run, others are more involved and can easily create an interesting dynamic and discussion that can take an hour to work through with participants. 
     
    If you want to create a more interactive learning environment when working on climate change and sustainable development issues, consider integrating some of these games into your next presentation, meeting, workshop or conference. It will be one of the things that your audience and participants will remember!
     
    The official publication date is 5 May 2016, but the book will be available beginning April 28. You can pre-order at the Chelsea Green site – The Climate Change Playbook. It will soon be up at IndieBound, and is active at Barnes & Noble  and Amazon , and of course you can order from your local booksellers as well. 
     
    We hope that enjoy learning about climate change, and playing these games as much as we do!
     

    I am enjoying being the Learning Expert for a very innovative programme (Learning and Knowledge Development Facility) that aims to promote, capture and share learning from a series of international public private development projects (PPDPs). The objective is to create a platform and a process for sharing learning among all the project stakeholders and with other interested parties for continuous improvement in the existing projects and to create efficiencies in future project development and implementation.

    For this project, among other things, I recently wrote a series of How-To Manuals (see the blog post: How to Write a “How To” Guide: Two Approaches to Creating Reusable Learning) based on individual learning gathered through interviews and collective learning from facilitated workshops and meetings. These detailed documents are all available for practitioners in the project to use as well as anyone else interested.

    But, they range from 20 – 30 pages, with some shorter executive summaries that aim to distill further key points. With piles of reading already on their desks, the project managers challenged us to create some new, shorter learning products, not just for them but for their colleagues and others who were interested in the project, who wanted to learn more, but were just starting to dip their toes into it. 

    The project is about developing Public Private Development Partnerships (I’m not going to describe them here, you have to watch the video!) It’s quite a nuanced concept. And because of the complexity of writing about and describing the PPDP approach itself (one of my long How-To Guides was about PPDPs – How to Develop and Implement a Vocational Training Public Private Development Partnership – even the name was long!) that was where we decided to start.

    So we made an animated video – a 3 minute 23 second explanation of what PPDPs were, how they worked (and of course the benefits!)

    All in all, it took us four weeks from the telephone interview that produced the narrative, to receiving the link to the final video. We chose an aggressive time frame as we wanted to show the video at an upcoming meeting. For this project we worked with Simpleshow.

    This was my first experience working with a creative team to create an “explainer” video. There were a number of lessons that I learned along the way that I want to capture, for my own future reference, and also for sharing with anyone who is tempted toward the process of condensing and sharing learning in 4 minutes or less.

    Lesson 1: What’s the message?

    As I mentioned above, the idea started with a 33-page “How-to Manual” which structured a rich multitude of lessons learned by many different actors. How on earth could that be condensed into 4 minutes or less? Four minutes was the upper limit given to us by Simpleshow, with a suggestion that even this could be too long. (Note: There is plenty of interesting research done on video length and viewer attention span – like this article by Powtoon Explainer Video: How Long Should Your Explainer Be? We went plenty over, relatively speaking, what seems to be a generally suggested time limit of 1-2 minutes.)

    It was obvious that this amount of content was far too ambitious for a 2-4 minute video. So we needed to think again. When we considered the questions that come in about the project, the first ones and perhaps the most fundamental are really the basics – What is a Public Private Development Partnership? Who is involved, how does it work and what are the benefits? In answering those questions, our message is really basic: This is a very cool approach which you should know about and might want to get involved in. So we started there.  You really need to be crystal clear about the central message you are trying to convey. Too many messages make for a messy animated video.

    Lesson 2: What’s the story?

    For a video to be good, there needs to be some kind of clean and simple story or narrative with some characters, a challenge that people are trying to solve together, a barrier to surmount. Our story had all of those components. To get to the essence of the story for our video, Simpleshow sent a questionnaire with some very good questions along these lines. We answered it and sent it back and then set up a call with a project manager and a story writer that lasted about an hour. I discussed with them the answers to the questions – What is a PPDP? Who’s involved? What makes it special? What problem is it trying to solve?  And they asked more questions, and I gave more answers. After a while it formed into a simple but compelling story.

    Lesson 3: Whose voices? Which characters?

    If you watch many explainer-type animated videos, you will notice that there is almost always one voice that is the narrator. This voice introduces the characters, and effectively tells the story for them while they move around and animate the story.  (More on this narrator voice later.) As such there are a lot of decisions around characters and voice in a video. First, you need to identify your characters. Our first list was very long as there are a lot of important actors in PPDPs. But you really can’t have too many characters as it can be hard to keep track of them and in some cases hard to tell (animated) people apart. Remember that they are not distinguished by their voice, as they do not speak – one central voice tells the story, so they need to be differentiated in other ways.

    In our case, the main actors involved were actually organizations, as we were describing an approach or a process. So we had to decide which organizations were the most central to our story, and what characters would represent them. We ended up with four main characters with actual names (Peter, etc.), and with some minor characters without names (e.g. teacher, government official, other student).

    You do need to be thoughtful about names – selecting those that are not too similar.  For names we tried to use known names from where our characters originated; the most important name choice was our central character, a woman graduate in Zambia. For that I researched the most popular female names in Zambia and decided on Thandi, which is near the top of the charts of popular names for women in Zambia, For next time, I would suggest even more diverse names for the other organizational characters as the project is international. We changed a couple of them from those suggested by Simpleshow, which was perfectly fine with them, but could have changed them a little more to capture the true diversity of the project.

    Lesson 4: Getting the story crystal clear

    The next step was to write up the narrative – the story as told by the narrator. This was the script and was written from the perspective of a storyteller which was not one of the characters. The script was drafted based on our telephone conversation. Simpleshow wrote out the script. word for word, exactly as the narrator would read it, and sent it for review along with some ideas of visuals (in words) and potential images that could accompany them (characters, icons, etc.) I checked the accuracy of statements, changed terminology, answered some questions, and looked for points of emphasis.

    It was important here to remember that some words can be very politically charged, how some characters are described can be consistent with their own terminology or quite incorrect. You need to remember that you are the expert at the topic, the video maker works on a myriad of different themes and although they do their best,  it is your responsibility to catch things at this stage. I shared my comments with colleagues to make sure that I was not missing anything, and indeed I had! At this important script stage we needed to sign off on the narrative as written, because it is not efficient or practical to change the text after the images are drawn.

    Lesson 4: Sketch stage – Choosing the right images and icons

    I considered what was being suggested in terms of images and iconography and made some tweaks. Sometimes the initially proposed icons might not be quite right to represent the actor – for example, a technical assistance donor will not resonate with an image of a bag of money, but with a growing plant instead.  Other images benefit from changing to increase accuracy or authenticity. For example, I changed an image that was represented on a chalkboard to make it more consistent with the reality of the project (from a flow chart to an engine diagram as the project works with heavy machinery), or changing what one of the characters was wearing to be more like that we see in the vocational training centre workshops in the project.

    For this, I used photos from our project, and also googled factories in Zambia, and sent links to the animators, and generally tried to help make the story and images as accurate as possible with the reality of the project. It was at this point also that I received a first sketched of the characters. For Thandi, our Zambian main character, I commented on her dress and hair, and googled lots of Zambian universities and factories for photos to see what students were wearing. Although I have been to Zambia on more than one occasion, I wasn’t in a heavy vehicle vocational training workshop! So I passed this by colleagues who had been working in Zambia, and had been to the vocational school until we all agreed. All the images need to be checked carefully for accuracy and authenticity as again, it is practically impossible to change them (or very costly to do so) once the voice actor is engaged and the animation completed. You definitely don’t want someone watching the video a month after production saying, “That’s not how you pronounce ‘Thandi’ in Zambia”!

    Lesson 5: Voice actors – What voice best matches the content?

    Speaking of pronunciation…the video narrative will be read by a professional voice actor (I enjoyed googling that fascinating field of work). The company has a pool of voice actors and sent me some audio clips to listen to, and from which to select the one that seemed to fit the content best. I found out from the company we worked with that most animated videos they made were narrated by men, and often with American accents (at the request of clients).

    We decided early on that we wanted a women’s voice, so the Simpleshow sent through some female voice clips for me to listen to, with some different accents. It was interesting to hear all the varieties of voices, and their different qualities, intonation, brightness, etc. We decided that we wanted a British female voice. I listened to a few more audio clips and chose one. The voice in the original clip I found a little too bright and chirpy, which didn’t fit as well for our content, so I made some suggestions along those lines. When the actor recorded it she matched our request and instructions.

    Lesson 6: Signing off final stages – no going back

    At this point I had signed off on the text to be narrated, and I needed to sign off on the images and icons, and what would happen to them which was described in words (wondering, searching, happy, ‘wiped away’). I was asked about how to pronounce ‘Thandi’ ( with “h” or without – I double checked with a Zambian friend to be sure!)  Also how to pronounce ‘UNIDO’ ( spell it out or read it.) It was great that they asked, I am sure the voice actor needed to know. Again this is something you might anticipate and give some instructions before the voice actor does her work.

    At this point, the text and images go out of your hands and the company puts together the animation and the voice actor records her text. You can listen to the final results in the video above!

    We would ideally have liked another review step or a quote for how much that might cost (it might be significant if the voice actor needs to re-record something to emphasize a word more or less, or a sequence in the middle of the video needs to be re-shot). I understand that is why there are so many opportunities for iteration and sign off steps. It is however still challenging to try to imagine how the voice will work with the images, and how the images will move. There can be unconscious messages communicated when some images stay longer on the screen or have a more central place in the viewing pane. In the future I will try to pay more careful attention and try to anticipate this, and thus give some additional instructions to the artist and voice actor on this aspect if needed.

    What might happen next?

    The video launch received a very enthusiastic response and good feedback. People are thinking actively about how to use it. The team recently translated it into French  as one of the new PPDPs is in a Francophone country. That took only 2.5 weeks, from request to final French-version of the video, and provided another broad set of possible accents and specialised terminology to select from (with no changes made to the animation except the last ‘thanks’ page).

    The video has been put on the webpage and shared widely with partners. It will feature in an upcoming training course on PPDPs in the introduction, and is being sent to potential partners through email and in workshops and meetings. It is such a short and easy introduction to PPDPs, and is much more engaging than any PPT slide set or oral introduction, both of which would take longer than 3 minutes 23 seconds.

    Overall, it was a very exciting and fast paced process, and it’s fascinating to see ideas move from a conversation, through written words, to images and then jump off the page into an animated video. And it is not as mysterious as you might imagine. I enjoyed writing down my learning and things I want to remember, not least because I might want to reuse my learning in the next set of animated videos that are already in planning!

    Plan A and B crossed, Plan C take over
    In June I had the opportunity to work in Sweden at a wonderful event on the seaside. I got the job because a friend of mine who usually worked with this group was unavailable.

    Unfortunately I had another event scheduled until 6pm the day before in Switzerland which meant that I needed to leave my event promptly, drive the 30 minutes in rush hour traffic to the Geneva airport, take a flight to Copenhagen, and there make a 35 minute transfer onto the last flight of the day to my Swedish destination. I would arrive at midnight, and my event started at 8am (outside the city).

    What could go wrong? My Swedish counterpart there asked a good question, what if… What was my plan B, she asked? Well, effectively I was already their Plan B as their regular facilitator couldn’t make it, so what was my Plan C, in case any of those many moving parts to get me to the event in time, didn’t actually move.

    That is a great question that we should always ask ourselves as facilitators (or trainers, or any person on whose participation an event may hinge). What if we fall ill, miss that flight, get taken to the wrong venue in a city we don’t know?

    Now, I have in the past run a plenary session with a dizzyingly high fever, covered in sweat and practically swooning in the blurry spotlights  in front of me (this was at a UN conference in Damascus many years ago – with organizers with a “show must go on” attitude. It was nothing that a huge dose of antibiotics and 2 days in my hotel bed afterwards couldn’t “cure”.) But I have also gotten a call at 05:30am on a weekday from my colleague who was desperately ill, and then found myself standing in a workshop room a couple of hours later picking up with a surprised group where she left off. (That was the source of another couple of blog posts – Facilitators: To Your Health! and Managing Exceptions – The Resilient Facilitator. I also wrote a blog post from the perspective of the stand in – Flu Season! Facilitators Prepare to Step In!)

    So sometimes the Grin-and-Bear-It approach can work, or if not, calling a colleague with whom you have a good working relationship and a shared approach. It’s definitely worth contacting your network and making some reciprocal agreements in advance that can help in such emergencies – both local and international.

    What else can you put into place as a Plan B or C? One thing that we always do is we develop a “Facilitation Agenda” which is a very detailed description of the process that we will use for the workshop. It includes the sequence of items and speakers, their titles and the titles of their presentations (for introducing them). It includes the group work and activities sequence, the timing and any roles. It can also include mock ups of job aids, flipcharts that need to be created on site, and any other process considerations (how to run the quiz, how to set up the room, etc.). Our Facilitation Agenda documents are very complete, and very long, but they also provide any experienced facilitator all they need to pick up the process and go on with it. A materials and equipment list completes the process pack.

    It is also good to make sure that this Facilitation Agenda is developed with your counterpart in the organization, so that they know exactly what the process is, the rationale behind it and the expected outcomes. This helps them better hand this over to a substitute facilitator if need be or even, if they are happy to do it, take on this role themselves, or find another internal person to do this as a last resort.  You can even anticipate this with your counterpart and identify another process person within the organization to have a talk with in advance, as your Plan B.

    Thankfully, in my case, the winds were with me. My workshop in Geneva ended promptly on time, and as luck would have it, I shared a taxi to the airport with a Norwegian participant who knew all about the local transport system where I was going. He told me all the ways to get to my destination in case I missed my connecting flight – from renting a car and driving the 3 hours north, to crossing the bridge from Denmark to Sweden and taking the train after midnight. Both would get me there in time for my event. Armed with bountiful Plan B’s, and after a brisk run from gate-to-gate in Copenhagen, I made all my connections and showed up in good shape for my event, much to the relief of my Swedish counterpart who stayed up very late until she received my “I’m here!” text message.

    It’s definitely worth coming up with contingencies before you really need them. I heard a TED talk recently by a Canadian neurologist Dr. Daniel J. Levitin (it was about the importance of pre-mortems, inviting us to plan ahead for stress), who reminded us that when you’re stressed, your brain releases the hormone cortisol which makes your thinking fuzzy.

    You don’t want to be fuzzy-headed trying to develop your Plan B. Well in advance, when you are calm,

    • 1) Get your network of potential stand-in facilitators in place (local or otherwise);
    • 2) Make sure your process is well documented to the final detail (Facilitation Agenda);
    • 3) Brief your counterpart (so they are fully aware);
    • 4) Know all the alternatives (routes and all);
    • 5) Wear good shoes and travel light.

    Chances are you won’t need these things, but if you do, you will be happy to have your Plan B, C, and D in place. It turned out to be a beautiful summer day for an event in Sweden!

    The conference centre staff were confronted this morning with the following appeal – PLEASE DON’T TOUCH THE PAPERS – written in foot-high capital letters, and strategically placed in front of the door to our workshop room, the walls of which were plastered with flip chart templates, timelines, prioritised project lists with actors designated – the golden nuggets of our intense working meeting. 
    Before leaving the room the night before I also took photos of everything, even though the next day we would work together again, further develop the ideas, layering additional information and meaning over our previous day’s outputs.
    In the past, I would have waited until the end of the workshop to take these photos, so as to have the final artifacts, organised and polished. But not any more.
    At a 3-day workshop in Paris last month in a beautiful new hotel we were also working visually. The walls of our meeting room similarly featured the colourful results of our first 2 days of work and discussions, decisions and ideas. The outcome of this strategy meeting was critically important in the life of this group. We were excited as we left the room the evening of Day 2 to have the few hours on our third morning to carefully review our work, synthesize and prepare the outputs and ambitious work plan going forward. 
    I guess you can tell where I’m going with this… for the first time in my professional experience, right in the middle of a 3-day workshop, we walked into the meeting room an hour early on the morning of Day 3 and were confronted with the brutal reality that the night cleaning team had taken down and removed absolutely everything from the walls, all our flipcharts posters, templates, papers from our tables and all of our workshop materials! It could have been any other empty meeting room in the hotel. In a very controlled, surprisingly calm and professional way we freaked out (then we got to work).
    You might think that this was a bit of an overreaction, but if you are using a visual discussion methodology that collects and organizes outputs on flip charts, posters and templates, and a group of 15 people and the host organization has collectively invested 320 person hours (effectively 2 person months of time), tens of thousands of Euros in logistics costs (having flown in from all over the world), and the equivalent monetary figure for their professional time, then having these documents removed is a very big deal. 
    We hurried to recreate the results from our handwritten notes and memories, the hotel having been quickly alerted about the loss. An agonizing 15 minutes later, we were relieved to hear from the hotel staff that a thorough search of the cleaning closet produced a bag of our flip chart sheets and materials – the new night staff member had been told to clean the room, had taken the instructions literally, but clearly had not felt confident to throw everything away. 
    We re-posted our slightly crumpled flip charts, taking the opportunity to reorganize them, and were done 10 minutes before our participants arrived. I took photos again, and learned a lesson – make records as you go along rather than at the end, just in case!

    Surfer Hollow Wave Ride

    There I was, prone, my nose the requisite hand-width from the logo on the waxed board. Then, on command, execute sequence: paddle the air like crazy, then up on one knee, then two knees, stand up, body turn, arms out and ride that imaginary wave.

    Surfing seemed pretty straight forward there on the sand. Side-by-side on the beach we had 10 surfboards, and 10 wannabe surfers, being put through our paces by the surfing instructor before we ran into the water with our boards. Cool! Well…

    I spent the first half hour of my 90-minute lesson just trying to get on the darn board without falling off the other side. That was already rather humiliating, but I had the water to hide in (frequently and head first). Once I could actually get on the board, turning it around so it was facing in the right direction was my next challenge, and doing so without getting caught broadsided by the waves that were coming in with frustrating regularity, as waves do I guess.

    Then I found myself miraculously on my board, facing the beach (at frighteningly close range) and hearing the surf instructor shouting “PADDLE!” at me. I paddled, and rode my wave onto the beach –  on my stomach. It was surprisingly comfortable but, I was assured by my sons, not the way to do it.

    There were several thousand witnesses on the beach that day, watching me fall off my board, belly surf onto the beach and twice get up onto my knees but no closer to the standing cool of the little kids and my sons dude surfing around me. All in all, I spent at least an hour humiliating myself and the rest of the time underwater.

    Benefits, you ask?

    That was a sunny day in Rhode Island, let’s go to the other side of the Atlantic Ocean now, to Newcastle University in the UK.

    Thirty volunteers were recruited recently for an experiment that began by subjecting them to a barrage of problem-solving, memory and reaction time tests to set a baseline. Then they were randomly assigned one of three activities to do for eight weeks and went home.

    Members of one group had to walk briskly for three hours a week, a vigorous exercise that kept their hearts pumping and their brains deliciously filled with oxygen-laden blood.

    A second group played Sudoku and did puzzles like crosswords for their three hours a week. Comfy in their lounge chairs, their brains were constantly being challenged and titillated solving these brain teasers.

    The third group spent their three hours each of the eight weeks staring at a naked man named Steve. This was actually in the form of a life drawing class, where Steve was the model.

    And eight weeks later, where were our volunteers now?

    As expected, the walkers made great strides in their general health and fitness. The puzzlers became addicted to Sudoku and presumably proudly got their solving times down from double to single digits and competitively went on to harder and harder puzzles.   And the life drawing group? They enjoyed it! But when the scientists re-ran their cognitive tests, which group do you think made the most brain progress? What’s your guess?

    If you guessed Sudoku, you would be WRONG.

    The life drawing class made the most progress in cognitive skills of memory, reaction time and problem solving –  why?

    BBC news, who reported the experiment, quoted clinical psychologist Daniel Collerton as saying “Learning something new engages the brain in ways that seem to be key. Your brain changes in response, no matter how many years you have behind you.” Learning something new improves your brain function and memory! Yes!

    Now, let’s go back to my surfing lesson, as embarrassing as it was. That was (obviously) completely new for me. Trying to do all those coordinated moves, that the instructor was telling me, in the right sequence, for the first time, definitely engaged my brain as well as my body. The life drawers in the study saw brain benefits from developing their psychomotor skills by thinking about moving their hands to draw.

    The life drawers also derived more health benefits and calorie burn from standing three hours a week for their drawing class (better than sitting – unlike our puzzlers, you can’t do Sudoku standing up). Although I was not standing, ever, I also was not sitting on my surf board (I was falling off it most of the time).

    And finally the life drawers in the class were the most socially active of the three groups in the study, talking to each other and learning together, this social side also reportedly contributes to keeping your brain sharp.  My surf class camaraderie also produced opportunities for social interaction that did not always involve collisions, but lots of tips, cheers of support and peals of laughter (including my own saltwater chuckles.)

    The Newcastle study concluded that “any group activity which involves being active and learning a new skill will boost your brain” and its cognitive function.

    So the next time you’re laying on the beach and see someone learning something new, like surfing for instance, remember that they are improving their brain function and you are just getting a sunburn!

    Bellagio 2
    This is not a holiday snapshot, it’s actually a photograph from the balcony of one of my recent workshop venues – the Bellagio Center, in Bellagio, Italy, on the shores of Lake Como.

    I had long heard of this venue, but my first visit was only recently, for a scoping meeting of an interesting new social enterprise initiative called Sphaera (the subject of a future blog post).

    Some groups hold their workshops a short walk down the hall from their offices. Some go a little off site to a nearby hotel or conference centre, not wanting to have to go too far to gather their participants together but wanting something a little different for a change of context. And yet others put a lot of effort into finding just the right gathering spot that will help participants bring their best and most relaxed and creative selves to the task at hand. Even if it means a little extra time and travel to get there.

    Environment definitely affects people’s ability to work effectively and creatively. I have been to many workshops held in square, grey institutional rooms looking out at parking lots (if they had windows) that took a heroic effort on everyone’s part to get inspired and energised for a hard working session to develop their new partnership, strategic plan, or vision. When the food is so-so, and the bed rooms are so-so, added to weather or logistics hassles, no matter how well structured your event is, you are starting on the back foot with your people.

    Now come with me to Bellagio, Italy for a moment – a visual feast every moment of the day (even in the rain), with cozy villa rooms to sleep and work in, served meals that always start with drinks in the drawing room or on the balcony. Winding lanes, vast gardens and olive trees to walk and talk, 24-hour coffee nooks, and bikes to borrow to follow signs to the swimming gate for before or after-hours exercise. Far from any large, noisy urban area (although gelati within a short walk) there is not a sound at night that can disturb deep sleep. What’s not to love?

    I pulled out three immediately obvious benefits from working in a peaceful and beautiful place:

    • Presence: It is often hard for busy people working 150+ percent to stop the noise in their brains long enough to focus on your agenda and goals, even if they have a vested interest. If they are close to home or their offices, they tend to disappear from time to time, or try in all the breaks keep up as much as possible with their full-time work load. Give them a magical place to work and shorten that transition time from crazy busy to creative. They will be present not only physically, but mentally because where they are with you for work is better than almost anywhere else they could be. They will still try to keep up on email in the evenings at least for the first day or so, but there will be a lot to get and keep their attention here.
    • Pace: Sequestered as we were in villas that were over 500 years old, watching sailboats o the lake float by, walking up and down the hill to our meetings and meals, hearing the lazy buzz of bees on banks of flowers, a beautiful ruin of a castle reminding you of the slow march of time  – things slow down dramatically in a place like this. With your focus on the one thing you are there to do together, your pace slows down dramatically  – from the full throttle dash to keep up or catch up through frenetic full-time multi-tasking, to a measured, considered and thoughtful cadence (aah, so this is what life should be like).
    • People: So now with your head up (rather than on your screen) and in an awe-inspiring environment, you begin to notice those people around you, also attending your meeting. You have time for them, and wonderful places to get to know them. You enjoy the beauty of the place together, you sit in the garden for your small group discussion with your shoes off and your bare feet on the grass, the sun just starting to set over the top of the villa. You remember that drinks are being served in 30 minutes on the terrace and you finish your discussion on creative ways to bring more learning into the process under discussion. 

    People are comfortable in this venue, they smile and laugh easily and before your very eyes, people are connecting, relationships are being built, and there is a desire to collaborate and co-create. Nice! (I just got a big rush of peaceful and productivity just looking at these photos and remembering my week at Bellagio.)

      Bellagio 3

      It is always interesting and fun to swap personal productivity systems tips and techniques with others. How do other professionals organize themselves, their information and workflow? How do they keep their tasks and “to do’s” up to date? Do they combine home with work projects?  All great questions that we have all pondered at one time or another.

      Today I got to share some of my tools, and a central piece of this is my GTD-inspired notebook that corrals all my work and home processes. For years I have been a devotee of David Allen’s Getting Things Done (GTD) and have implemented a number of these techniques over time, and adapted them for my own purposes. The result is not 100% GTD, but warmly inspired by it (See this blog’s other tags for GTD to read more about how I use this interesting system). On today’s call, I offered to share my Tasks Notebook table of contents, and instead of writing an email I thought I would blog this –  Linda, this is for you!

      Getting Started: Hardware

      I use an A5 notebook that has removable pages so that when pages get full I can simply replace them.

      I have plastified tabs that separate major sections (see first photo). These are labelled as follows:

      1. Next Actions – the immediate next action on a project or task, organized by context
      2. Waiting – Things I am waiting for
      3. Projects – Activities that have more than one task (these can be work or home)
      4. Agendas – Pages for people that I talk to or work with regularly
      5. Someday/Maybe – Things that I don’t want to do now, but don’t want to forget
      6. Checklists – Lists that I have made once but will use again 
      Within each of the tabs there are a number of individual pages, These are described in more detail, tab by tab, below…  
      Next Actions Tab: Organized by Context
      • Email Work – Time Sensitive: These are emails that need to be sent quickly, their deadlines also show up on my calendar.
      • Email Work: These are emails that need to be sent, but have more flexibility in terms of time, but are not in the Someday/Maybe category – yet…
      • Computer Work – Time Sensitive: These are things that need to be done on my computer (writing, reading online documents, checking websites, signing up for things online, etc. in a time sensitive manner)
      • Computer Work: Again less time sensitive but still needs my computer, including things I need to do online
      • Office: Things that I can do in my office that don’t involve my computer. This can be reading hard copy, scanning a file, finding a business card, practicing my next toastmasters speech, etc.
      • Write Blogs: I have a separate page for this to record my blog ideas, they were clogging up my Computer Work page, so I made a separate page for them. 
      • Email Home – Time Sensitive: Any email I need to write quickly that is home-related – like send an email to an internal listserve to find a pet sitter for my dog for vacation, etc.
      • Email Home: Not time sensitive but again not on the Someday/Maybe list – for example, thank Grandparents for present (this should be on my son’s To Do list, but somehow is on mine).
      • Computer Home – Time Sensitive: Fill in that accident form, rent a car for holiday, etc. Things that need to be done on the computer asap.
      • Computer Home: These are online and computer-assisted tasks that are not as time sensitive – such as find the baseball schedule for spring, sign up for half-marathon in October, etc.
      • (Note that when I am travelling I might start a page called Computer Plane/Train – which includes things that I need to do on my computer that I don’t need to be online to do)
      • Home – Indoors: Things I need to do in my house (change light bulbs, make a list of household repairs, find the cabin key, organize the loft, etc.)
      • Home – Outdoors: Things I need to do outside the house – like trim branches, put up the hammock, etc. These may be seasonal in which case I might write them on a paper and put them in my tickler file for that month. (My tickler file is a major life-hack for me, couldn’t live without it! Google it, there’s lots of ways to set it up.)
      • Calls: Phone calls I need to make WITH the telephone numbers (no good just saying ‘call the orthodontist’ – then you should put it on your “Computer” list as you need to find the number before you call.)
      • Errands: These are things I need to go out to do – buy slippers, turn in something to the lost and found, buy a baseball glove, etc. I organize these by place which can be shop (department store, grocery store, garden store) or the town where I need to go to get them. 

      Waiting Tab: Things I’m Waiting For

      This tab only has two pages:

      • Waiting for Work – Things I am waiting for comments on, things I asked people to do, things people promised to send me, things I lent that I am waiting to get back, payments for invoices sent, contracts promised, etc. 
      • Waiting for Home – Things I ordered online, money my sons owe me, phone numbers I asked for, dates for weddings, school photos delivery, etc. 
      Projects Tab: Current Projects
      This tab has a master list of projects first, with little boxes that I can tick when they are finished, and then a list beside it of pending – these are projects that are potential but not yet settled. Once they are settled they go into the master list. I keep this by year, so I am working on my 2015 list now. Once a year passes, I take the list and put it at the back of this tab, so that I can keep in mind the projects that have been completed.
      After the master projects list, I have one page for each project, organized alphabetically. They have the next actions listed and create some redundancy with the Next Actions Tab, but give me an overview of the project and its steps and activities.  
      Once a project is done, I take out the page and toss it (unless it is useful to keep the steps, then I keep it in the Project file. These are for any physical artifacts – meeting notes taken by hand, printouts, brochures, etc – that I need for my project. They are all kept in pink paper folders (all the same colour and style for added neat factor) and have a label (label maker essential – same reason) and kept in alphabetical order on the side of my desk so when I get a call or go to a meeting, I can grab it easily.
      Agendas Tab: For People I Deal With Regularly
      This tab has a page for each of the people that I deal with on a regular basis, husband, kids, colleagues, etc. The page has their name at the top, and then anything that I need to talk to them about I write there (from “can you help me find my lost file” – husband being software engineer  – to “you owe me 32 francs” – son (the former might also be on Email Home – Time Sensitive and the latter would also be on Waiting – Home.) I don’t think redundancy is a problem, whatever it takes to get it done. With the Agendas lists, when you are sitting down in front of someone, you can just work through it quickly and get answers efficiently. 
      Someday/Maybe Tab: For Things I Might Want to Do Someday
      This set of lists was very liberating. So many things sat on my To Do lists for ages, I just kept copying them and not doing them for one reason or another. This set of lists – which are Someday/Maybe Work and Someday/Maybe Home include all those things that I don’t want or need to do now but that I don’t want to forget. There might be a reason why the time is not quite right, so I write them here and I review this regularly and occasionally they move up to the Next Actions Lists because the time is right. Or else they stay there (forever). Sometimes I have wildly ambitious ideas – Write a book, Listen to the Reith lectures, Do a PhD, Buy a trampoline, Take all the photos off my SD cards, Get a dog (well this latter I finally did), etc.  
      Checklists Tab: Never Make These Lists Twice
      This final tab is a useful one. If there are things you do over and over again, why not make a Checklist and keep it for the next time? For work I have a mobile working checklist – all the things I need to take when I am travelling with work, a venue checklist when I am looking at a workshop venue, a Webinar Facilitator’s Checklist that helps me prepare for online webinars, and for home a ski checklist – I don’t go often but I always take along the same things, etc. Make these generic and reusable and findable, keep them on the web and/or keep them under this tab. 
      ***
      At the end of my Notebook I keep some blank pages, so that when I have some time and am doing my review (going through all the tabs and updating, checking off, moving things around etc.) I can rewrite my lists if they are full or mainly completed and pop these pages into the appropriate places. 
      You need to review this system regularly (David Allen calls it a “weekly review” but I think I do it with less regularity.) When things are super busy, I set my pomodoro and do it almost daily, and when things are less busy I might do it on my next flight or train trip. Either way it is a pleasure to do. 
      And even more fun is talking about and sharing those tips and techniques with others who are also productivity geeks – and you know who you are!

      There’s nothing like a conference with short presentation after presentation to remind you what makes a particularly good one. I facilitated two Awards ceremonies recently where 18 people in all presented their cases and proposals in 6 minutes each. These were critical opportunities for the speakers to share their ideas and convince the jury and audience of their merits in relatively micro-timeframes (imagine condensing your 30 years of hard work into this time frame?) It became very clear in this long string of short speeches that a super good presentation would do a lot to support a candidate’s case.

      As I watched one after another fly by I jotted down observations that I thought might make a good checklist for speakers making short presentations (including me!) I would say that we all know these things intellectually, but when we are up there in front of the lights and hundreds of people, do we do them?

      My advice, don’t read this list now.

      You will just say, “Yes, of course, obvious, duh.”

      Use it AFTER you have prepared your presentation, as a checklist, then it will be most useful. Be honest when answering these questions, the quality of your presentation depends upon it!

      1. Does it fit into the allocated time? How do you know? (Please practice for timing out loud.  Just because you can whiz through something in your head in the allocated time, doesn’t mean that when you have to move your lips, pause to breathe, and fiddle with the slide changer, etc. you won’t need a few extra minutes. With a 6-minute time slot, this can be a killer.)
      2. Are you talking too fast? (Don’t speed up to fit it in the timeframe, and when you are nervous you might speed up your pace naturally – or should I say nervously. It is also incredibly stressful for the audience members who are desperately trying to keep up with you and understand you. Non-native speakers have a big advantage here as they might be translating at the same time which can slow speech down. Native English speakers have to work harder at comfortable pacing. Breathe again.)
      3. Is there any fluff? Cut it out. (Don’t spend time thanking every distinguished person in the room up front, it is nice but people will assume your thankfulness if you don’t say it. Remember that your timing starts as soon as you open your mouth. Don’t give too much background on yourself, a smart sentence will do if needed at all – in all of my sessions I introduced the speakers, ask if this will be your case, so you can cut this out. Don’t give too much context and background, just enough to launch your idea. You probably have a very smart audience too who knows where Switzerland is, skip the map.)
      4. Are your key messages up front? (It might be tempting to leave the big idea for last, but if you run out of time, and you have a strict timekeeper like me, you might never get there – this happened over and over! Pull them up front and share your lessons learned all the way through rather than saving all that juicy stuff to a potentially rushed and awkward end. You can always repeat them on your closing slide which you want to leave up while people clap for you – NOT that big empty slide that says “THANK YOU!”)
      5.  Is your presentation or slide set too data heavy? (In these short time frames you should sprinkle in the most powerful data and figures and not overload slides with graphs that say too much for the seconds you have to share them. If you do use a graph, use a red circle to highlight the key point or figure, or write the key message on it. And you should NEVER have to say to your audience, “sorry that graph is not clear”, “sorry you can’t read that table from the back, etc.” Just skip it and give a summary instead.) 
      6. Can you deliver it without reading your slides? (With a short timeframe, you should be able to memorize or at least mostly memorize a presentation. In those that are best, the speaker moves away from his or her slides and tells the story with the slides as emphasis photos, key words/figures or messages. It also means you will be facing your audience rather than having your back to them. With a short time frame, you will not be able to engage them much or make eye contact if you spend 50% of your time starting back at the big screen. For short speeches have a few strong key headings that you can keep in mind while you weave your narrative together. Of course, this takes practice – see Point 1 above again.)
      7. Is your PPT/Prezi working? (The PPT equivalent of a wardrobe malfunction is when your animation doesn’t work, your video doesn’t stream, your sound doesn’t work, your picture on a huge screen is blurry, etc. Does this work 100% of the time when you test it before you speak? Even with this testing, your e-karma might be off this day, we’ve all seen it. Can you pare it down to the minimum of these additional bells and whistles – because if they don’t work, your time is still ticking away, and they can create a bit of a “what was that?” blur if they do. A good, clear short video can be a powerful addition, but make sure it is faultlessly embedded and works every time; get rid of the rest unless it really adds to your message.)
      8. Do your visual choices work? ( Are your colour combinations caustic, or sophisticated? Does that font colour show up when it is two stories high? In all these presentations I really liked the ones with a dark background, especially those that also featured photos which really popped on the black or dark background rather than white. For short presentations you need visual punch as well as message punch, with crispness to both of these. There isn’t a long time to develop thoughts and ideas with many white slides and verbal or visual asides,)
      Well, there you go, that’s my checklist, derived from my observations from watching all those very short presentations one after the other. No doubt there are plenty other tips to add.  These were the ones that really jumped off the screen and stage at me. 
      I assure you that I was also listening to these short presentations at the Awards Ceremonies as they whizzed by me, 6-minute timer in hand. I really noticed, however, that your presentation’s delivery can really help the audience get your point, or it can stand firmly between you and the prize.

      I have been working for the last few years as the Learning Expert on a very interesting partnership project called the Learning and Knowledge Development Facility (LKDF). This project focuses on “promoting green industrial skills among young people in developing countries”.  The focus is on developing Public Private Development Partnerships (PPDPs) in selected Vocational Training Centres (VTC) in a number of countries, and promoting multi-level learning within and among them in innovative ways, as well as capturing this  learning and reintroducing it back into the different projects and into new PPDPs.

      In addition to developing the learning elements and designing and facilitating the peer-learning components, I have had the great pleasure this year to write a number of “How-To” Guides – four in all. They have taken two different approaches to development, described below. But there is something critically important that must come first…

      The first question to answer when writing a How-To Guide is “Who will use this?” Who is the audience? If you are crystal clear about that, then it makes it much easier to write with those people firmly in mind. Our audience for these Guides was project managers who are developing and implementing PPDPs and those who might be interested to do so in the future.

      Approach 1: Interview-based 

      The first How-To Guide was based on a co-generated set of “Learning Opportunities”. This set of questions, combined into one document, was effectively what the different partners wanted to learn from their participation in the different PPDPs and the LKDF. In our Learning Opportunities document each partner has its own set of questions under each agreed heading – one for the UN partner, the donor, the private sector partner, and the VTC. This took a question format and formed the basis of ongoing query throughout the project. We use these questions in our face-to-face learning workshops (self-reflection and group reflection) as well as for the interviews that provided the input to this particular “How-To” document, which was titled, How-To Guide: Developing and Implementing a Vocational Training PPDP.

      The Learning Opportunities – that is, what we wanted to learn – included 5 main headings, paraphrased here: How is the PPDP different than a more traditional project of a similar kind; What steps make up an effective PPDP project development process, and an effective implementation process; What is the value added of the learning platform; and how can policy-makers be most effectively engaged and policy change supported.

      Each Learning Opportunity had a number of assumptions that we were making, and then related sub-questions identified per partner (exploring their experience, their role, their learning both internally in their organizations and as a part of a multi-stakeholder partnership, what was working and what could be different and better in the future).

      This document was used to create a one-page interview questionnaire tailored to each of the Partners. The interview was timed to take 30-45 minutes (it tended to take 45-60 minutes) and was administered by telephone or Skype. After the interview the notes were recorded under each question to create a set of response forms that ranged from 4-6 pages in length. For our How-To Guide we undertook 13 interviews (some had 2 people on the call).

      Then the exercise was to take the inputs from the interviews and write the How-To Guide. For this I used the following process:

      1. Divided the questionnaires by Partner (UN, Business, Donor, and VTC)
      2. I did a first read through of those in each sector to get a general overview of the key messages, and to see what themes were repeatedly arising among them members of the same sector.
      3. As I used the 5 Learning Opportunities roughly as the chapter titles for the How-To Guide,  I went a second time through all the interviews (still clustered by sector) in more detail, picking out key words that were repeated under each Learning Opportunity 1-5, and I wrote those key words in the margins of the questionnaires (so I could see them at a glance). I was especially looking for success areas/things working well and why, challenges being experience and actions that partners had taken to mitigate the challenges (or try to), and learning and advice for the future.
      4. I then put aside the Interview questionnaires and created the overall Table of Contents for the How-To Guide, and blocked out sections with titles and placeholders to write into. Creating a Table of Contents is a great way to see if there is overall flow to the Guide. The Chapter headings I chose (and changed a few times) became: What Makes the PPDP Approach to Vocational Training Successful; How to Develop the PPDP Concept and Project Document; How to Implement a Vocational Training PPDP Project; How to Form a Dialogue with Policy Makers During Vocational Training PPDPs; and How the LKD Facility Fosters Learning. The Chapter titles were based on the Learning Opportunities, the interview questions and what had emerged from the interviews (some questions produced rich responses, others not so much).  I found it very useful to have the framework set up before writing the main body of content.
      5. I then wrote the Introductory sections of the How-To Guide: About the project; About the Guide, Useful definitions (what is a PPDP?), Who is involved, etc.
      6. Next I went back to the Interview Questionnaires. I wrote bullet points into my Guide framework under the right headings, amalgamating and summarising the text from Questionnaires. I used the key word reminders that I had written in the margins that repeated, drafting them into more generic lessons. If it was a sector specific comment or a general comment, then I noted that.
      7. I organized these bullet points into sub-sections that were emerging based on content from the questionnaires such as: Reported benefits; General considerations; What to watch out for; Steps to take; 10 things that have worked so far. I also included some observations and tips by and for specific partners (e.g. The Business Perspective or The Donor Perspective).   Each chapter was organized differently depending on the kind of inputs Partners gave in their interviews, but always with the Guide user/reader, and the questions they might have, in mind.
      8. The rest of the exercise was writing the bullet points into narrative, making them parallel, reorganizing for flow and logic, and editing for readability.
      9. This was then sent out for feedback to the Partners who gave suggestions and questions and sent the document back through an editing cycle before finalisation (formatting and printing).

      This produced a 27-page How-To Guide: Developing and Implementing a Vocational Training Public Private Development Partnership which had quite a lot of practical detail. To give the high points from this, I created a 7-page Executive Summary from this document (which was almost harder than the longer version!) This whole process as you can imagine, took weeks!

      The next three How-To Guides followed a very different process.

      Approach 2: Process and project documentation-based

      Learning is everywhere in a project like this, and the astute project manager identified some good reusable learning content in the project and process documentation that had been written in the early set-up stages of project development. Experts on M&E and learning (like me) had written a number of longer documents proposing M&E systems, learning processes, management training programmes etc. for the project. These included interesting rationale, research, substantiation of what was proposed and support from good practice, expert opinion, etc. How could the re-usable learning be extracted from these early documents? (Processes which had now been tested for a couple of years!)

      It was an interesting exercise for me to sit down with the proposal for the M&E system, the Management Training Programme, etc. and work with the text to identify what was generic and what could be used by other managers undertaking the same or similar processes. Again we needed to be clear on our target, and we enlarged it a little for these three How-To Guides to not only those who would be working in vocational training PPDPs, but would also be useful for those setting up and managing PPDPs in general.

      Here are the steps I followed to turn specific project-related documentation into something that others could be interested to use:

      1. An initial read through of the document provided some obvious sections to cut out – details of our specific context (a little was left in the section About this Guide and the PPDP Approach to give people an idea of where we were starting), excerpts from our Project Document, references to specific partners and their roles, etc. All this could be neatly cut out immediately.
      2. A second read through provided the opportunity to take things out that we didn’t do, hadn’t done yet, or didn’t work in the way it was planned. In some cases, it was interesting to refer to this and talk about what happened (or didn’t) and why. This also provided a good learning back and forth with the project management team and some ideas of what to do in the future.
      3. At this point a number of things were also identified to add in, links to other knowledge products that had been produced along the way, videos, examples from different country experiences, and samples of agendas for events and questionnaires that had been developed since the original project documentation had been produced. This greatly enriched the learning shared.
      4. Then an overview was needed – so I wrote the table of contents and framework for the How-To Guide based on what was there now (and this also identified a gap or two, and in some cases where there was too much information – more to cut!)
      5. The final steps included writing transitional text so the sections were logical and would read smoothly, filling in explanations for an external audience, footnotes for other resources, revising charts and tables so that they were accurate (I needed to remake a number of images so they fit the new context and language of the How-To Guide).
      6. A final review by the project managers completed this exercise (this approach had more back and forth during the process than the interview approach). Then a final edit, and off for formatting and printing.

      This approach took a few days of work per How-To Guide, as the existing content was mainly there and the main work for a learning practitioner was to identify what is most interesting and reusable from the original documentation (which took weeks to write and was an investment already made, additional value added through this How-To Guide development process). The resulting How-To documents were:

      How-To Guide: How to Set up a Monitoring and Evaluation System for a Vocational Training PPDP
      How-To Guide: How to Develop and Manage Knowledge in Vocational Training PPDPs
      How to Guide: How to Set up a PPDP Management Training Programme

      I think that both of these two approaches work well together. The first approach above is highly participatory and involves all partners in an iterative learning exercise. It can easily be repeated annually and additional updates to the How-To Guide can be written as learning continues and deepens. New questions could be added and new Guides produced.

      The second approach maximises existing investments made in project and process documentation. Rather than keeping these proprietary internal documents and on shelves here and there, it aims to draw out the reusable learning from these to share internally and with outside learners. This exercise also provides a valuable moment for reflection about what was done based on the original plan, why or why not, and might also point out what is yet to be done.  With this reflection, the result is a more accurate How-To document produced based on real learning from experience. These How-To Guides also tend to be more specific as the project documentation is more focused on specific parts of the project (e.g. the M&E system, the learning platform, etc.).

      And taking the last-mile steps to create the How-To Guide out of the project documentation, rather than just releasing the original project documents, which go out of date and are often long and rather dry, gives the material new life. It does the work of identifying that learning which is most useful to others, rather than letting this work of pulling out the lessons to be done by the reader (and who has time for that!)

      Colloque BIOFILMS 5 à Paris.

      They cost millions to put on and convene the best and brightest of a community – how can you channel that collective strength for collective impact and, in the end, how can you tell?

      I just returned from 7th World Water Forum in Korea, where numbers of attendees were reported at 41,000 people. I also worked at the 6th World Water Forum in 2012, with 35,000 people. That’s a lot of talent in one place.

      Is there an Expectation of Learning and Impact?

      It is interesting to think about the cost-benefit for individuals and organizations for participation in such an event. If you were on the Learning Team for such an event (do these events have learning teams – maybe that is Suggestion #1!), what might be some of the ways to first, identify desired learning (organizational and individual level), foster that learning through design and format, help record outcomes for monitoring and sharing, and see what changes people are making based on their learning and participation?

      I’ve seen and worked with some different approaches and, taken together, they make for an interesting thought exercise and potentially an opportunity. Here are a few ideas for consideration.

      1) Use a Facilitation Team to ensure interactive learning in Conference Sessions

      Conference don’t have to be panel after panel of 9 speakers giving their ideas from a podium of behind a table and a short Q&A (IF the speakers don’t go over their time) for those bold enough to stand up in front of hundreds, or lucky enough to get the attention of the person with the roving microphone.

      Interactive learning is possible even for very large groups, and even in theatre set up (although round tables are MUCH better – this can work for 400-600 people in a ballroom, at least it has for us in the preparatory meetings for the 6th and 7th World Water Forum.) I have written a blog post about facilitating large groups (When Numbers Soar: Facilitating Large Groups) and it is certainly possible with good design and professional and confident execution. It might take a moment to flip your audience from passive half-listening/texting observers to active contributors, but once you have their attention the opportunity engage and crowdsource ideas, suggestions, solutions, etc. from such a large group is incredible.

      A good facilitation team can also help create consistency and support reflective practice throughout the event, when these questions and practices are built consistently into the agenda of events. With the whole facilitation team introducing this in all parallel events.

      2) Introduce a Conference Activity Handbook

      At another large conference I facilitated recently, we created an Activity Handbook that was put into each conference pack, and had a couple of different purposes. First, it guided participants through the conference, each session had an entry that engaged the participant in some way, from a place to write their goals for the event (Session 1), to places to record answers to specific technical questions, a self-assessment that started one session, a quiz to warm up on another, an action planning template for the final Session (to record follow-up to the conference of people, ideas) etc.

      The resulting Handbook once completed, was a take-home artifact from the conference that reminded the participant of his or her learning, thoughts, ideas, and actions. It also included other key information – contact information, URLs of resources, etc. all in one place. But unlike any Conference brochure, this participants interacted with daily and became a living record of THEIR event.

      Even in a larger event where people are moving around to different activities all the time, such an Activity Handbook could be helpful to guide people through their experience and structure reflection. If there are facilitators, they could start and end their sessions with a reflection question recorded in the workbook (“Open your Activity Handbook to page 16 and take a minute to reflect on what you want to learn today – make a few notes for yourself and I will give you a couple of minutes to share this with the person sitting next to you”,or “What was the most important key message from the sessions you attended today”, “What is one thing you might do to follow up on something you learned today?” etc.)

      If people need an added incentive to complete their Activity Handbook, offer a completion gift to those who complete their book, such as a mug or water bottle with the conference logo, available in the exhibition area at Stand X – ask people to come towards the end and show their completed booklet for this gift. (There was such a gift at the recent World Water Forum, although you only needed to answer a few questions to get it, but almost all people I spoke to found their way to the exhibition hall stand with their voucher to collect it). As people get these items in their conference bags anyways, why not give them a little homework to get it?

      3) Ask Organizers to Develop and Participants to Contribute to Next Action Plans

      One of the features of the World Water Forum process was the expected output of an Implementation Roadmap (IR) from the different thematic streams of the conference (every conference seems to have an organizing principle of some sort – often thematic). The organizers’ reporting templates from the different thematic sessions were made consistent with this and individual session organizers were asked to collect ideas from participants in their sessions that could be integrated into a thematic IR.
      The idea of this Implementation Roadmap was to capture in one place all the ideas and actions that stakeholders attending identified and felt are helping achieve some desired change in their subject area, so that they can be executed after the conference and this execution monitored. Each IR had one or more coordinating organizations who volunteered for this role (because it is central to their work), and participants in their sessions could indicate how these Implementation Roadmaps could improve, if they wanted to be involved in follow up, and what they could contribute.

      Of course this only works if there is engagement and good coordination prior to the conference, real interactivity in the sessions (see Facilitation above) and if there are resources made available (time, energy and potentially funds) for this follow-up. The organizers must take this seriously and support it. More information on the IR process can be found on the 7th World Water Forum website. As this event is each 3 years, Coordinating organizations can be asked to report on progress and results from their Implementation Roadmap work. Central coordination over the interim period to keep momentum is an important additional role for the main organizer. Without this, probably only a small percentage of these would produce results, based on the sheer will and investment of the thematic coordinators.

      4) Follow Selected Individuals for a Conference Impact Study

      We did a Curriculum Impact Study at LEAD International when I was the Director of Capacity Development there and this was a really interesting and effective way to see how a learning experience impacted individuals participating in the programme. This could be an interesting addition to a large conference M&E and learning process, and help answer the questions – what changed? and was it worth it?

      In the LEAD process, we identified a select cross-section of participants (different countries and different sectors – we had 18 in total), and invited them to participate in our study. This process took some time, so they had to be aware of that and committed (in the case of a conference, could they get a reduction on their conference fee by participating?) We started prior to the formal learning events, and went on for a designated period afterwards.

      The study started and ended with an interview that we administered. The initial Orientation Interview included key questions that established a base-line of the individual and their organization, and identified an issue or issues that they and their organization would be dealing with over the next two years where they might apply their learning, etc. After the initial interview (also to explain the process), the exercise was journal-based (there were three Journals) with key reflection questions at periodic points that were triggered by dates, reminders, and email. The journals were collected and analysed (and returned) and case studies following the learning and learning application process of the individuals were written (not using the original names and organizational names).

      This impact study provided a more detailed way to understand the impact of the programme on their professional and personal lives. Based on your overall goal of a conference (such as more conservation impact on the ground), such a study could help understand what participants do to prepare, engage during and integrate into their practice afterwards. It also helps identify places where the organizers can support participants more – maybe the preparation needs to be more directed and different, maybe the sessions need to be more interactive and engaging – as people spent most of their time in the exhibition hall (or maybe more needs to be programmed there), or more support in identifying or using the learning, etc. This kind of impact study of individual’s experience with your mega event can give insight into this.

      5) Design a More Deliberate Learning Programme

      All of the above need good design, preparation, coordination, guidance, consistency across a complex event with many moving parts. Lessons? This needs coordination, guidance, and consistency, and a central team with an overview of the learning goals and enough advance time to prepare the different elements so that the experience is reinforced throughout the conference.

      Of course, this also costs money, but then you just invested millions to get everyone there. Doesn’t it make sense to invest a little more to make sure you get as much impact out of the conference as possible?

      Fotolia_1339788_XS

      I saw this first last year at the Balaton Group Meeting where Junko Edahiro, a fellow life-long learner and enthusiast in the field of productivity, was using her “nu board” to take notes during the meeting. I usually use my iPad and Penultimate to take photos, written notes with my stylus etc, etc. and they sync to my Evernote account so I can search them later.  (See our blog post “Fast and Easy Workshop Reports with Penultimate“.) But as soon as I saw the nu board, I knew I had to have one! (Thanks to my Japanese Balaton Group friends for their kind gift – they are made in Japan!)

      If you were sitting next to me in The School of Life gathering in London (on the timely topic of keeping New Year’s Resolutions) last week, you would have seen me taking notes in my small nu board with a thin black marker, filling a page with notes, taking a photo of the page with my phone (I was actually putting it into my mobile Evernote app), then erasing the whole page with the top of my pen (a mini white board eraser), and start writing again. I did this again and again throughout the 2-hour event.

      The nu board (available in A4 and A5 size), is effectively a bound book of thin white boards. In between each board is a transparent page that you can either write on to overlay additional text/drawings, or use it to protect your previous page from wrist smears.  You simply write with the nice thin marker (the board comes with the white one below, and the blue nu board pens, available separately, have a harder and thinner nib for even crisper writing)…

      Then you take a photo of your page (as I mentioned I put mine into Evernote, but you might keep photos in a different database system) and then simply use the top of the marker that comes with your nu board to erase the page (its very easy to erase if you do it right away, if you wait you need to use some elbow grease)…

      …and you start writing again. There are 4 whiteboard pages in each nu board, so you can take 8 pages of notes before you need to take your photos if you want. I had just cleared one page when I was at the School of Life, as I had not yet processed the other pages (which were from the terrific TEDxPlaceDesNations I wrote about in the previous post), but the pace of the TSoL event made that fine.

      There is also a separate unbound, single page A4 nu board that I was told could be used, for example, during workshops or conferences to keep time for speakers (e.g, writing up 5 MINUTES), or give instructions to people at a distance (CLAP! – just kidding). I look forward to thinking up interesting ways to use that too.

      Nu board is a very clever and simple idea. It is a paper-free solution that takes away the problem of having a bunch of handwritten notes after a workshop or meeting that you need to store somewhere (of course you can take a photo of those too, but then why use the paper?) The improvement on my iPad is that the pen is thinner and I can take denser notes on the paper (the stylus I have for Penultimate is thicker so your writing is bigger, thus less words on each page – fine in some contexts, less so in others).

      The mobile photo archiving is high tech, but the nu board is wonderfully tangible and low tech in your hands, giving you the satisfaction of writing, drawing and decorating your notes page, just like you did at school – but you don’t ever have to torment yourself about whether or not to throw those old school notebooks away. Presto! with a swipe, its all gone into your digital archive…

      (If you want another reason to try something like this, have a look at this LifeHack article Here’s Why You Should Take Notes By Hand (instead of with a laptop) which discusses a new Princeton/University of California study that shows that those who hand write their notes learn more than those who take notes on their laptops!)

      When your story is a powerful as UNHCR’s Vincent Cochetel – of his 317 days in captivity near Chechnya as a hostage chained to a bed, in darkness but for 15 minutes a day of candlelight and able to take 4 small steps and no more – simply the facts can have a profound influence on listeners. But when you tell it as eloquently and powerfully as he did at the recent TEDxPlaceDesNations, you have a message that sears itself into the memories of your audience.

      If you have 20:44 minutes, watch his talk, “Attacks on Humanitarians are Attacks on Humanity“. Listen to the message and see if you can keep a dry eye. It’s a beautifully told story of a captive, an object in a political struggle, that makes himself a human being in the eyes of his captors, an act that ultimately makes it easier for them to free him. It’s told in a quiet way – an example of storytelling of the very best kind in my opinion, and humbling to watch. I was sitting in the second row of that grand hall in the Palais des Nations in Geneva for the event, and his talk gave me an immediate sensation of the humanitarian work that goes on within the United Nations system (I worked there myself for a few years, although, as a young professional, I was in a big building in Geneva far from the reality that Vincent speaks of).

      Watch him take his 4 small steps, light his candle for that 15 minutes, and speak in the hushed tone of a captive. His words transport you – you’re there in that small room with him. You might find yourself, as I did, wondering how many other humanitarian workers throughout the world right now are in captivity still waiting to see daylight again, and what more can be done to help them.

      We like to use this blog to capture our learning as we go, through the interesting and varied processes that we have the opportunity to co-develop with our partners and support in different ways.

      Many of these initiatives produce news! They develop new standards (like for aluminium stewardship along the supply chain), test innovative models for development partnerships such as Public Private Development Partnerships, create new learning around sustainability issues like de-coupling or transboundary water basin leadership. They develop new partnerships that go on to make contributions to sustainable tourism or 3D mapping of natural resources, climate change adaptation and women’s empowerment, and more.

      We have begun to share this news in short articles on our website: www. brightgreenlearning.com with links to the different announcements and products. Are you interested in a “How To Manual for Developing a Public Private Development Partnership”? Or a link to 15 case studies and a summary report on “Evaluating existing policy mixes to identify solutions for EU resource efficiency” Or curious to read about how a big cement company manages biodiversity and water in its production processes? You can find this and more news there – and we are incredibly proud as Bright Green Learning to be able to contribute to these initiatives!

      Lizzie and I from Bright Green Learning wish you a very happy holiday season!

      Want to learn something new and make your own holiday e-card in 5 min? I enjoyed using Penultimate to make these two holiday cards – how to? 1) Grab your ipad; 2) Open the free app Penultimate; 3) Start a new notebook and upload a photo from your photostream or take a new one (I used this photo taken at the Women’s Forum photo booth); 4) Place it where you want it on your page and draw on your message (and/or silly hat); 5) Send the page to yourself by email (using the sharing icon on the app), it comes back in .jpg format; 6) Send out or post it on your blog! Happy Holidays!

      TED signAttending a TED event is like spending 5 days surrounded by shiny objects – great opening lines to speeches, weird facts, interesting turns of phrase, amazing visuals, and those random ideas that you get that are sparked by something that the speaker says, and more –  and from amongst all this having to choose what to pick up and take with you. These are some of the shiny things that I picked up this year:

      • My top 3 speeches this year were by:
        • Melissa Fleming about generations living in refugee camps and why educational opportunities are critical. People in camps have time to prepare for their return – the average time in exile is 17 years! Her question: can refugee camps become centres for academic excellence?
        • Glenn Greenwald on why privacy matters – he invited anyone watching who said that privacy didn’t matter to email him all their internet passwords so he could read through everything and publish whatever he wants, and
        • Kimberly Motley is a former Miss Wisconsin who is now the only foreign litigator in Afghanistan, focusing on using the laws to protect.
      • Privacy speaker and scientist Andy Yen, one of the founders of Proton mail (email encrypted by default), reminds us that our data can and will outlive us. He also mentions the benefits of using the CERN cafeteria to develop an idea – you have 2000 free engineers between 12 and 2pm.
      • Joanna Wheeler’s theme was how to use storytelling to stop violence, based on her experience working in South Africa. Her business card was a story cube with her address on it, and the key messages of her talk (in images), printed on a piece of A6 paper that you can cut out and make into the cube.
      • The break area of the beach venue (the tent-like auditorium they built from scratch on the Rio beach sand where the talks were held) was filled with different diversions when you want to do something other than think.

      TED interior

      • Batalho do Passinho is a new Brazilian street dance out of the favelas of Rio  combining the anxiety of fighting with the poetry of dance, and the Bottle Boys are Danish singers/musicians who use only bottles and their voices to cover popular songs. (The Bottle Boys played at one of the evening TEDGlobal parties on the beach in Rio. Their “Call Me Maybe cover got hoots of laughter and lots of applause.)
      • I didn’t know that 2/3rds of the population of  Sub-Saharan Africa has access to a cell phone signal (one fifth of these people have 3G or better data service). Steve Song’s talk was about not waiting for someone else to “build an on-ramp to the internet”, and the opportunity cost for those without access is skyrocketing as technology comes on and is ubiquitous.
      • One speaker, Sipho Moyo, asks, “How do we feed 10 billion mouths? There is no answer that doesn’t involve Africa.” She put up a blank slide, and said it was a picture that hadn’t yet been taken – it was a picture of Africa feeding the world. (She also points out that in the $110b chocolate industry, 70% of the cocoa comes from West Africa”, interesting for a Switzerland-land-of-chocolate-based person like me).
      • There’s a new food scanner called Tellspec being developed that you can put next to any food (including baked goods with no labels, etc.) that will tell you the composition of the food.
      • Architect Alejandro Aravena used a chalkboard for his talk about participatory design for low cost public housing – they build people half a house and then let the people living in it build the other half in the years that come, to suit their needs and with their own style. This innovative housing project is half the cost (obviously) and fits into the cultural norm in Chile (and many other countries) of building your house little by little over the years.
      • The auditorium was filled with different kinds of chairs. Every day you could try a new one and sit upright or sink into a comfy couch.

      IMG_5323

        • Brazilian CEO Ricardo Semler says on Mondays and Wednesdays he “learns how to die”. He calls these his “Terminal Days” and does things he would do if he had gotten news of a terminal illness and didn’t have much time left on earth. He runs a company without “rules” and gives people Wednesdays to do what they would do if they were retired. He ran board meetings with 2 seats for the first two people who showed up, whoever they might be in the company.
        • I liked that they gave a pair of Havianas flipflops with the gift bag, along with an Entreposto beach/picnic blanket with grommets so you can tie it down in the wind.
        • The Beach area with all the deck chairs and umbrellas was a great place to unwind and reflect on what you heard, and the sand was so hot that you needed those flipflops (if you didn’t want sand in your shoes!)

        TED beach

        • Linking the digital with the physical – With a 3D printer they printed a car in 2 days in Manitoba. A Chinese company is printing 5 houses a day for under $5000.
        • Bel Pesce’s TED University speech was about 5 ways not to follow your dreams (from believing in overnight success to believing that your goal is the end goal.)
        • Journalist Bruno Torturro of MediaNinja opens by asking, “Has anyone has been exposed to tear gas?” He shows the simple molecule that he says is trendy with police and says that it makes your eyes burn and also opens them (in his case to the power of independent broadcast). He has helped create a network of experimental journalists who use mobile equipment to live stream political protests in “post television formats”.
        • I have never eaten so much quinoa as I did that week with TEDGlobal in Rio, who knew how many ways you could fix it.

        I enjoyed going back through my notes to write this blog post and see what had endured for me a month now from being with TED in Rio. There are plenty of shiny objects still glittering around in my mind!

        Balaton Books

        We’ve recently put together the Balaton Group Book List of 124 books by Balaton Group Members. If you are interested in systems thinking, systems dynamics, sustainable development and related issues, you might be curious to look at this collection, which includes a wide range of titles from academic books to games books.

        There are books by the Balaton Group Founders, from the Limits to Growth series to Thinking in Systems and Groping in the Dark: The First Decade of Global Modeling, among others. These are followed by over 100 titles by other Members (single or collective authorship) such as: Image 2.0: Integrated Modeling of Global Climate Change; Tackling Complexity: A Systemic Approach for Decision Makers; The Local Politics of Global Sustainability; Affluenza: How Overconsumption is Killing Us; Creating Regenerative Cities; What if Money Grew On Trees? Asking the Big Questions about Economics; and many, many more…

        Donella and Dennis Meadows – authors of The Limits to Growth – founded the Balaton Group in 1982. The Group has met annually for over three decades on the shores of Lake Balaton to advance the boundaries of research and strategy for sustainable development, using a systems perspective. Collaboration among members has resulted in book projects, over a hundred conferences, new learning centres and NGOs and uncounted computer models, training programmes, planning methods, journal articles, films, videos, policy initiatives, educational games, courses and research projects.

        This Book List provides fascinating insight into the Balaton Group Members’ considerable work over the years in these issues. We hope this collection helps others interested in sustainability issues find a wide range of thoughtful work in our field. Feel free to share the Balaton Group Book List page!

        82123824-0b93-4e37-906c-0607ad9c4930
        As learning practitioners we play many roles – we are process designers and facilitators, panel moderators, skills trainers, advisors, team coaches, and sometimes we are MCs (Master of Ceremonies), helping weave together the different learning threads of a larger event.

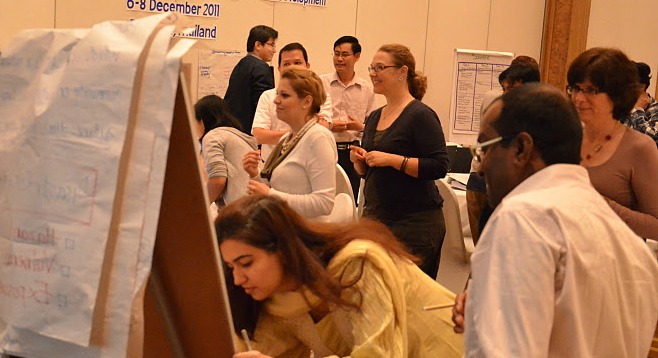
        I recently took on this role at the Women’s Forum, having done this on a number of occasions with other groups. This event had high production values, with beautiful lighting, a 360 degree stage, video cameras and screens in all directions recording and simulcasting, professional makeup and a “Madonna” mike (as they called it), and, I might mention, 1500 people watching every move you make (or at least the intention to).

        I personally find this role – Master of Ceremonies (we couldn’t come up with a satisfying gender neutral alternative -any ideas?) – more than a little nerve wracking. To get to a place of comfort in this role I tend towards over preparation. However, I won’t apologize for this; that’s what it takes for me to do a good job in this high visibility role. I want to help make participation meaningful for everyone in the room, add value and interest – spark curiosity and maybe some surprise to grab attention, and help connect the dots of the event for people. Now that I have done this for a number of events, I thought I would record and share my tips for preparing and delivering as an MC. I divided my reflections into four parts: what I do in the weeks before, the day of the event, moments before, and onstage.

        red seats
        Weeks Before

        1. Get the Programme: Be proactive and request early versions of the Programme and keep in touch with the Programme manager about changes. Make sure you always have the latest agenda (this can change daily nearer the event when speakers and moderators cancel at the last minute, or even miss their flight). You don’t want to introduce the wrong person in front of 1000 people. It might be tempting to wait until things settle to do this, but don’t; it will be a big job to get on top of it and identify the main threads all at the last minute. Plus your antennae will be up for interesting facts and initiatives in all the other meetings you attend and newspapers you read, and new ideas will come to you as the programme and its key messages percolate in your brain.

        2. Build Your Background: Read about the speakers and the conference themes. This research can be considerable if you are the MC for the whole event as I was, with 13 different sessions, themes, panels and speakers. I estimated that it was like giving 13 Toastmasters icebreaker speeches in 3 days, each one taking some 5 or more hours to prepare (research, collect ideas, write, edit, make notes, brief speakers/moderators, practice, practice, practice).YouTube is a great place to listen to other speeches given by your speakers, to hear their perspective and main messages, and to see how other MCs and moderators have worked with them.

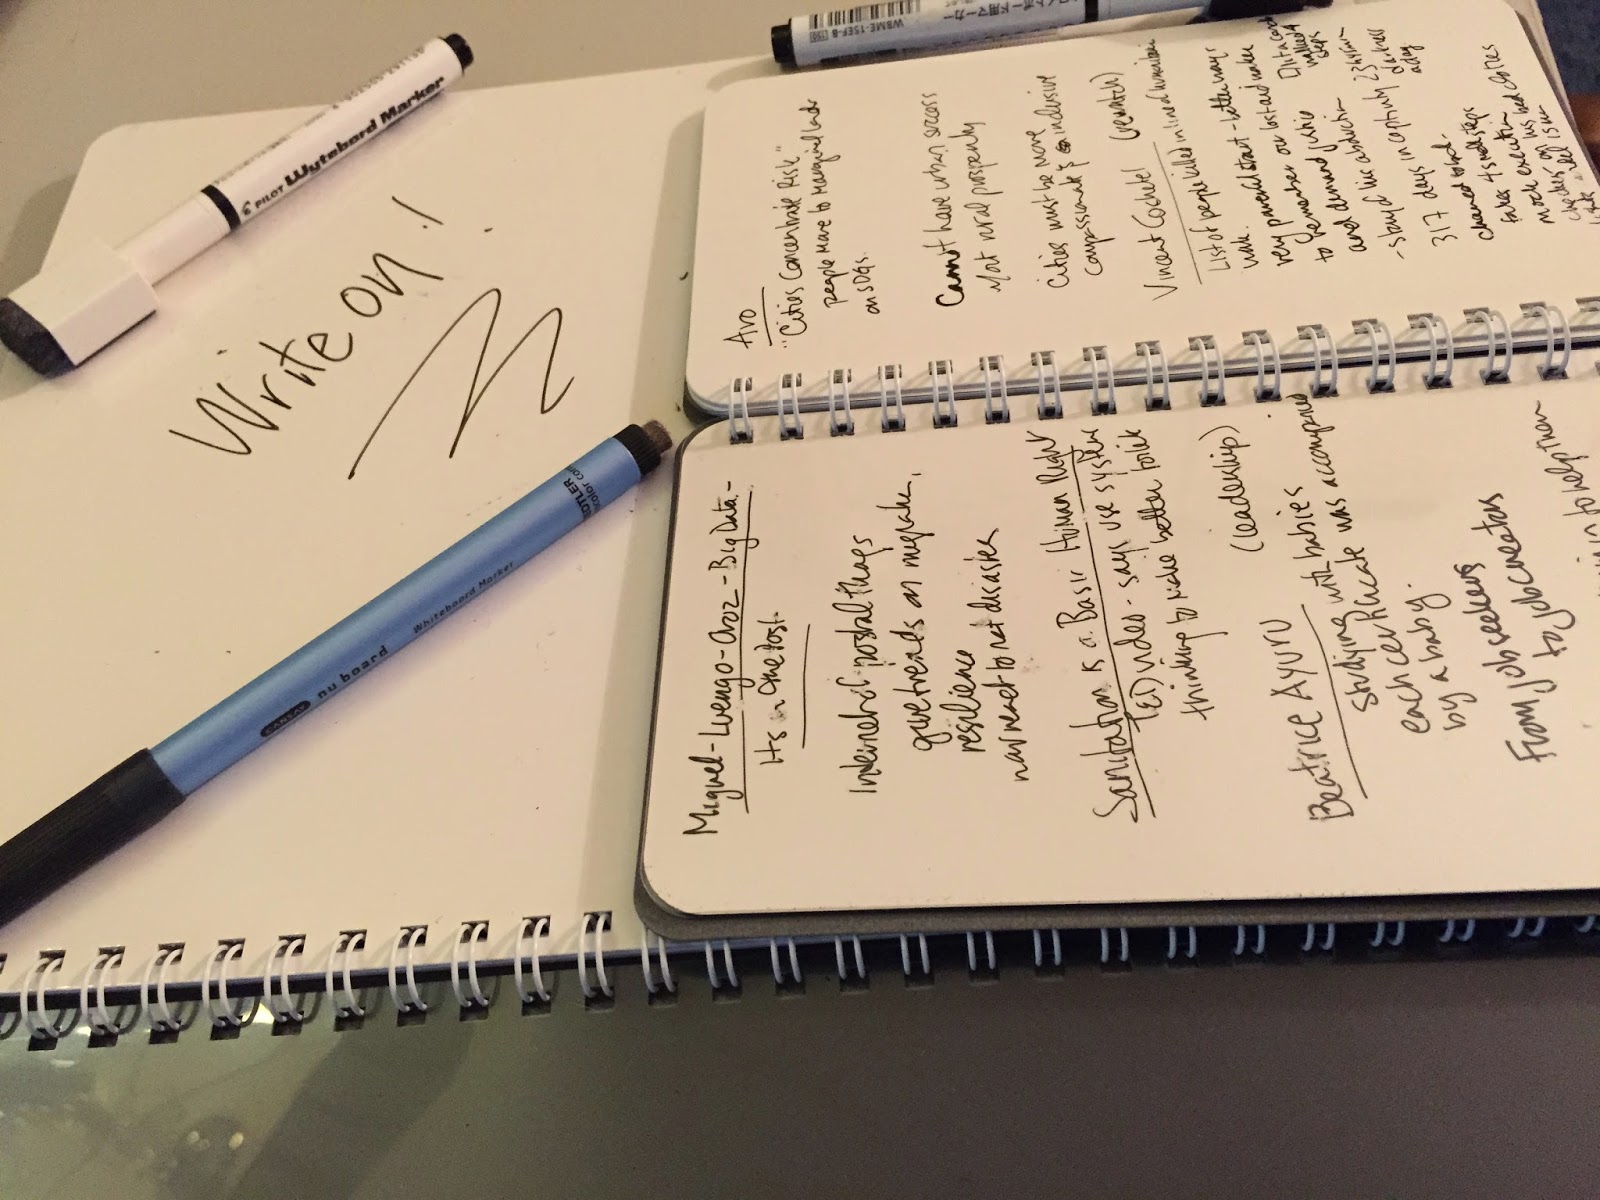
        3. Get Inspiration: Once I had my session themes I looked into a number of directions for inspiration. TED is a great source, in fact I spent the week before this event at TED Global in Rio and found some good leads for interesting facts and angles. The news and current events is an obvious source and I read newspapers and periodicals cover to cover (even sports!) for a change in the weeks before the event, as you never know what facts or questions might come up on stage.

        notebook
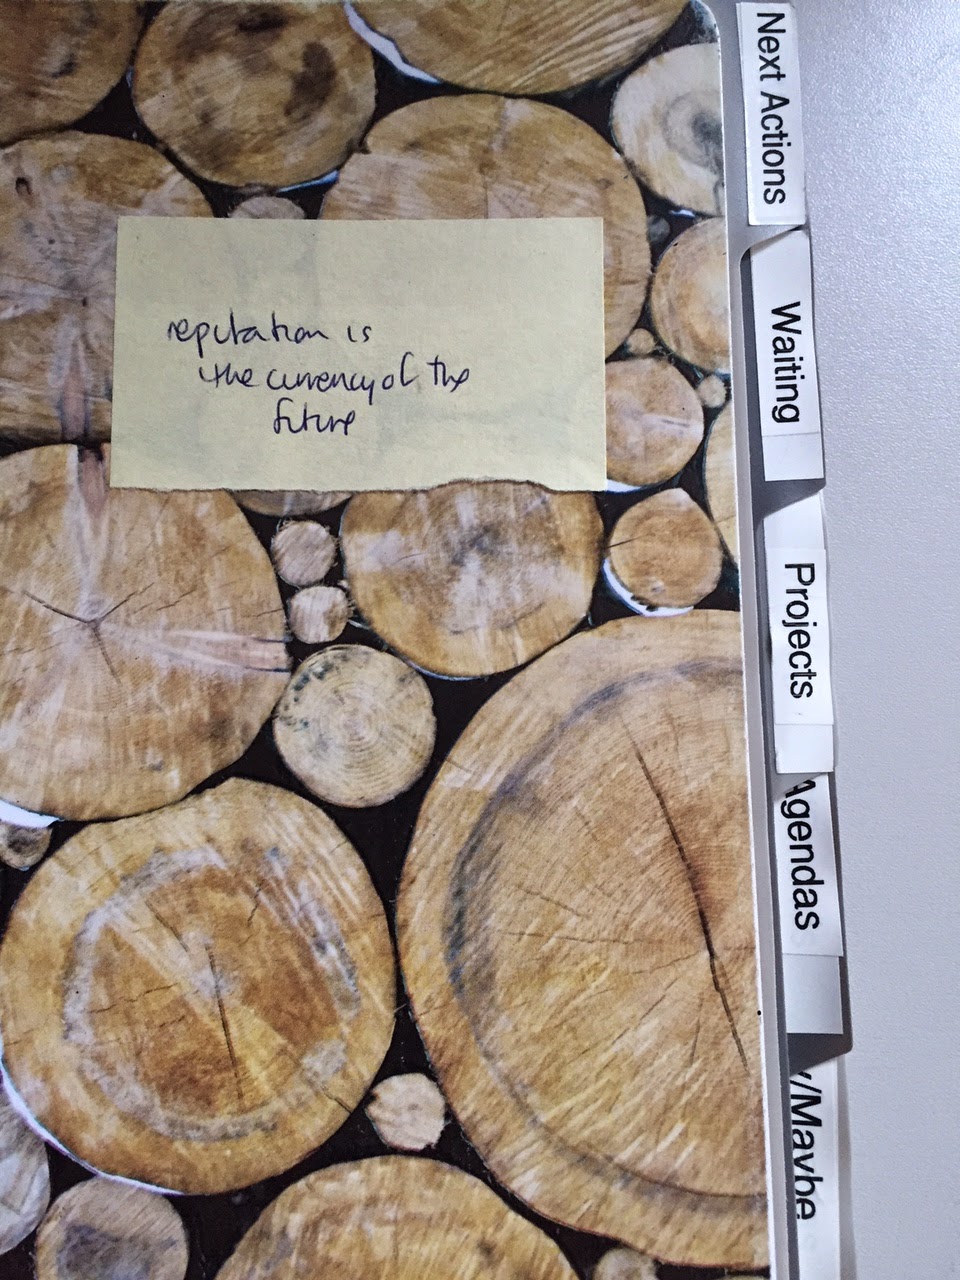
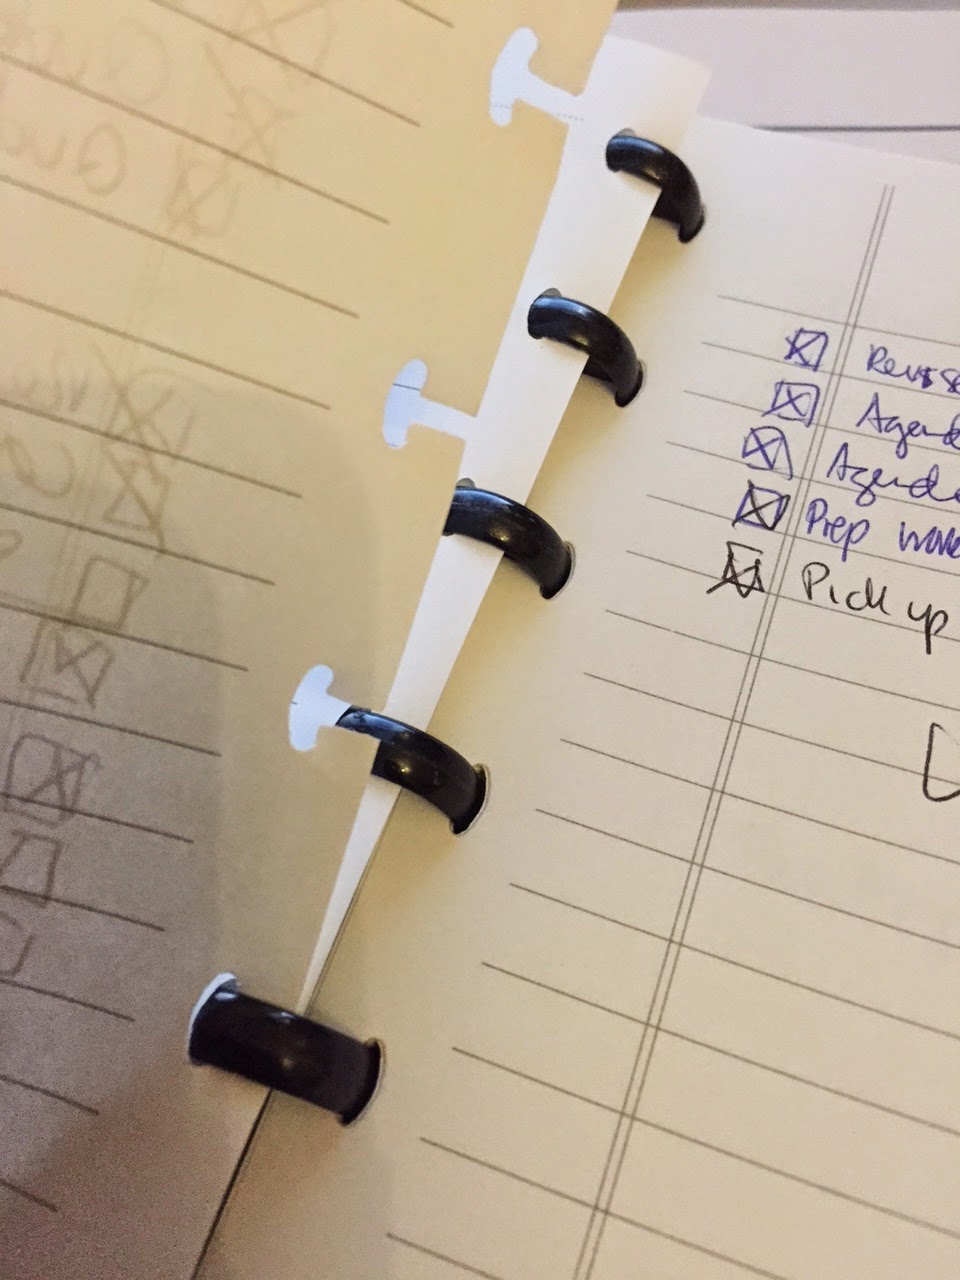
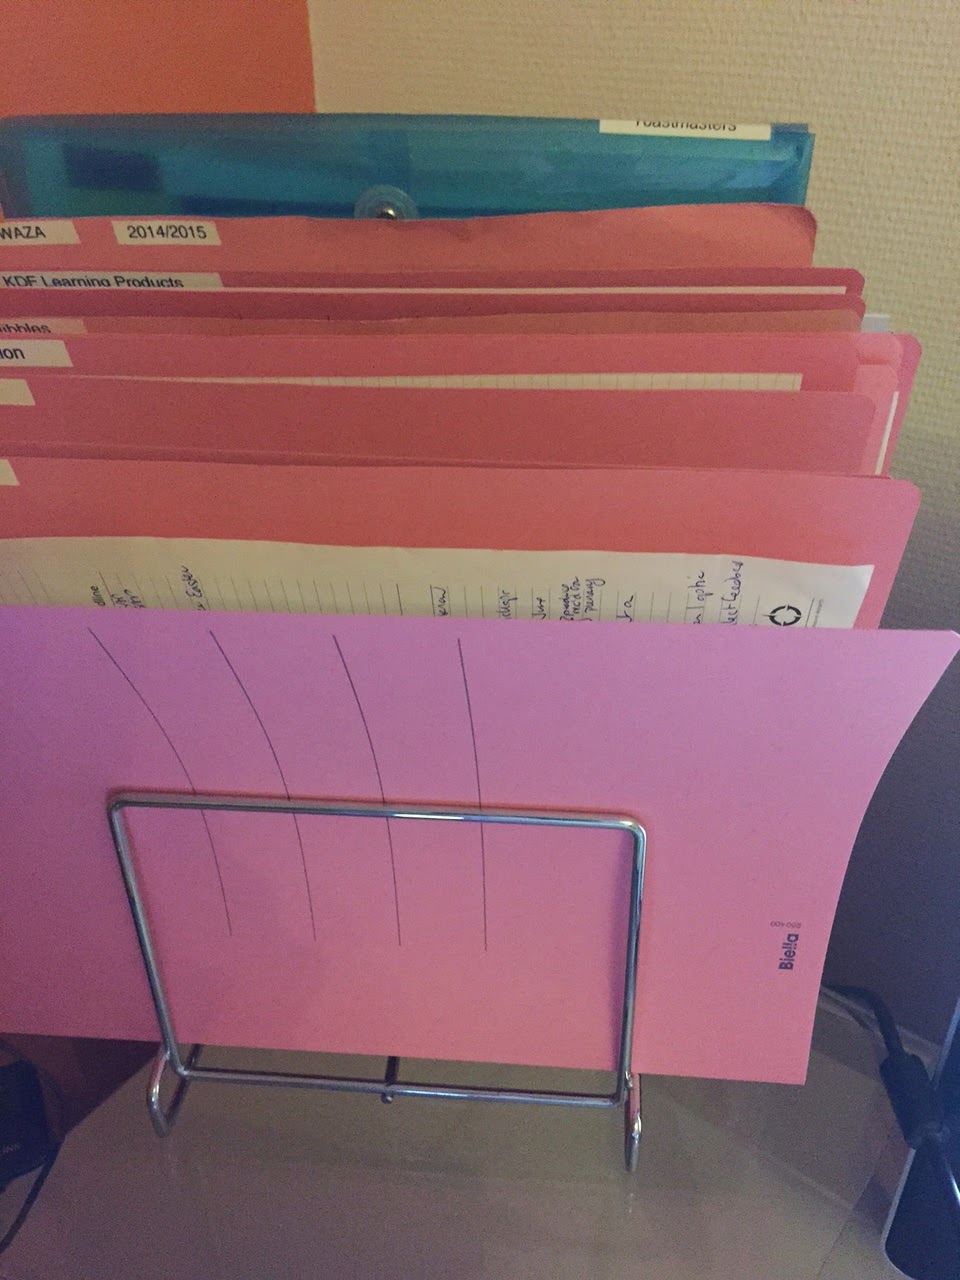
        4. Make a Notebook: This is actually a step the “maker” and tinkerer in me enjoys. This year I used an A5 sized notebook, with the pages that you can take in and out along those plastic discs (because things will change!) Use any notebook that you can change the order of the pages and put new ones in easily. Use dividers by day, and then within the days each session has a page. At the top I have the title, timing (when to meet speakers, time of session), list of speakers with their titles, the objectives of the session, notes on the choreography (if there is a sequence to introductions, if there are chairs or if the speakers stand, etc.) and then my script (see below). This makes it easier to practice session by session and quickly check details if there is a question (how will you introduce me) or a change in the programme. Carry your notebook around all the time and use post-its to note any ideas that pop up on the appropriate session page, to integrate later.

        5. Write Your Script: I always write out my scripts completely first, then edit them and tweak them repeatedly, as I am more of a writer than an off-the-cuff speaker. I write out the narrative word-by-word first, including interaction with the audience (and put this in my notebook). Then I start to boil it down to bullet points with sub-text, and then the final step is to define headlines/key words to trigger my memory of the associated text.

        Note that I always build in interactivity (mapping the audience, introduction to your neighbour, etc.) early in my scripts to liven up the participant experience and engage the audience but also to give me a moment to look at my cards if need be. It shortens the length of what you have to commit to memory before you can pause and regroup/breath/centre yourself once onstage. So I write these breaks into the text. I also include short stories/vignettes that I can tell as they are easier, once you launch into them, to remember and tell than a list of facts. You want your introductions to be thought provoking, meaningful, and relevant to the audience. It should make then want to hear and think about the next session and not choose instead to go and get a coffee or stand in line for the photo booth. It’s not as easy as you think.

        black cards
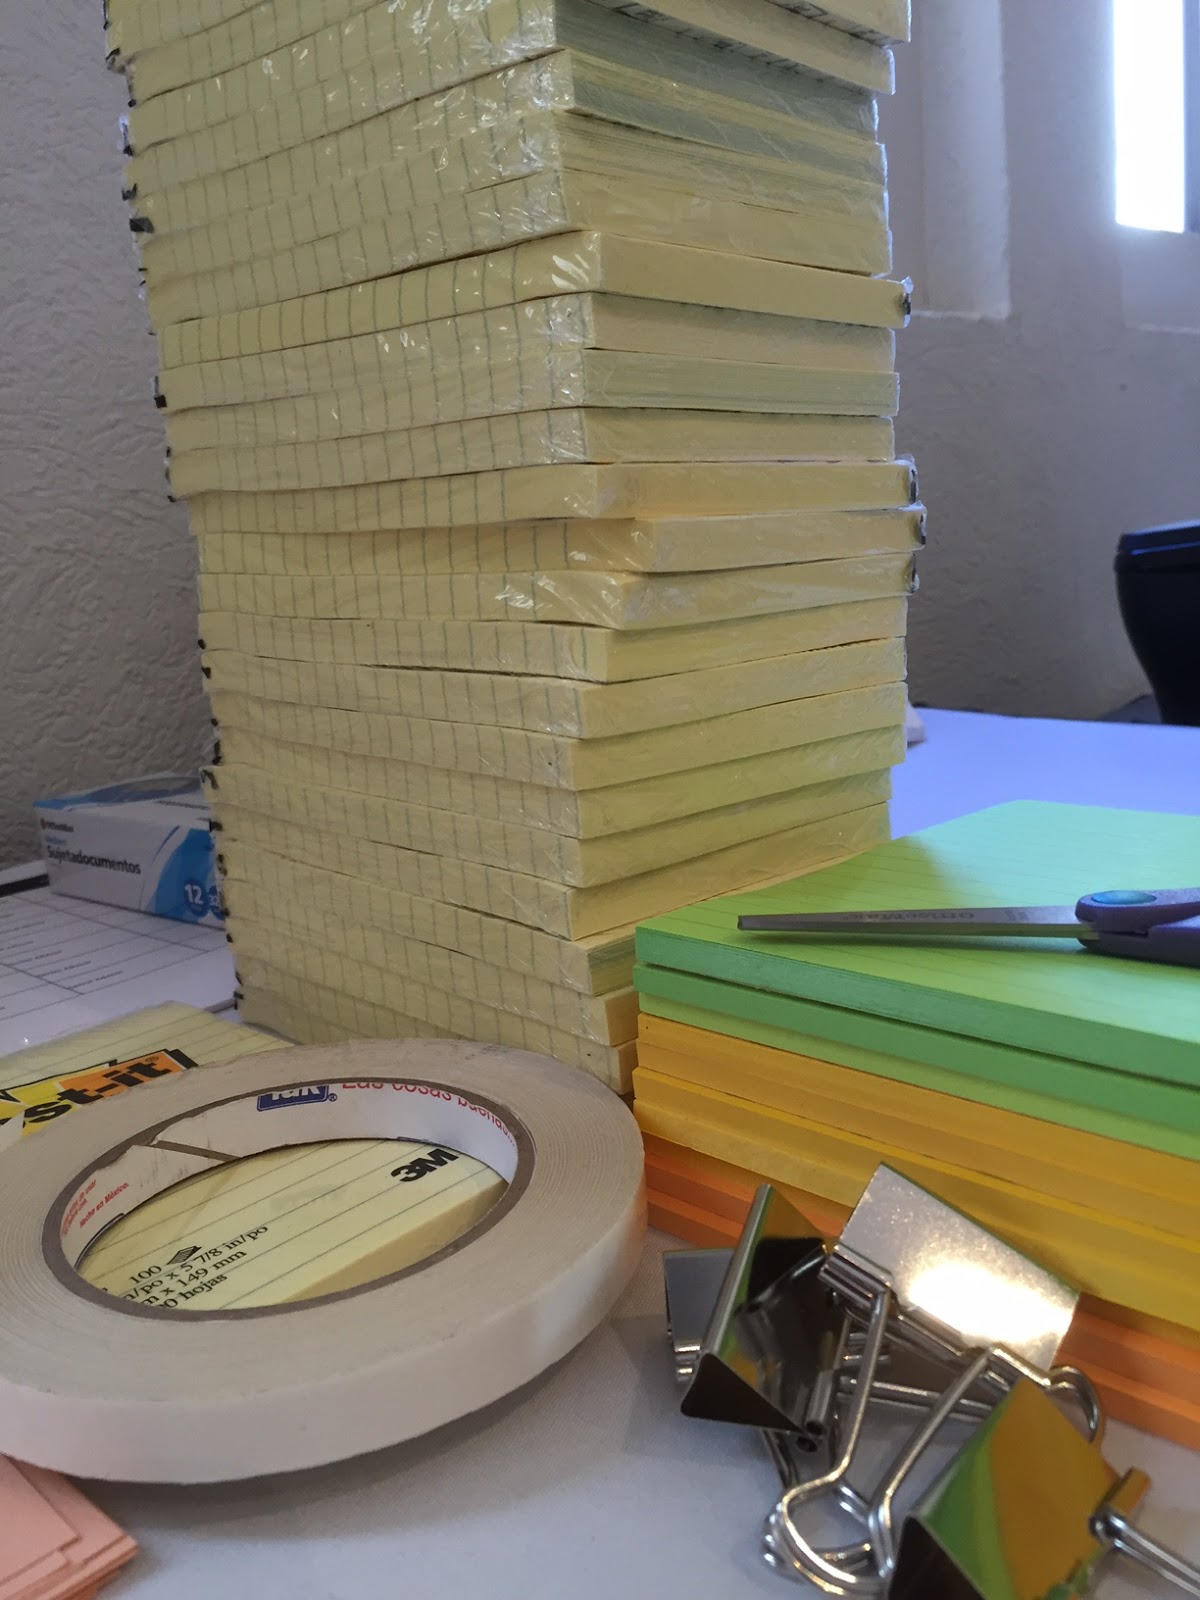
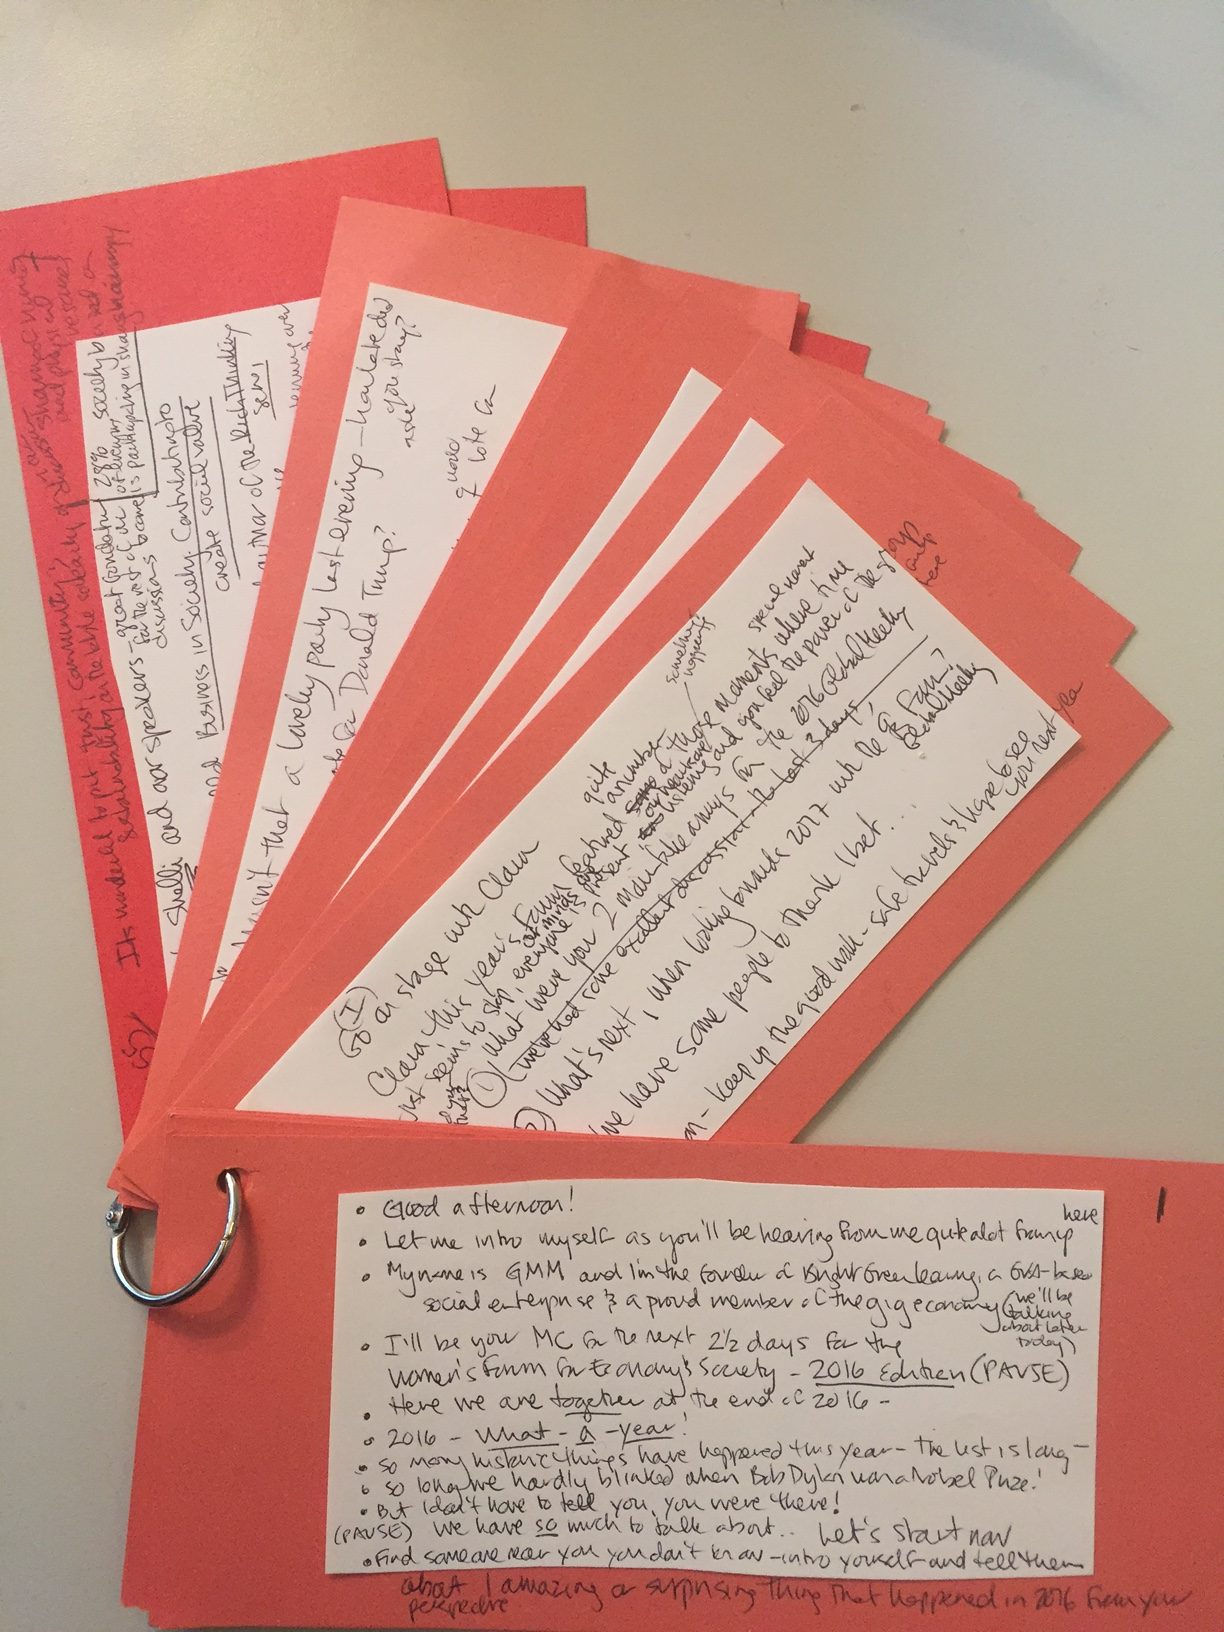
        6. Prepare Prompt Cards: In all the photos and videos of me as the MC at the Women’s Forum, you will see that I have notes in my hand. They are my bullet points and key words written on black card stock and cut to hand size. I write on them with a white pen. This draws much less attention than white, dog-eared, A4 papers flapping around as you wave your hands. At TED Global I noticed Chris Anderson and Bruno Guisani had small cards in some sessions, held with a single metal ring on the upper right hand corner, so you can flip cards easily and quickly as you are talking. They also from time to time had a bright red Clip board. All of these things work, and look good, choose your favorite, prepare them in advance, and if there is any doubt that you might forget the three line title of the fifth speaker on the panel you’re introducing, use them!

        Put what you need on the cards, after practicing you will know the places where you trip up or forget or get the two parts of someone’s last name turned around (people care about this!). The cards I hold on stage have some of this bullet point text (especially the transitions – opening words and closing words for each idea/story), and the key words written larger that I can glance at if needed.

        7. Practice!- Once I make my cards, I carry them around and practice everywhere in the days before and during the event. I take them with me to cafés, I pace in my hotel room, I go through tricky text transitions, or complicated names, or super long titles ( and there will be many) before I go to sleep and before I get up. You can do this with your eyes closed.

        Doing this will also help you revise and change word order or transitions so the words and narrative seems more natural. Once you are familiar with the written script, you will be able to slow down and get comfortable as you know where you’re going with the text. And this will make that last minute additions or name changes less of a problem (e.g. when a speaker asks you to call him or her by their nickname rather than their formal name just before going onstage, etc.)  You want it to be super smooth and easy onstage and this takes a lot of work! I had several speakers ask me if I was using a teleprompter, which made me smile. Maybe it’s my line of work, but I haven’t seen one of these yet! ( I have heard of an iPad app, and have seen moderators use ipads once in a while, but I will probably continue to do this the old fashioned way for now).

        _GR17643 - Copy
        The Day of the Event

        1. Confidence and Looking Good– I will venture that this applies to anyone getting on a 360 degrees stage ( or any stage where you are being watched by a thousand plus in the room, any number on simulcast, and then for perpetuity on the internet.) We all have our strategies. I got my hair done professionally, it’s the only time a year I do! There was a professional makeup station in the Speakers Room, where we convened for our Speakers briefing 30 min before going onstage, because the lights and filming can do funny things to your features and complexion.

        You need to think about what to what to wear (stage and mike friendly clothes). I was always on my feet and walking up and down the steps before and after speakers, interviews and panels. For women, low heels are definitely best and your feet will thank you at the end of the day – I stand up about 10 min or more before the scheduled end of any session just in case it stops abruptly and you need to hustle up (elegantly of course) on to the stage. You don’t want any tripping. For the microphone, if you have a hand mike no problem, but I try to avoid that as I want to be able to clap and I will also have my cards in my hands. So a Madonna mike works best, and for that you need a belt or some hidden way to fix the Madonna mike to the back of your clothing (jacket, belt, or camisole). The sound team also discouraged earrings (actually taking them off me) as the can can clank or get caught in the mike.

        I try to wear something interesting and colorful, even a little sparkle if you can get away with it ( I’m thinking more of necklace or pin than full length evening gown and tiara). This goes for all speakers but especially the MC as people see you over and over again on stage all day. Remember that they will be looking at you at 8:30 in the morning and 8pm at night, and tired or hungry or in need of caffeine, you can at least try delight both minds with your words and eyes with your turquoise and magenta scarf.

        2. Speakers Briefing: As noted above, having a scheduled meeting of speakers directly before the event is incredibly useful and serves a number of functions. First, it lets you check that all speakers are present- there’s nothing like introducing someone who is stuck in traffic 3 km away. Second, it lets you go through the mechanics of the session with all the speakers together. You might have done this before with the panel moderator or even all the speakers, but it will only be when they see the stage and the huge audience sitting around it that they will really want to know who walks on first, what chair they should sit in and how long they can talk. Finally, it lets you check name pronunciation, title accuracy and give them confidence in how you will introduce them to the audience and frame their session. And of course it lets you establish some rapport and remind them of your name so they can talk to you on stage and thank you by name. These little touches make the session seem more friendly and less formal or staged – that makes the audience feel more comfortable and the discussion going on in front of them more accessible.

        3. Bring Food: You may not have time to, or want to, stop for the scheduled meals. It is hard to “grab and go” when you are the MC as everyone knows you and you will get stopped for an interesting chat everywhere you go. If you need to prepare, you might rather eat your Power bar in your room.

        girl holding a bag. closeup
        Moments Before

        1. Where are Your Cards? At this stage you are still keeping the prompt cards for the next session in your hand and now only thinking about one session at a time, literally relegating anything from the next few sessions to the back of your brain and the past and upcoming cards to your bag.

        2. Your stuff– When you’re onstage you don’t have any place to keep your stuff, bag, other papers, lipstick etc. Find that place first, so you are not looking under every chair for it at the end of the session, because as soon as you stand up, someone else will sit in your empty chair (even with a reserved sign there is something oh so tempting about a front row seat) and by the end of the session you will have sat all over the place. Bring the minimum, and put it under the chair of your neighbour or someone you know who will not be jumping up all the time to take the stage. This might seem like a small point, but it will take up residence in a small paranoid spot in your mind that you need to be totally zen and not worried about your handbag.

        3. Take a deep breath: Ok, you are about to walk up those steps. Breath deeply and smile. You might want to do some Amy Cuddy “Power Posing” to get you ready and confident to go onstage. I also write at this stage on my first card at the top in big letters “SLOW”, “BREATH”, “PAUSE”, for obvious reasons. If that’s the only thing I register in the bright lights and 2000+ eyes! then the rest will go much easier. Then you step up, confidently…

        SONY DSC
        Onstage

        1. Voice/Body: As there are books written about this, I will only repeat two pieces of advice given to me by Lizzie the first time I did this big stage work: 1) Pause before starting and look at the audience (I am an MBTI ENFP and tend to open my mouth first and think later, this helps enormously); and 2) Emphasize at least one word in each sentence. It can literally be any word, but do that and it immediately adds interest, voice inflection, and give you a natural pause (breath, think, collect visual feedback). Even if you only do this at the onset of your introductory remarks, it will help with flow. Try it!

        2. Try to Enjoy Yourself! I have to tell myself this over and over, and to be honest it starts to be true only about 1 hour into the day, when feedback starts sinking in. I know intellectually that it is a great privilege to have this role, as well as a great responsibility, and that the role should be fun and I should try to enjoy it. But it takes me a while to get here. Once I start seeing positive reactions with my own eyes and hearing it from others, then the mantra starts to have the desired effect. And this calmness and sense of enjoyment is critical for me to calm the voices in my own head so that I can deeply listen and connect into the richness of what is going on onstage.

        And there you go!

        I can not emphasize enough how important good event structure and design is. When you are done, thank that terrific Programme manager  for their months of effort in Programme development, identifying timely topics, the right speakers and developing the briefing notes that were sent out in advance. (Thank you Jennifer!)

        Being the MC isn’t just memorizing titles and names and the sequence of sessions. In its best and most helpful form, it is a guiding, weaving and connecting role. It helps people understand why the topic is interesting and important for them, why they should listen and why they should care. It connects the different sub-themes into a powerful whole. In creating meaningful frames, it helps the audience connect to the broader narrative of the overall conference, and invites them to draw their own learning. This is the work of the MC from my perspective.

        A gentle warning, this kind of work is both mentally exhausting (you are probably the only person in the room that is present and deeply listening 100% of the time) and physically exhausting (reread shoes part). And it is at the same time incredibly gratifying to support collective learning, one thousand people at a time, in this way. If you get the offer, take it, and bear in mind that it is more than just walking on stage on a very exciting day.


        I often get asked for interesting resources to help people learn more about Systems Thinking –  what it is and how to use it for understanding the complexity that surrounds us, and for making effective interventions for positive change. For those of us in the sustainable development community, working with this complexity is a feature of ever day life.

        There’s a new short video just out, called “A Systems Story”, which aims to introduce systems thinking and its key components (stocks and flows, archetypes, delays, etc) through a story. The example this video uses is not what we might expect to see – water resource management, the climate system, global commodities flow – the example that is uses to introduce systems thinking is love. 

        The Budapest-based start up that produced it,  BEE Environmental Communication, with team lead Sarah Czunyi, worked for the past few months to create the video with seed funding from the Balaton Group‘s Donella Meadows Fellowship Programme. Sarah was a Fellow of the programme last year and used the stipend to create this innovative educational video as a way to learn about systems thinking through trying to explain it very simply, and in a visually appealing way – all in 4 minutes and 45 seconds. 

        Whether as an eye catching start to a formal course on systems thinking  learning and applications, or a way to introduce a strategic planning workshop exercise that uses some systems thinking diagramming tools, the video can grab people’s attention and help spark a discussion about how things are interconnected, what possible influence elements of the system can have on each other, how things change dynamically and what kinds of effects an intervention might have on your system – be it love or climate change. 

        See what you think!


        With thanks to Guest blogger: Cristina Apetrei 
        Back in January my friend Gillian and I were planning to go together to a Common Cause workshop, but we both cancelled last minute due to work obligations. When six months later I did manage to attend a similar event, she was very eager to hear what I learned and kindly invited me to write a guest blog post to share my experience with all of you.

        Common Cause is an initiative started in 2009 by several NGOs in the UK who wanted to engage in a broader conversation about the values at the core of our society and what is needed in order to get more public engagement around various global (sustainability) issues. In an initial report – Common Cause: The Case for Working with our Cultural Values (September 2010) – they looked at social psychology and cognitive science to investigate the relationship between values and behaviour. Later some of these findings were summarized in the Common Cause Handbook – which I recommend as a quick introduction to this discussion, although the full report is much richer.

        The main practical conclusion is quite simple: An organization might well be striving for a certain idealistic goal, but it will not be very effective as long as it communicates in a language that enhances values which conflict with that goal. Therefore, we should always pay attention to how we frame and contextualize our messages, and be on the lookout for the implicit values that are being reinforced

        Common Cause also says that some values are held more easily together by the same individual. To give an example, a campaign that frames the installation of solar panels as a way to save money on the energy bill reinforces the so-called “extrinsic value” of “wealth”. This value however is in conflict with values such as “protecting the environment” or “equality” that would be required for deeper engagement with the issue of climate change.

        But value communication goes beyond the text of a campaign or the copywriting of a website; it also includes the context of an event or the overall culture of an organization. No communication is value-neutral, the Common Cause report argues, so try to nurture intrinsic values (self-transcendence, see Figures 2 and 3 How Values Work) rather than extrinsic ones (self-enhancement) if you want to see behaviours aligned with bigger-than-self goals.

        Of course, one may read between the lines an implicit moral dimension here, suggesting that some values would be preferable to others, and this remains an open point for critique and debate. Nevertheless, I believe that the Common Cause approach at the very least makes us aware that not only are our behaviours determined by our values, but also that our actions shape the cultural value landscape that we are part of. As activists or sustainability workers, we are reminded that change does not happen in a vacuum, but requires a certain set of conditions to be met in our environment.

        This has implications also for the work of a process designer and a facilitator, whose art is precisely about creating a space that is favourable to a positive outcome. I try to give a few lessons below:

        1.      1. Think about the implicit frames and values of the participants
        a.   Understand existing frames: Consider not only what each participant sees as the problem and the solution, but also the cultural frames that they may be employing in their evaluation. What stories do they have about the issue at hand, who is to blame in their view, who should take responsibility and why?
        b.   Understand values: What underlying values do these frames elicit? Are these values compatible? Is the spectrum of values represented around the table very broad and what could be common ground for a solution?
        2.       2. There may be more space for agreement than it appears
        One of the findings of the Common Cause report is that people are not selfish, but value intrinsic goals more than their own interest. Also, appealing to people’s intrinsic values will over time reinforce them, while appealing to conflicting values will create confusion. If we take such insights as premises, how could the problems (or the difficult points) be reframed in a way that allows participants to more easily see the common ground?

        3.       3. The context of the facilitation session  and dialogue matters
        The space in which an event takes place also embeds certain values. To the extent to which you can influence the choice of the space and its setup, consider the following questions: Where does the session take place? Is it in a sumptuous room or is it on neutral ground, in an environment that makes everyone feel equal? What about group dynamics: who are the actors organizing the event and what is their relationship to the rest? Is there a speaker dominating the room or are hierarchies being reduced?


        Whether you are working as a researcher, consultant, activist or facilitator, I hope this post will make you a bit more aware of the subjective fabric behind words and inspire you to think of your own role in promoting some values over others.

        (From Gillian: Thanks so much to Cristina – also a Fellow Balaton Group Member –  for her intriguing post and report back from the Common Cause workshop – it sounds highly relevant, particularly to the communication and convening work that we all do continually in the sustainability community. Next time I will try to attend myself!)
        Every year on the shores of Lake Balaton, a very unique group of systems dynamicists, systems thinkers and sustainability practitioners – called The Balaton Group – meet. The Group has met annually since founders Dennis Meadows and Donella Meadows (Co-authors of Limits to Growth) constituted it in 1982 to explore, exchange, support, dream and create together around the sustainability challenges that face our world. 
        This year our meeting focuses on the SDGs and is titled: How Can the Sustainable Development Goals Advance Sustainability?  Now, Balaton Group Members are remarkable people, and one of them who participated in the recent deliberations that lead to the current SDGs wrote a thoughtful reflection on the meetings that he was attending as a part of the intergovernmental Open Working Group (OWG). He called it The Turkish Astronomer…I thought it was a lovely reflection, it was poignant for me as I have sat on both sides of the room at these kinds of meetings, and I wanted to share it here (with his permission)…
        *************** 
        I am sitting here at the morning hearing with stakeholders and major groups, morning after morning. This right now, as I write,  is the last one in the series, the Friday one. An African girl from a women’s group, also on behalf of trade unions is speaking.  Then an Arab one. Then a Latin American. Then a European. Then an old lady from Harlem.
        What they are demanding eloquently, regularly, repetitively is what many of us yearn to hear during the day from UN Member States: respect to human rights, decisive action on climate change, observation of planetary boundaries, development instead of growth, new indicators for prosperity, win-win solutions for ecology and economy, natural resource accounting, contraction and convergence, and so on. The call for the establishment and use of new monitoring and evaluation methods for society, economy and ecology.
        They are our Turkish astronomers. (Remember the Little Prince of Saint-Exupéry?) They are saying all the correct things. More than that: they are saying the essential things. But they  have the wrong clothes, an appearance that, ultimately, screens away this essence. They are not XY PhD, or Prof.dr. ZW or Director of the IIVSEM  (International Institute for Very Sound Expertise on the Matter). They are mere NGO activists of pressure groups with unknown but giveaway names. It is not their research. It is not their data. It is, in fact information from you, academics, scientists, research people from UN special agencies they rely on, they quote, they wield. They are people who listened to you, who read what you wrote, discussed it, teamed up and came together around it, understood it.
        But they do not look likeexperts. They do not sound like experts. The do not have the business cards of experts. They are nothing but passionate persons impatient with the inertia of national governments that threatens their future, their childrens’ and grandchildrens’ future. They do not want war, violence, disasters, migration, hunger and thirst in their lives, and they find it intolerable that their representatives are not willing to make the right decisions to avoid the avoidable, and prepare wisely for the unavoidable.
        But their members do not number enough to be taken seriously politically, and their identity offers an excuse to dismiss their messages as amateur personal opinions.  
        But unlike the case of the Turkish astronomer, here we cannot hope for them returning “properly dressed” and thus credible to the same forum with the same message, this time to be listened to. 
        Unless their ranks will be joined at the same fora by those whose spokespersons they became, they fight in vain.
        Their “light cavalry” would need some artillery – the will not save the day by themselves.
        Many thanks again for those of you, those of the science and expert community, who are engaging in this effort, through the OWG and through relentless lobbying your governments.
        Warmest regards,

        Janos

        Our last post in this series of Suggested Facilitation Strategies is on ensuring that you valuably and dependably guide the process and the group; and that still hand over to the group, fostering ownership and self-reliance. This is a critical skill for any Facilitator.

        Consider the following:

        (1) Checking-in with the client and group is key.  Help them reflect on what they are achieving and how they are progressing with their outputs as well as their hard and soft outcomes.  


        (2) In some cases you might like to introduce models (such as Tuckman’s Theory of Group Dynamics) and ask them where they think they are at the start.  Then see if they think they progress towards different stage(s) during the event.  

        (3) Design activities towards the close of an event that have increasingly less presence of the facilitator, such as a session using a self-facilitation technique (such as a ‘talking object’ which is passed among participants by participants, or a ‘Samoan Circle’ in which participants control who is ‘in’ and ‘out’ of the speaking circle at any moment).

        (4) Conclude events with the group determining its own next steps and summarizing itself the progress made (rather than helping them with this), as well as reflections to one another in a ‘closing circle’, heightening group identity.
        General conclusions
        Continue to think into and work on your learning edges.  Write these down.  Consider the strategies suggested here and others you can identify upon individual reflection or conversation with peers about learning to best improve your facilitation practice – using your personal preferences to the full where they strengthen your practice and managing your preferences where they entail risks.

        Return to the start of the series > 1 of 11: Suggested Facilitation Strategies: Me, My Behavioural Preferences & My Facilitation Practice

        As the Facilitator, how to you make sure your desire for harmony doesn’t skew the process when debate may be beneficial / necessary? Or you might be just the opposite – how do you make sure your desire for debate doesn’t hinder agreement and moving forward?

        Here are some things to consider:

        (1) Explore potential areas of conflict in advance.  Check with the client what is likely to be contentious and why.  Inform yourself as much as possible about the potential conflict, and determine with the client what conflict needs to be carefully avoided (e.g. careful wording so as not to aggravate sensitivities) and where it is essential to address the source of the conflict in as safe a space as possible. 


        (2) When debate and potential conflict is on the cards, design for it using great techniques for exploring contentious issues whilst maintaining a generative group process.  If people aren’t provided with an environment to share contentious issues, they will likely emerge nonetheless – and if they feel the process is repressing the emergence of issues they may throw out your process providing you with little room for manoeuvre.  It’s safer to design for it.

        (3) Co-create principles for your time together, and hold people to these (e.g. making sure comments are constructive and solutions-oriented, listening to one another and trying to understand the perspective of others).  Giving these a number, you could then task everyone in the room with the job of ensuring adherence to the principles, asking people to hand a card with the corresponding number on it if ever there is an infraction.  (This takes the pressure off you being the only one in the room trying to manage the conflict.)

        (4) Challenging participants to think with different ‘hats’ – exercising / flexing different thinking muscles and showing their intellectual dexterity.  (De Bono’s Six Hats is a great example, others include using tools from Systems Thinking, and methodologies such as Thiagi’s Point-and-Counterpoint activity.) ‘Externalizing’ thinking is central to many of these techniques. 

        (5) Use techniques to ‘externalize’ thinking.  This helps participants move from an emotional state where it is about me and my issue (versus you and yours) to ‘an issue’ which is a little more ‘out there’… something happening in the system, amongst many other interacting things happening.  Getting all the information ‘within’ or ‘held’ by participants ‘out there’ – and especially written somewhere for posterity – is a great way of re-assuring people their concerns are being heard.  It also opens them up to better hearing what others are saying, and they look at the system of interacting bits and pieces (‘variables’) with a more objective perspective – as can others.  This often creates an environment for more generative conversation to follow.  Such techniques may be getting people to draw what is happening in the system as a series of causal loops.  Or use sticky dots to respond to statements and then stand back and look at results, and explore reasons for those results (rather than stating one’s own position).

        (6) If conflict does emerge unexpected, have a break taking people ‘offline’ and rethinking how to proceed.  Determine whether resolving the conflict is essential to achieving the desired outcomes or not (sometimes it is between just two people on a related but tangential matter), and plan accordingly.  Note: in some instances, you can create a sub-group for people to debate a specific point or resolve a specific conflict, whilst the rest of the group work on something else. 

        (7) Remind people from the start of the event of why they are in their room and the commonality of their objectives.  Keep coming back to shared objectives.

        (8) If you are a subject matter expert who likes to debate, this aspect of the facilitation role may be particularly challenging. Not only do you need to maintain your neutrality; you also need to know when to stop debating (which may be something only a few of your participants are doing anyway) and to move things along.  Again, remind people of why they are in the room, coming back to shared objectives, and how the process is going to get you there.
        Related blog posts:
        Practicing Creating Conflict: 

        Some Facilitators find it a challenge to keep track of group maintenance (how they’re feeling) when they themselves are getting swept up in the content of discussions; and others find it hard to focus on the task and content of discussions when they’re getting swept up in the group dynamics. Maybe you have experienced both at different times. What are some things you can do about that?

        (1) Ask the group about the progress it is making with reference to the desired outcomes. 

        (2) AND ask the group about how they feel about this work. 

        (3) Some people are naturally intuitive when it comes to the maintenance side of group processes.  Others need some help picking up on cues, as well as some tips to change the energy and dynamics in the room.  If you are less intuitive in this area, you can always ask the group how they feel. For example, Are they energized or tired?  Do they feel ambitious or cautious? Creative or constrained? Then you might get some information and consider how you need to shift gears. 

        (4) Create yourself a prompt sheet of ideas! Have some tricks up your sleeve for changing energy and dynamics.  It might be as simple as taking a break, getting some coffee and fresh air, or changing the physical environment (such as by going outside, or rearranging seats). If you’ve been doing lots of group discussion, perhaps take a break for some individual thinking time or watch a short video talk (have some short ones aside).  Ask people to draw what they are thinking or pick and image (have a mixed deck available) which reflects their mood and do some ‘presencing’ to get people back in the room.  Jump around.  Clap.  Make noise a task: such as tasking people with creating a 30 second musical reflection of the event so far using only what they find on their tables.  Have some quick games up your sleeve (we find a great source is the Systems Thinking Playbook) to highlight a relevant point from the event so far.  Consider different scenarios (from people tired and flagging to people playing and laughing too much and not applying themselves to the task) and options for each.

        (5) If you know you have a bias towards ‘task’, practice wearing a ‘maintenance’ hat in group opportunities.  In situations where you are not officially ‘facilitating’, try and turn down your ‘task’ hat and tune into group maintenance, thinking specifically about what is happening in terms of group dynamics and what interventions or design choices you could make to strengthen the process for the benefit of group maintenance. 

        (6) If the reverse is true and your bias is towards maintenance, try and practice wearing your ‘task’ hat.  Try and step out of your ‘modus operandi’ and flex other thinking muscles.  And note the great things other people do that you might like to incorporate into your own practice.

        (7) If you struggle to follow the discussion sufficiently, consider strategies to help you ‘tune in’.  For example, perhaps decide to take notes at a flipchart so that you can structure your thinking – creating a mind-map of the keep points emerging from the discussion.  And if that doesn’t work and an element of group dynamics is really distracting you (e.g. some voices are not being heard and others are overbearing), chances are others may also be struggling – in which case you could go with a different methodology (maybe break from plenary into groups to discuss either the same questions in parallel or different questions according to their interest). 
        (8) See also the points about summarizing and synthesizing above.  Use the strategies suggested there, getting others to summarize things for everyone (you included) and using lots of templates that you can review as necessary.
        (9) Invite others to review your event designs with you – with knowledge of ‘you’ in mind.  And invite others to observe you in facilitation delivery mode and provide you feedback.  Additionally consider providing feedback forms (or other mechanisms) at the end of each event, providing people with opportunities to help you improve.
        Related blog posts:

        For a Facilitator, there is definitely an art to knowing when you should summarize and synthesize discussion for the group; and when it would be better to have the group summarize and synthesize. Here are some suggested strategies for how to work with the difference:

        (1) Summarize progress in the process towards achieving desired outcomes to make it more apparent.  For example: “We considered numerous potential project ideas and then, concerned about how to prioritize these, generated a list of criteria for prioritizing.  These were then applied to the ideas, resulting in the selection of the following as the top 3 to take forward…”

        (2) Structure your agenda to elicit synthesis from participants as you go along, so that you can steer clear from synthesizing subject matter yourself.  This is a point that some facilitators may debate.  We feel, however, that as the process guide, the facilitator should steer clear from summarizing subject matter and substantive content discussions (and never produce reports!).  Instead, structure your agenda with regular moments designed in, during which participants summarize and synthesize as you proceed through logical, iterative sessions. 
        (3) Guide participants in summarizing and synthesising by providing time for reflection (individually and in groups) and rather than asking one person to do the work, distribute the task, potentially using a funnelling approach, where the individuals reflect on their own, and then at tables participants share their reflections and come up with 3 key points, and then these 3 key points are shared in plenary, and then in plenary participants are invited to suggest the key patterns or trends emerging across all the different interventions.
        (4) Provide templates to capture synthesized ideas – asking clear questions and providing space for key points to be written in.  Having well-structured templates to capture information makes any post-event summarizing or synthesizing much easier later (for participants).

        (5) Use methodologies for synthesizing and summarizing. For example, rather than having an open discussion on various controversial statements, write the statements on sheets around the room and invite participants to place a sticky dot representing their position from strongly agree to strongly disagree, along with a place to write open comments.  Then assign randomly mixed small groups to analyse the various results sheets and describe reasons for the results, and suggest implications for going forward.  This way, rather than lengthy conversation, you quickly and effectively provide everyone with the opportunity to express their perspective, and distribute the role of analysing and summarizing to sub-groups of participants.  You could then combine this with a carousel discussion, where participants add to the work of previous groups doing the analysis and synthesis.

        (6) If you feel you really need to summarize (because someone’s gone off on a tangent and you need to bring them back to the task at hand), do it as a question rather than a statement.  For example: So do I understand correctly if I say that the 3 next steps are x,y, z?  Or simply invite someone else to paraphrase for you:  So, could someone please summarize or paraphrase that for me in a few words that I can capture on this flipchart?   (There is usually someone in every group who prides themselves on their ability to synthesize!)

        Related blog posts:

        As the Facilitator, how do you go about striking the right level of visibility and intervention in your workshop – walking that fine line between saying enough and not saying too much?

        Here are some suggested strategies:

        (1) Prepare a script for yourself (and edit this during the meeting).  Whether you tend to say too much or too little, this can really help.  Write out key points to communicate to the group about the desired outcomes of the meeting as a whole, the process and methodology of each session, and questions to put to the group to check in on progress.  This will help you make sure you keep on message and say enough, without saying too much.


        (2) Repeat yourself without being overly repetitive.  When it comes to groups of people with diverse language skills and learning styles, it is really important to reinforce your messages without repeating yourself in a time-consuming and tedious fashion.  Consider, for example, writing the outline agenda on a flipchart sheet in the room which you keep coming back to, ticking off as you progress through the sessions, and reminding people of the logic of the agenda – connecting what you’ve done (lightly) with where you are heading next.  Similarly, have your desired outcomes visible in the room for reference. 

        (3) Be careful about those brief briefings. When briefing a specific session, remember that people digest info in different ways. Some people understand better reading than just hearing what you’d like them to do, whilst others need to talk about something to make sure they have understood.  Write up (on a flipchart or slide) details such as questions for discussion, how much time they have, what and how they should capture the discussion, and how they will share it with everyone afterwards.  Having briefed the session, ask participants in the group to summarize back to everyone the task, checking whether anyone else understood it differently.  And/or ask questions to the group test whether they are listening (e.g. So, if we have 30 minutes, at what time are we going to reconvene – according to your watch?)   

        (4) Aim to ask questions rather than make statements.  Asking a powerful question you can make a great intervention, leading participants down a path of questioning, whilst allowing them the space to respond as a group.  If you aim to ask questions rather than making statements, you are less likely to say too much, and participants are more likely to listen to what you do say.

        (5) If you have a tendency to take an overly visible (and vocal) role in a group, design in more small group work and less plenary… You can’t be in all small groups at once! 

        (6) Be sure to focus what you do say on the process.  Beware speaking about the content, unless relating the content to the process and progress on the task.